Snowflake
Prerequisites
You would need access to the
ACCOUNTADMINrole to enable this share.
Setting up tables
Data in Snowflake typically resides in tables. When sharing data with Toplyne, the best practice is to create separate tables for event data and profile data partitioned on a time column.
How does Toplyne sync work?
We prefer to ingest your data from Snowflake in an incremental fashion. You must add a monotonically increasing timestamp column in your tables. We will use this column to identify all the new data added to the tables and will only read that much data for syncing.
You can add a column called UPDATED_AT with timestamp data type to your table, and this column will highlight when the row in question was added to the table.
If you don't share such a timestamp column, we'll do a daily full scan of your table and sync it entirely.
Event data table
This table will capture a user's action; it will help answer the question, “What has a user done on your product, and when.”
Rows
Each row in this table represents an event triggered by a user.
Columns
USER_ID(Required): Key to identify which user has performed the eventACCOUNT_ID(required for account-level analytics): Key to identify which account the particular user belongs toEVENT_NAME(Required): Name of the eventTIMESTAMP(Required): Timestamp at which the event has occurredUPDATED_AT(Required): UTC timestamp when the row has been updated or added (not the event timestamp)EVENT_PROPERTIES(Optional): Event properties, typically shared as a JSON
with key/value pairs
Partition
Partition this table on the TIMESTAMP column.
Sample Event Table
| USER_ID | ACCOUNT_ID | EVENT_NAME | TIMESTAMP | UPDATED_AT | EVENT_PROPERTIES |
|---|---|---|---|---|---|
| 1298 | 23 | Payment_Initiated | 2022-10-26 07:08:34 | 2023-01-09 17:08:34 | { "paymentid": 123, "amount" : 200, } |
| 1567 | 77 | Trial_Ended | 2022-11-01 20:01:14 | 2023-01-09 17:08:34 | { "accountid": 77 } |
Profile data table
This table will capture any profile information a user or an account has; it will help answer the question, “Who is this user or account?”.
Rows
Each row in this table is a unique entity.
Columns
USER_ID/ACCOUNT_ID(Required): Key to identify which entities' properties are listed in the row.USER_CREATION_TIME/ ACCOUNT_CREATION_TIME (Optional): To identify since when the user or account has been active.UPDATED_AT: UTC timestamp when the row has been updated or added (not the event timestamp)USER_PROPERTIES/ACCOUNT_PROPERTIES: Each subsequent column is a profile key; against it, you will have its value. For example, you may include the email address, geographical location, account name, current billing plan they are on, etc.
Partition
Partition this table on the UPDATED_AT column.
Sample User Table
| USER_ID | USER_CREATION_TIME | UPDATED_AT | Country | Current Plan | |
|---|---|---|---|---|---|
| 1296 | 2022-10-26 07:08:34 | 2022-11-26 07:08:34 | freddie@queen.com | UK | Annual Plan |
| 2676 | 2022-11-01 20:01:14 | 2022-12-01 20:01:14 | _john@beetles.com | UK | Monthly Plan |
Sample Account Table
| ACCOUNT_ID | ACCOUNT_CREATION_TIME | UPDATED_AT | AccountName | Country | Current Plan |
|---|---|---|---|---|---|
| 23 | 2022-10-26 07:08:34 | 2022-11-26 07:08:34 | Queen | UK | Annual Plan |
| 56 | 2022-11-01 20:01:14 | 2022-11-26 07:08:34 | Beetles | UK | Monthly Plan |
Important information regarding Snowflake Share
- Snowflake sharing works seamlessly as long as the tables and schemas that are being shared are not recreated after the share has been created.
- We are completely agnostic to change in data shape.
- However, to seamlessly deal with data backfilling, we leverage Snowflake's CDC using STREAMs.
- So we would want you to enable change tracking on all the tables that you share with us.
For reference:alter table <table> set change_tracking=true;- As far updates to data are concerned, we classify the data into two categories:
- Events data: e.g., events data coming from clickstream. We don't handle updates in these datasets, so we would prefer you notify us if you do any significant updates to such data.
- Profiles data: e.g., Data regarding users/accounts/teams/workspaces, etc. This data will include some personal information like, device info, country info, metadata about an entity, etc. You can keep updating such data in your source and we seamlessly handle updates to these data points.
Step-by-step guide
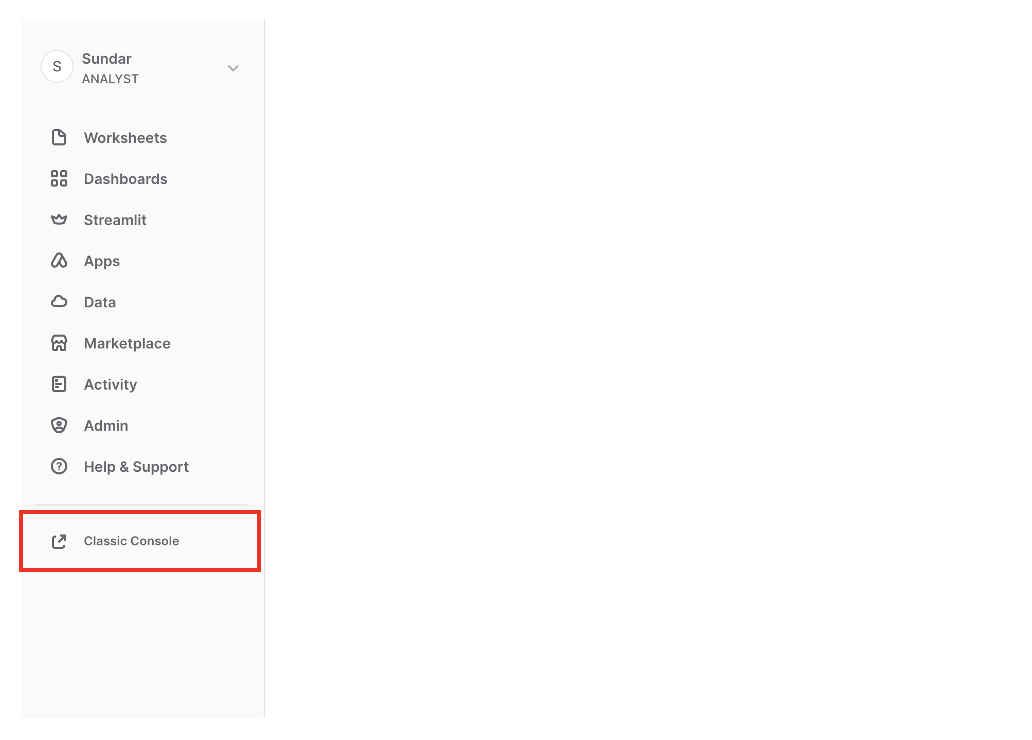
- Login to your Snowflake account on the Classic Console. If you are on the newer Snowsight, navigate to the Classic Console by clicking the Classic Console option.
- In the upper right corner, click on your email account and switch the role to ACCOUNTADMIN. Reach out to your admin if you can't see the option.

- On the upper left side, click on the Shares icon.

-
Select the Outbound tab.
-
Click on the Create icon next to the Outbound tab button.

-
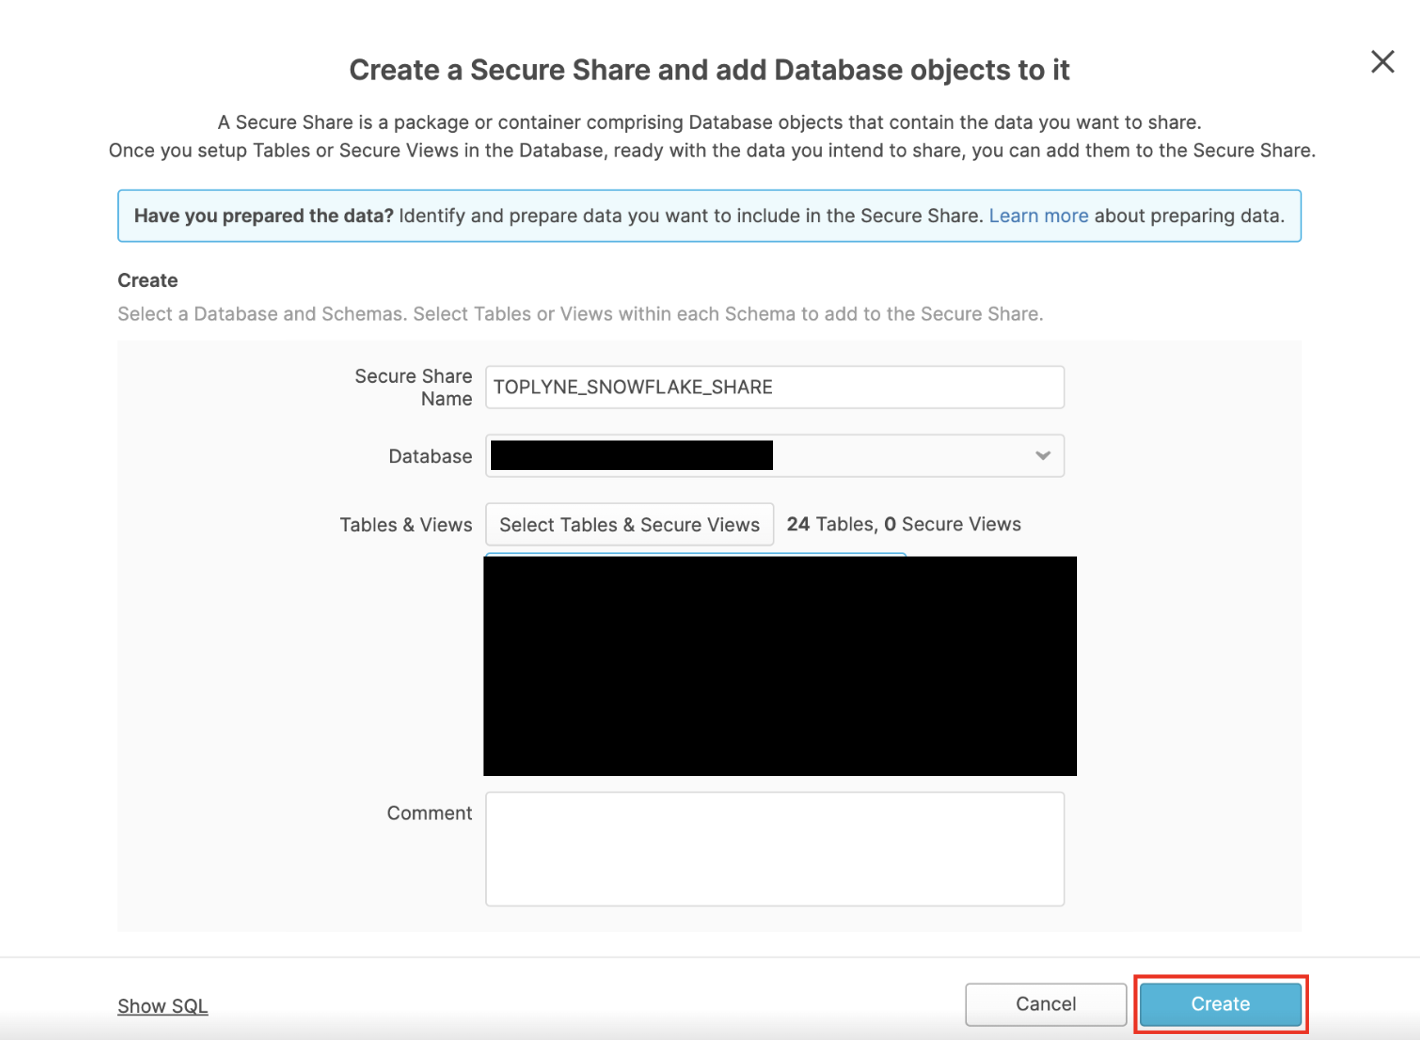
Fill in the Secure Share Name field (a text field, so any name should work) and select the database you want to share.
-
After this, click on Select Tables & Secure Views.
-
You can access the select tables you want to share and hit Apply.
-
Click on Create at the bottom right.
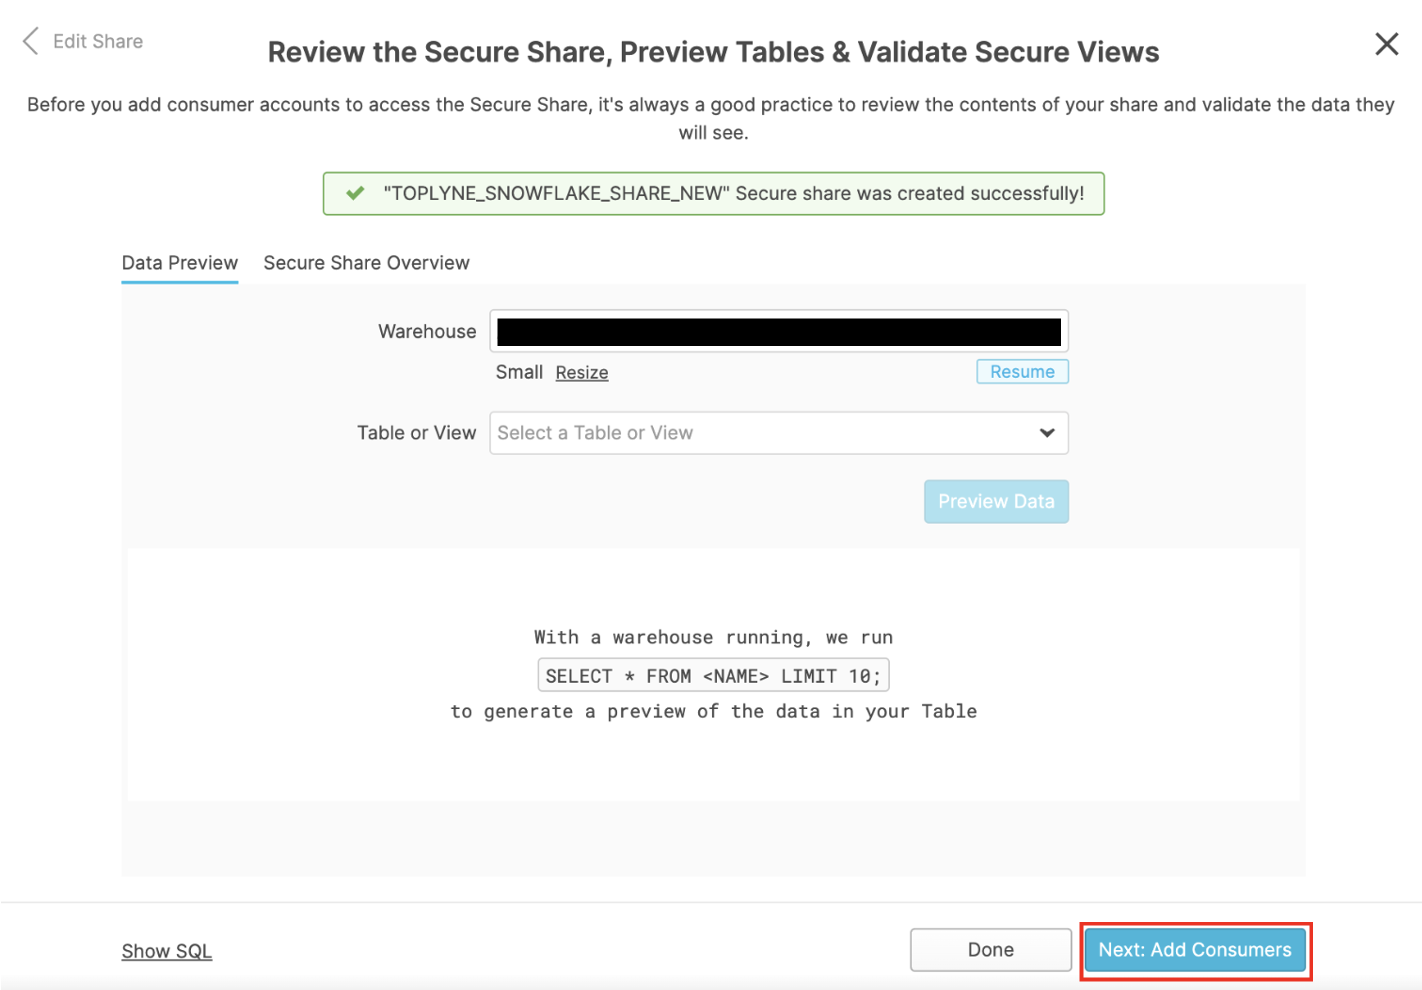
- Click On Next: Add Consumers on the bottom right to add the account you want to share the data with.
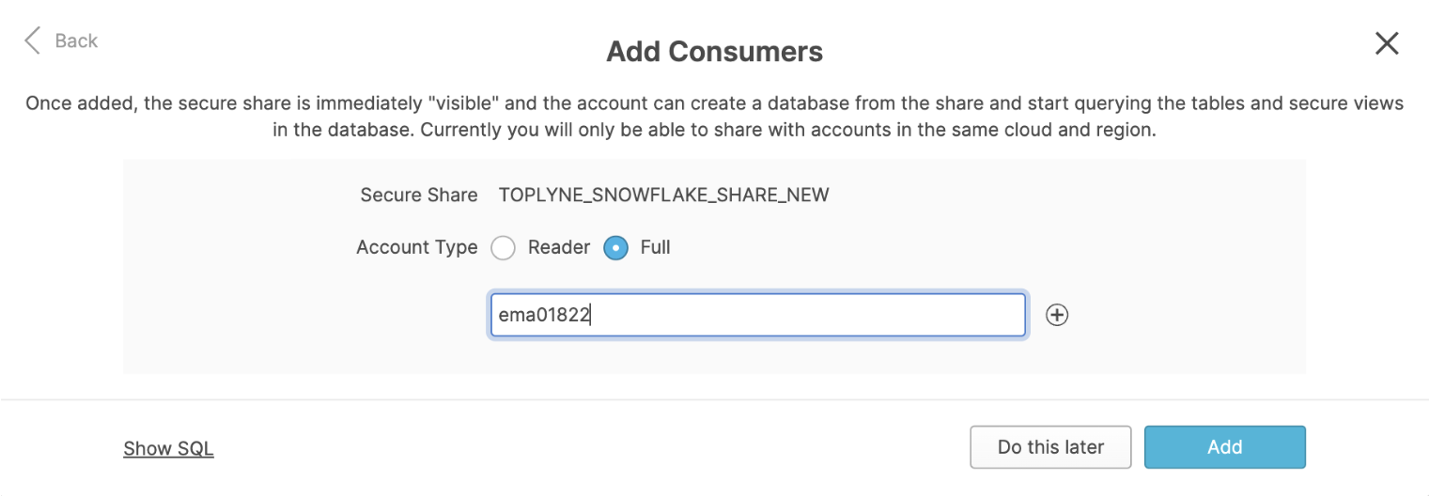
- Under Account Type, select Full (don’t worry - this will grant read-only access!) and enter the appropriate account locator based on your region. If you cannot see your region here, please reach out to your Toplyne POC or to customer@toplyne.io.
| Region | Snowflake Account Locator |
|---|---|
| us-east-1 | jfa01628 |
| us-east-2 | yj35120 |
| us-west-2 | xta40177 |
| eu-west-3 | ux59952 |
| eu-west-1 | ob64984 |
- Click on Add on the bottom right - and we’re ready!
Sharing tables that are recreated every time
There are two ways we can retain the share with Toplyne even after a table is recreated.
Adding a query on the DAGs that generate the tables to grant access each time.
Alternatively, you can create a Snowflake task to automate this.
Updated over 1 year ago