Marketo
Setting up Marketo as a destination 🔩
- Select Integrations from the left pane. Search for Marketo and select it from the list of destinations.

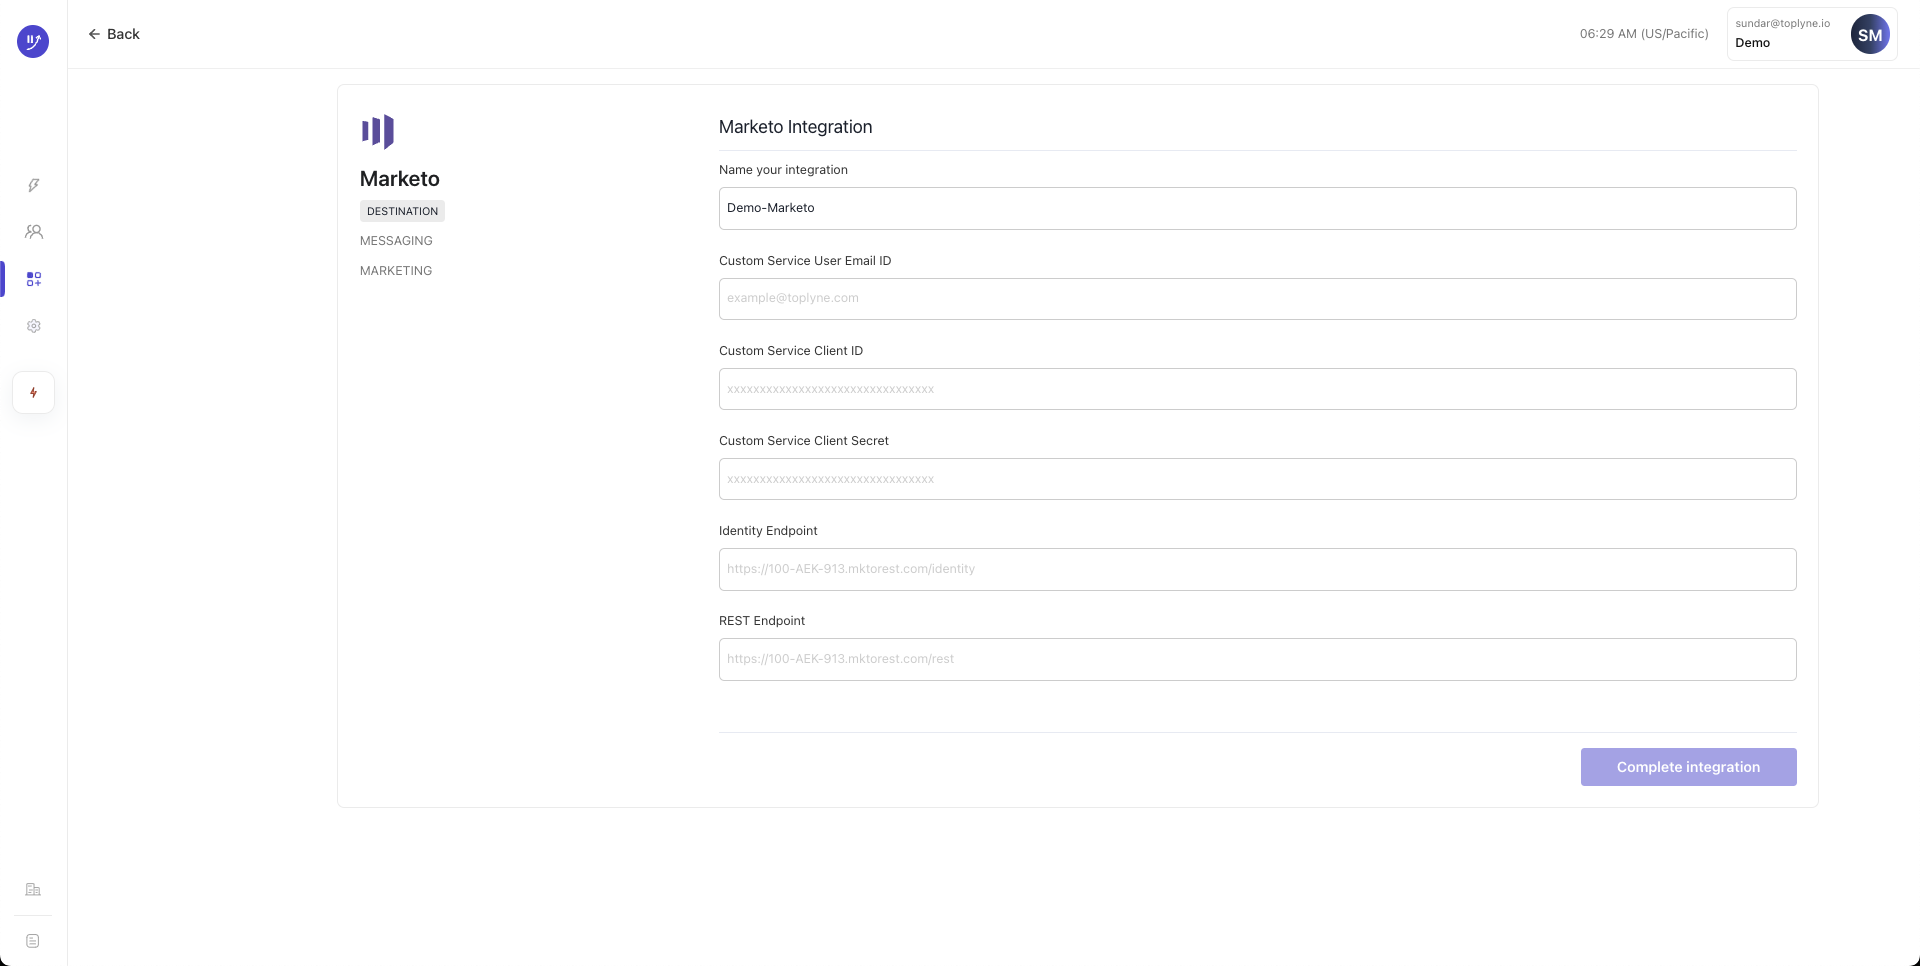
- On the Marketo integration page, name your integration.
-
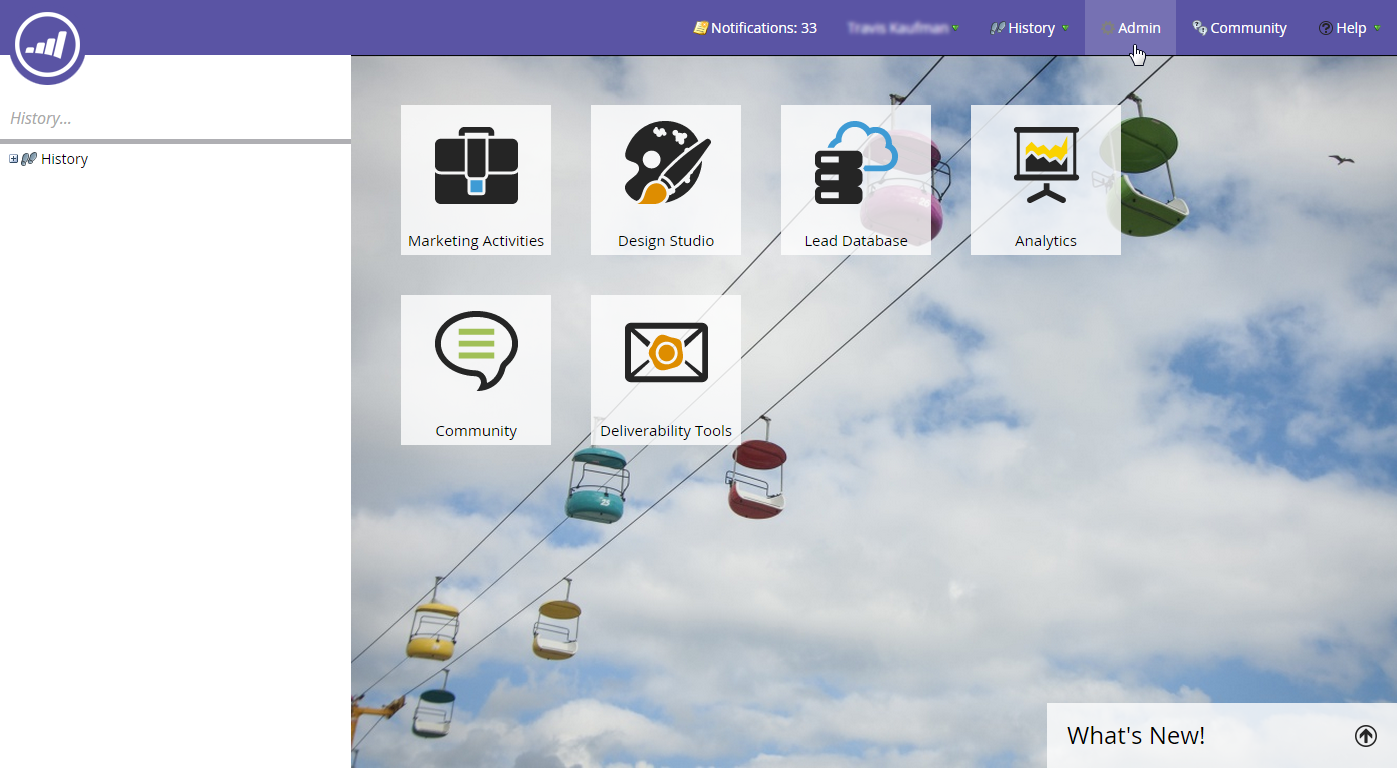
Filling in additional information - a Marketo detour. Navigate to the admin area of the Marketo application.
-
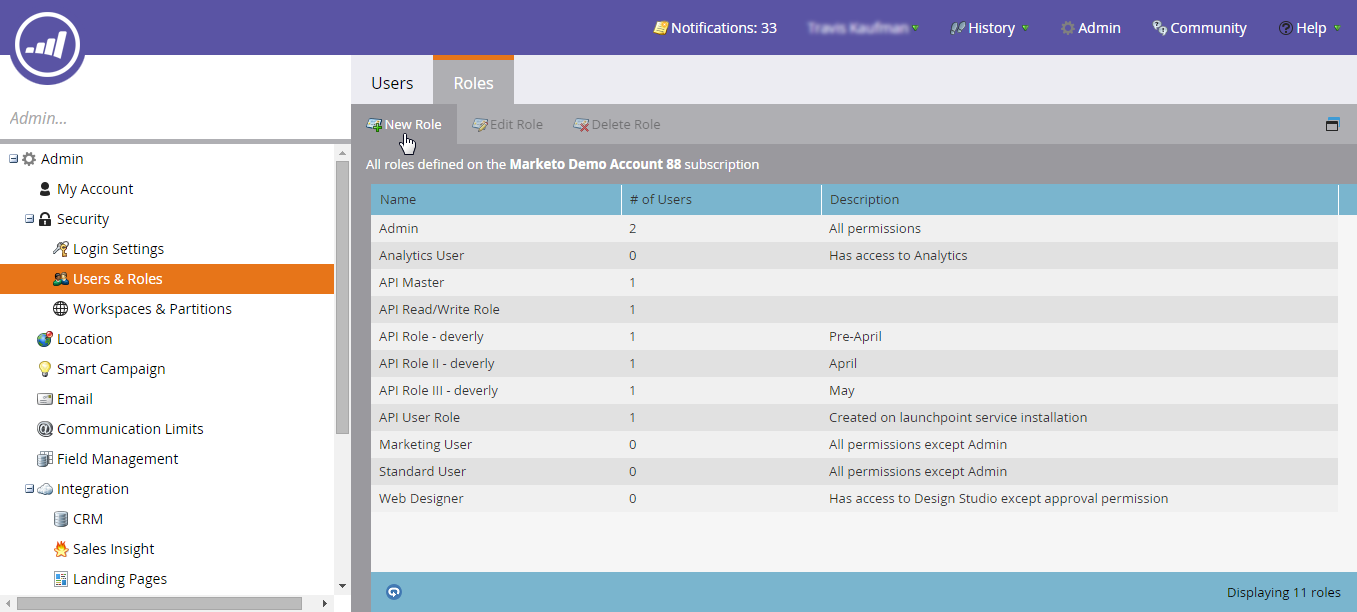
Click on the Users & Roles node on the left panel.
-
Create a new role. Call it
Toplyne ClickUp. Reveal the list of role permissions by clicking Access API.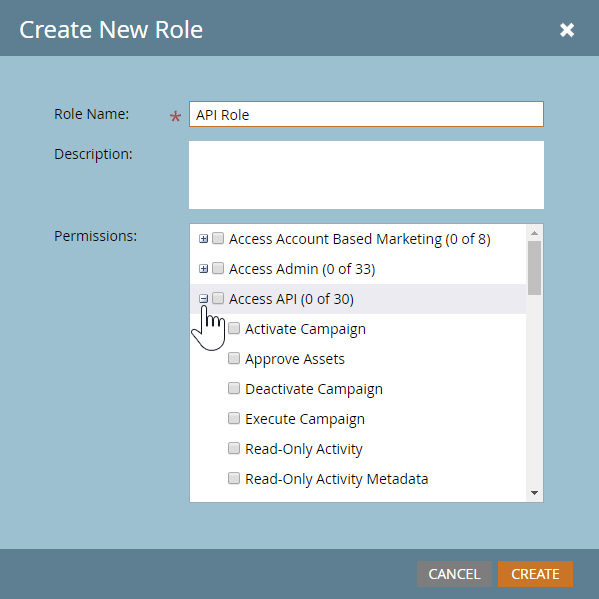
-
Now scroll down and select the following permissions:
Read-Write Activity,Read-Write Activity Metadata,Read-Write Assets,Read-Write Campaign,Read-Write Company,Read-Write Custom Object,Read-Write Person,Read-Write Named Account,Read-Write Opportunity. -
The next step is to create an API-Only user and associating it with the API role that you created in the previous step. Click on the Users & Roles node and select the Users tab. The email address should be [email protected]. Be sure to check the API-Only user checkbox at the time of user creation. This email will be populated on the Toplyne Integration page under Custom Service User Email ID.

-
A Custom service is required to identify your client application uniquely. To create a custom application, go to the Admin > LaunchPoint screen and create a new service.
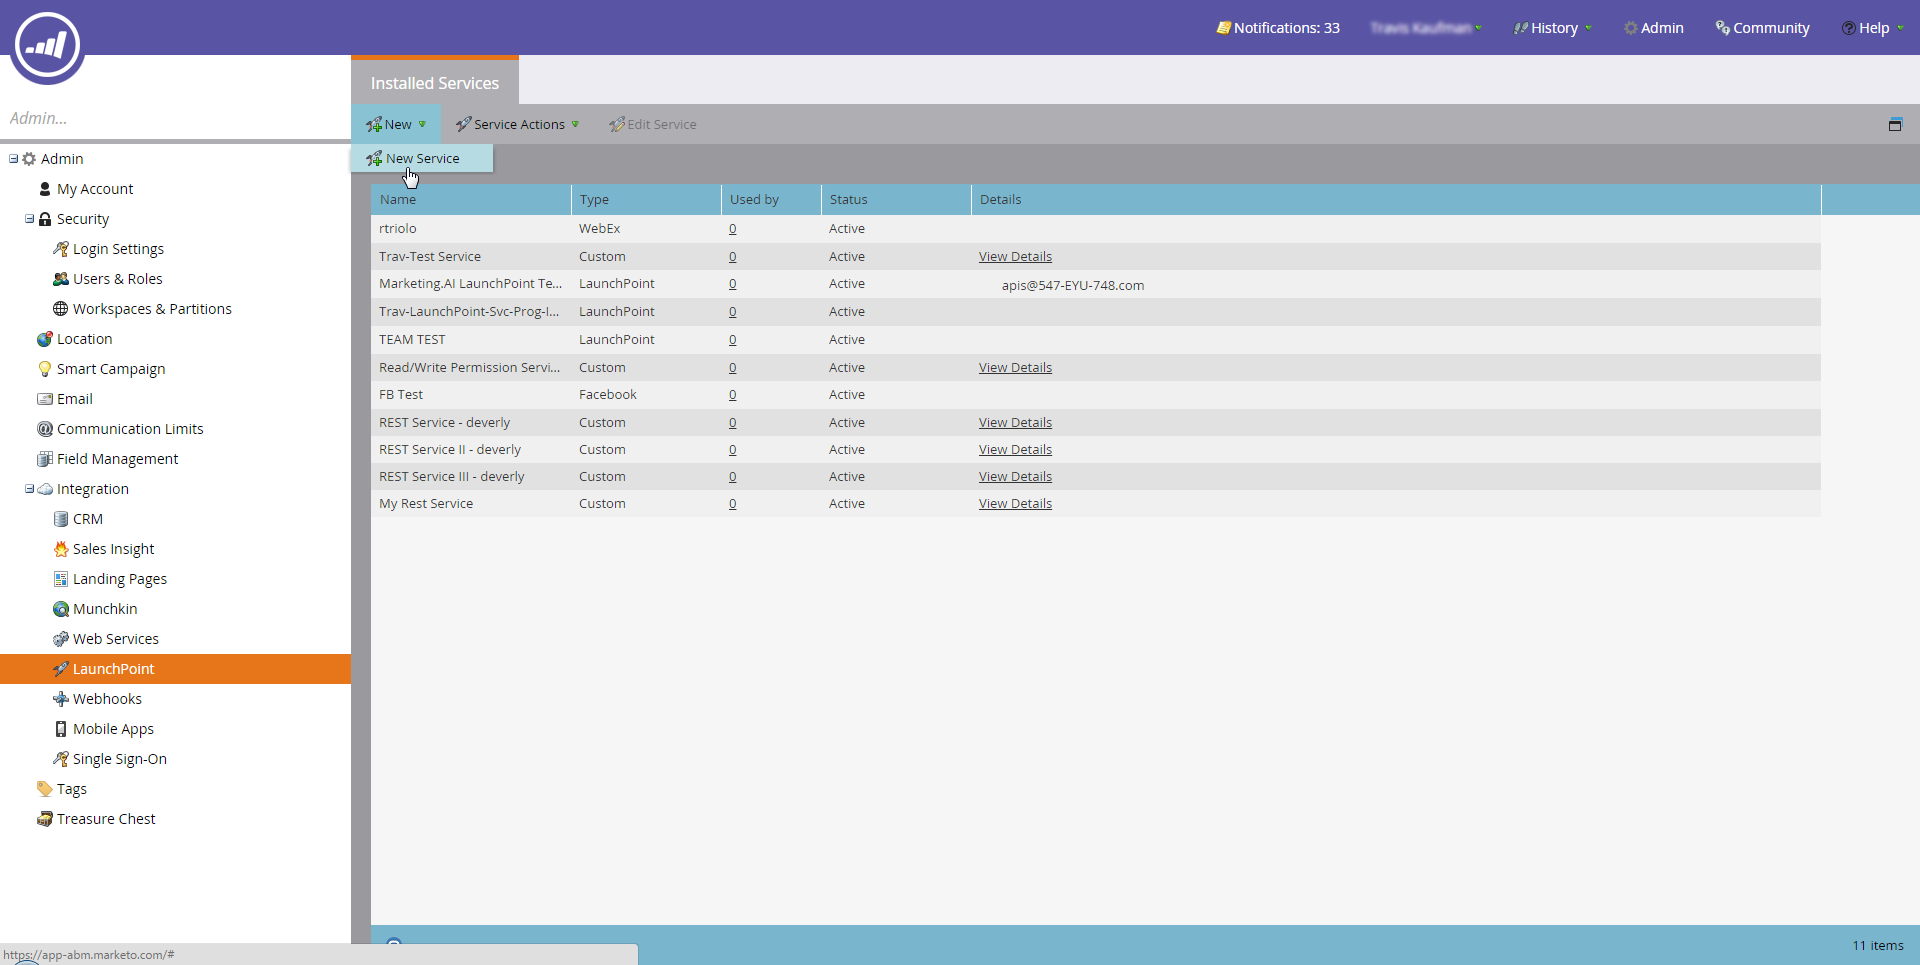
-
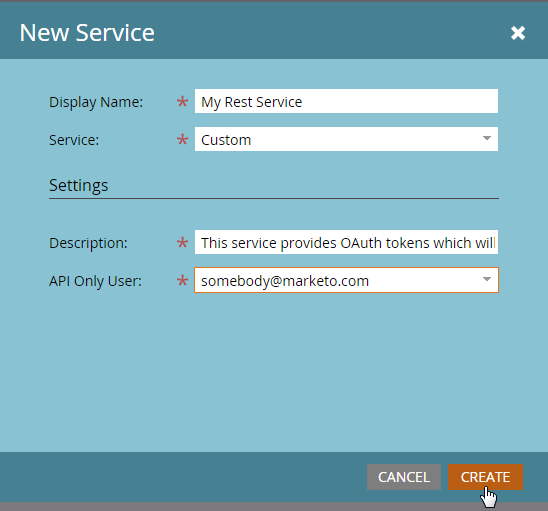
Provide the Display Name, choose “Custom” Service type, provide the Description, and the user email address created in step 7. We recommend using a descriptive Display Name that represents either the company or purpose of this Custom REST API Service.
-
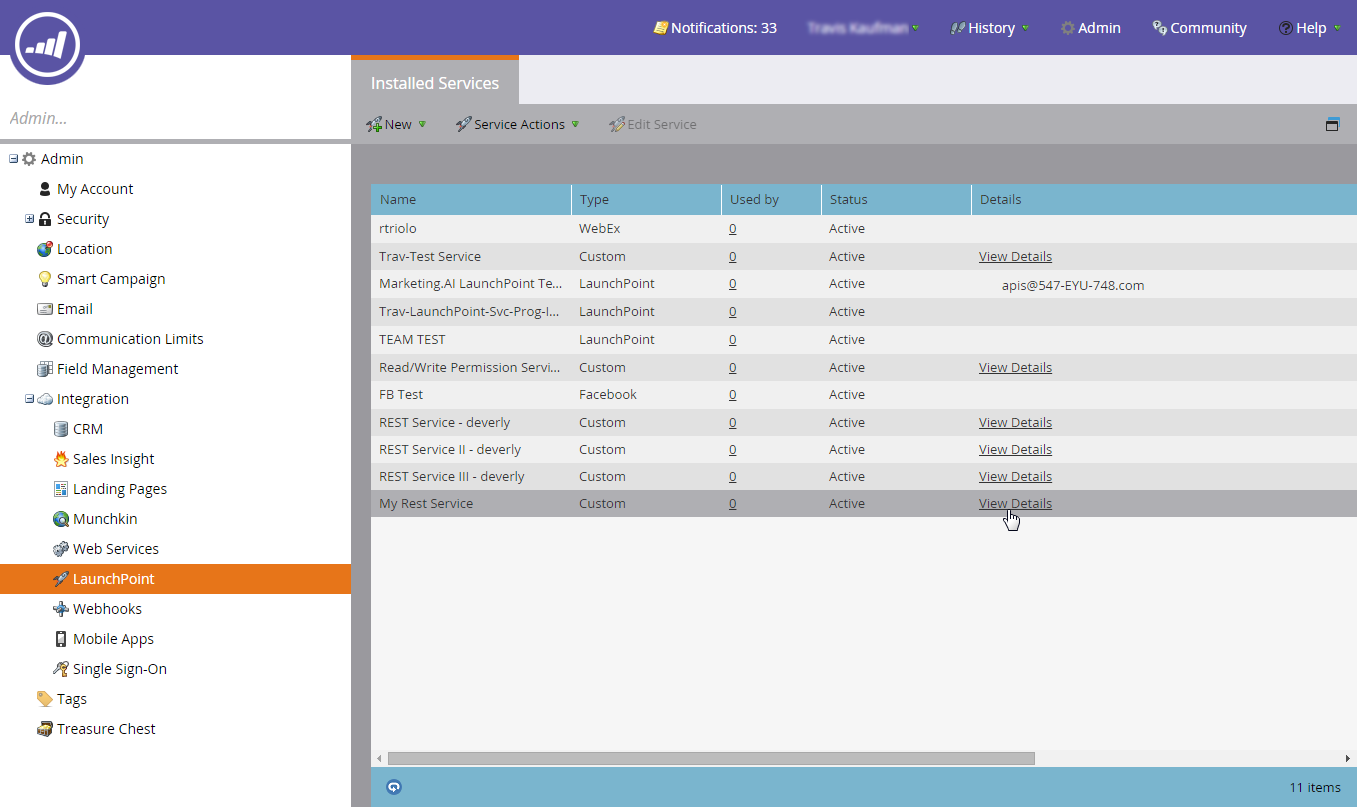
Click on View Details link on the grid to get the Client ID and Client Secret.
-
Copy your Client ID and Client Secret. Enter this in your Toplyne Integration page.

-
Determining the Endpoint URL: In requesting Marketo API, you must specify your Marketo instance in the endpoint URL. All non-bulk API requests to the Marketo REST API will follow the format below:
<REST API Endpoint URL>/rest/. The REST API Endpoint URL is in the Marketo Admin > Web Services panel.
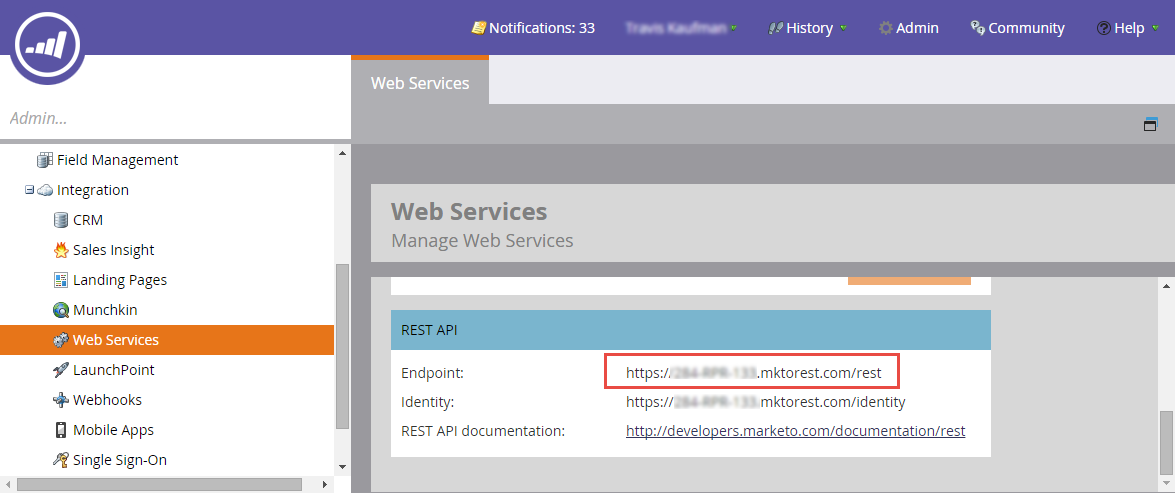
- Copy the Endpoint and the Identity link, and paste them against REST Endpoint and Identity Endpoint fields respectively on the Toplyne integration page.
- Click Complete Integration, and you're done!
Using Marketo as a destination
- Select the destination you just created on the export page.
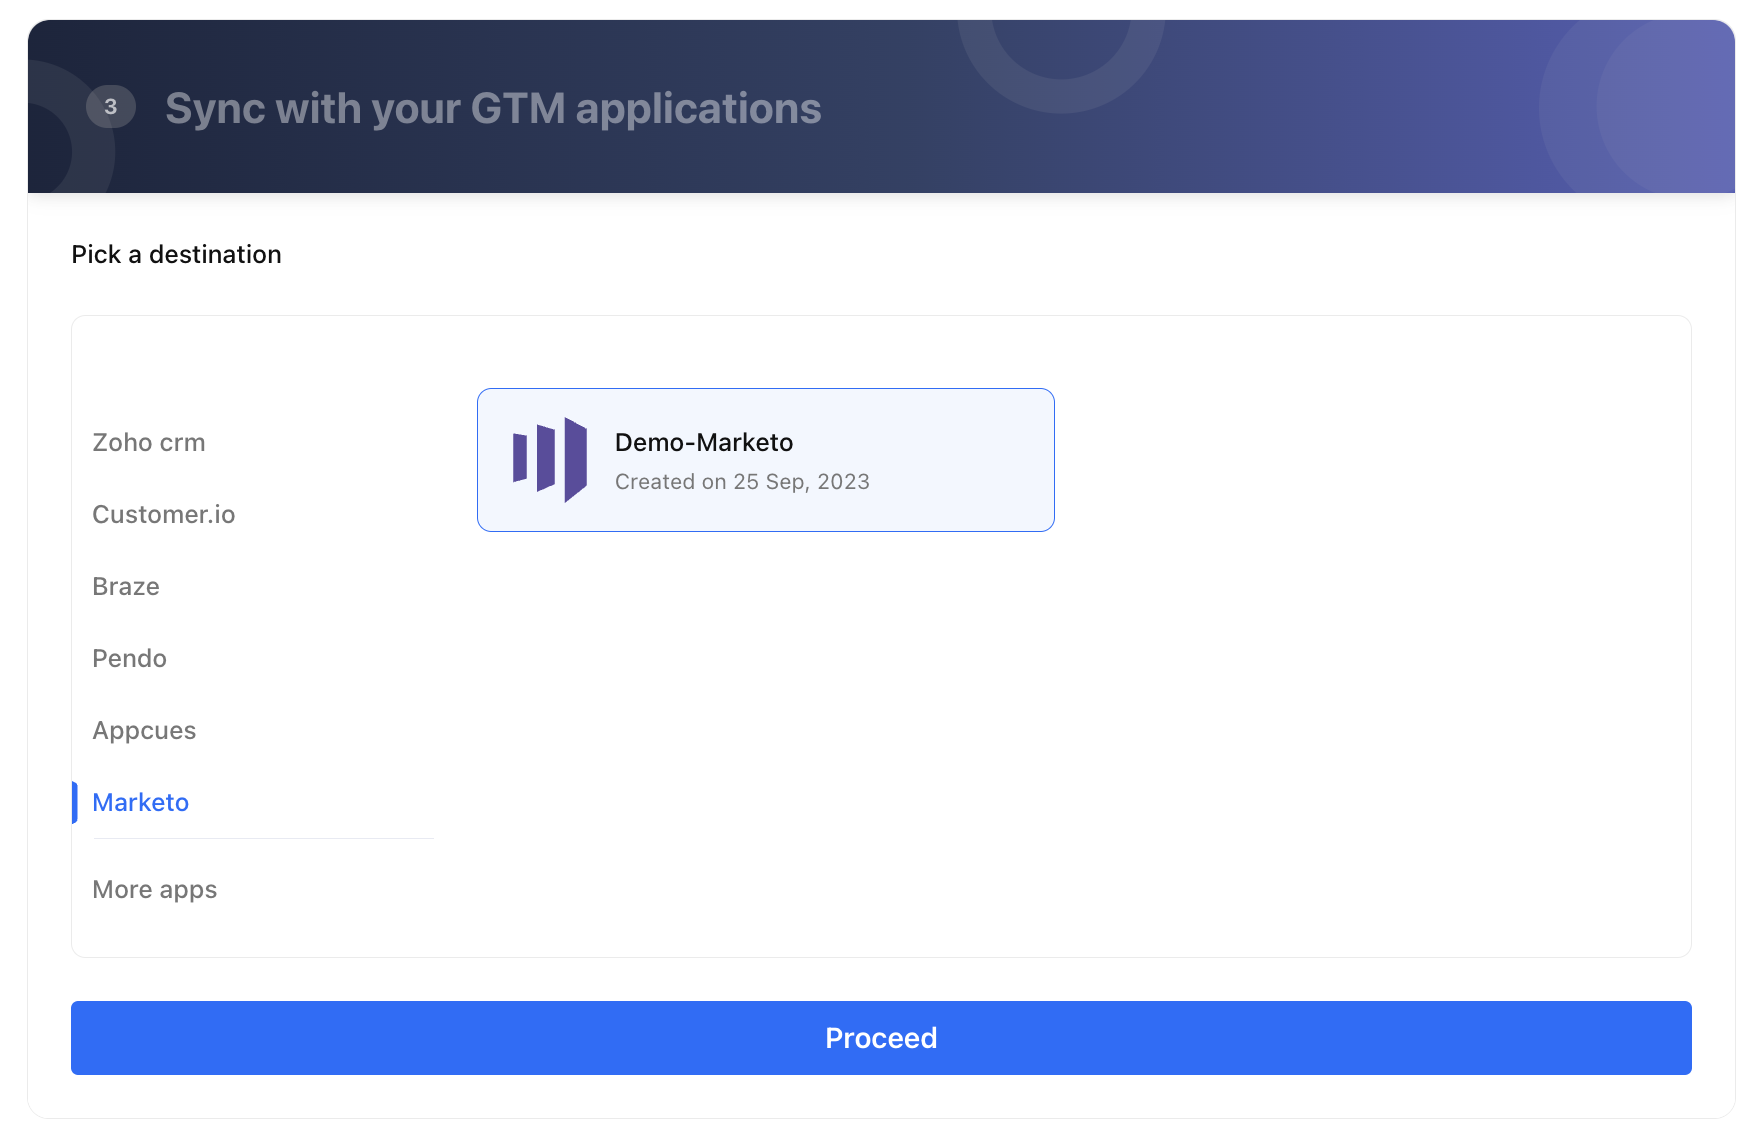
- Select the type of operation you wish to perform. The identifier in each of the cases would be the Email ID.
- Add to List
- The "Add to List" operation adds the users qualified in the playbook to a pre-defined list.
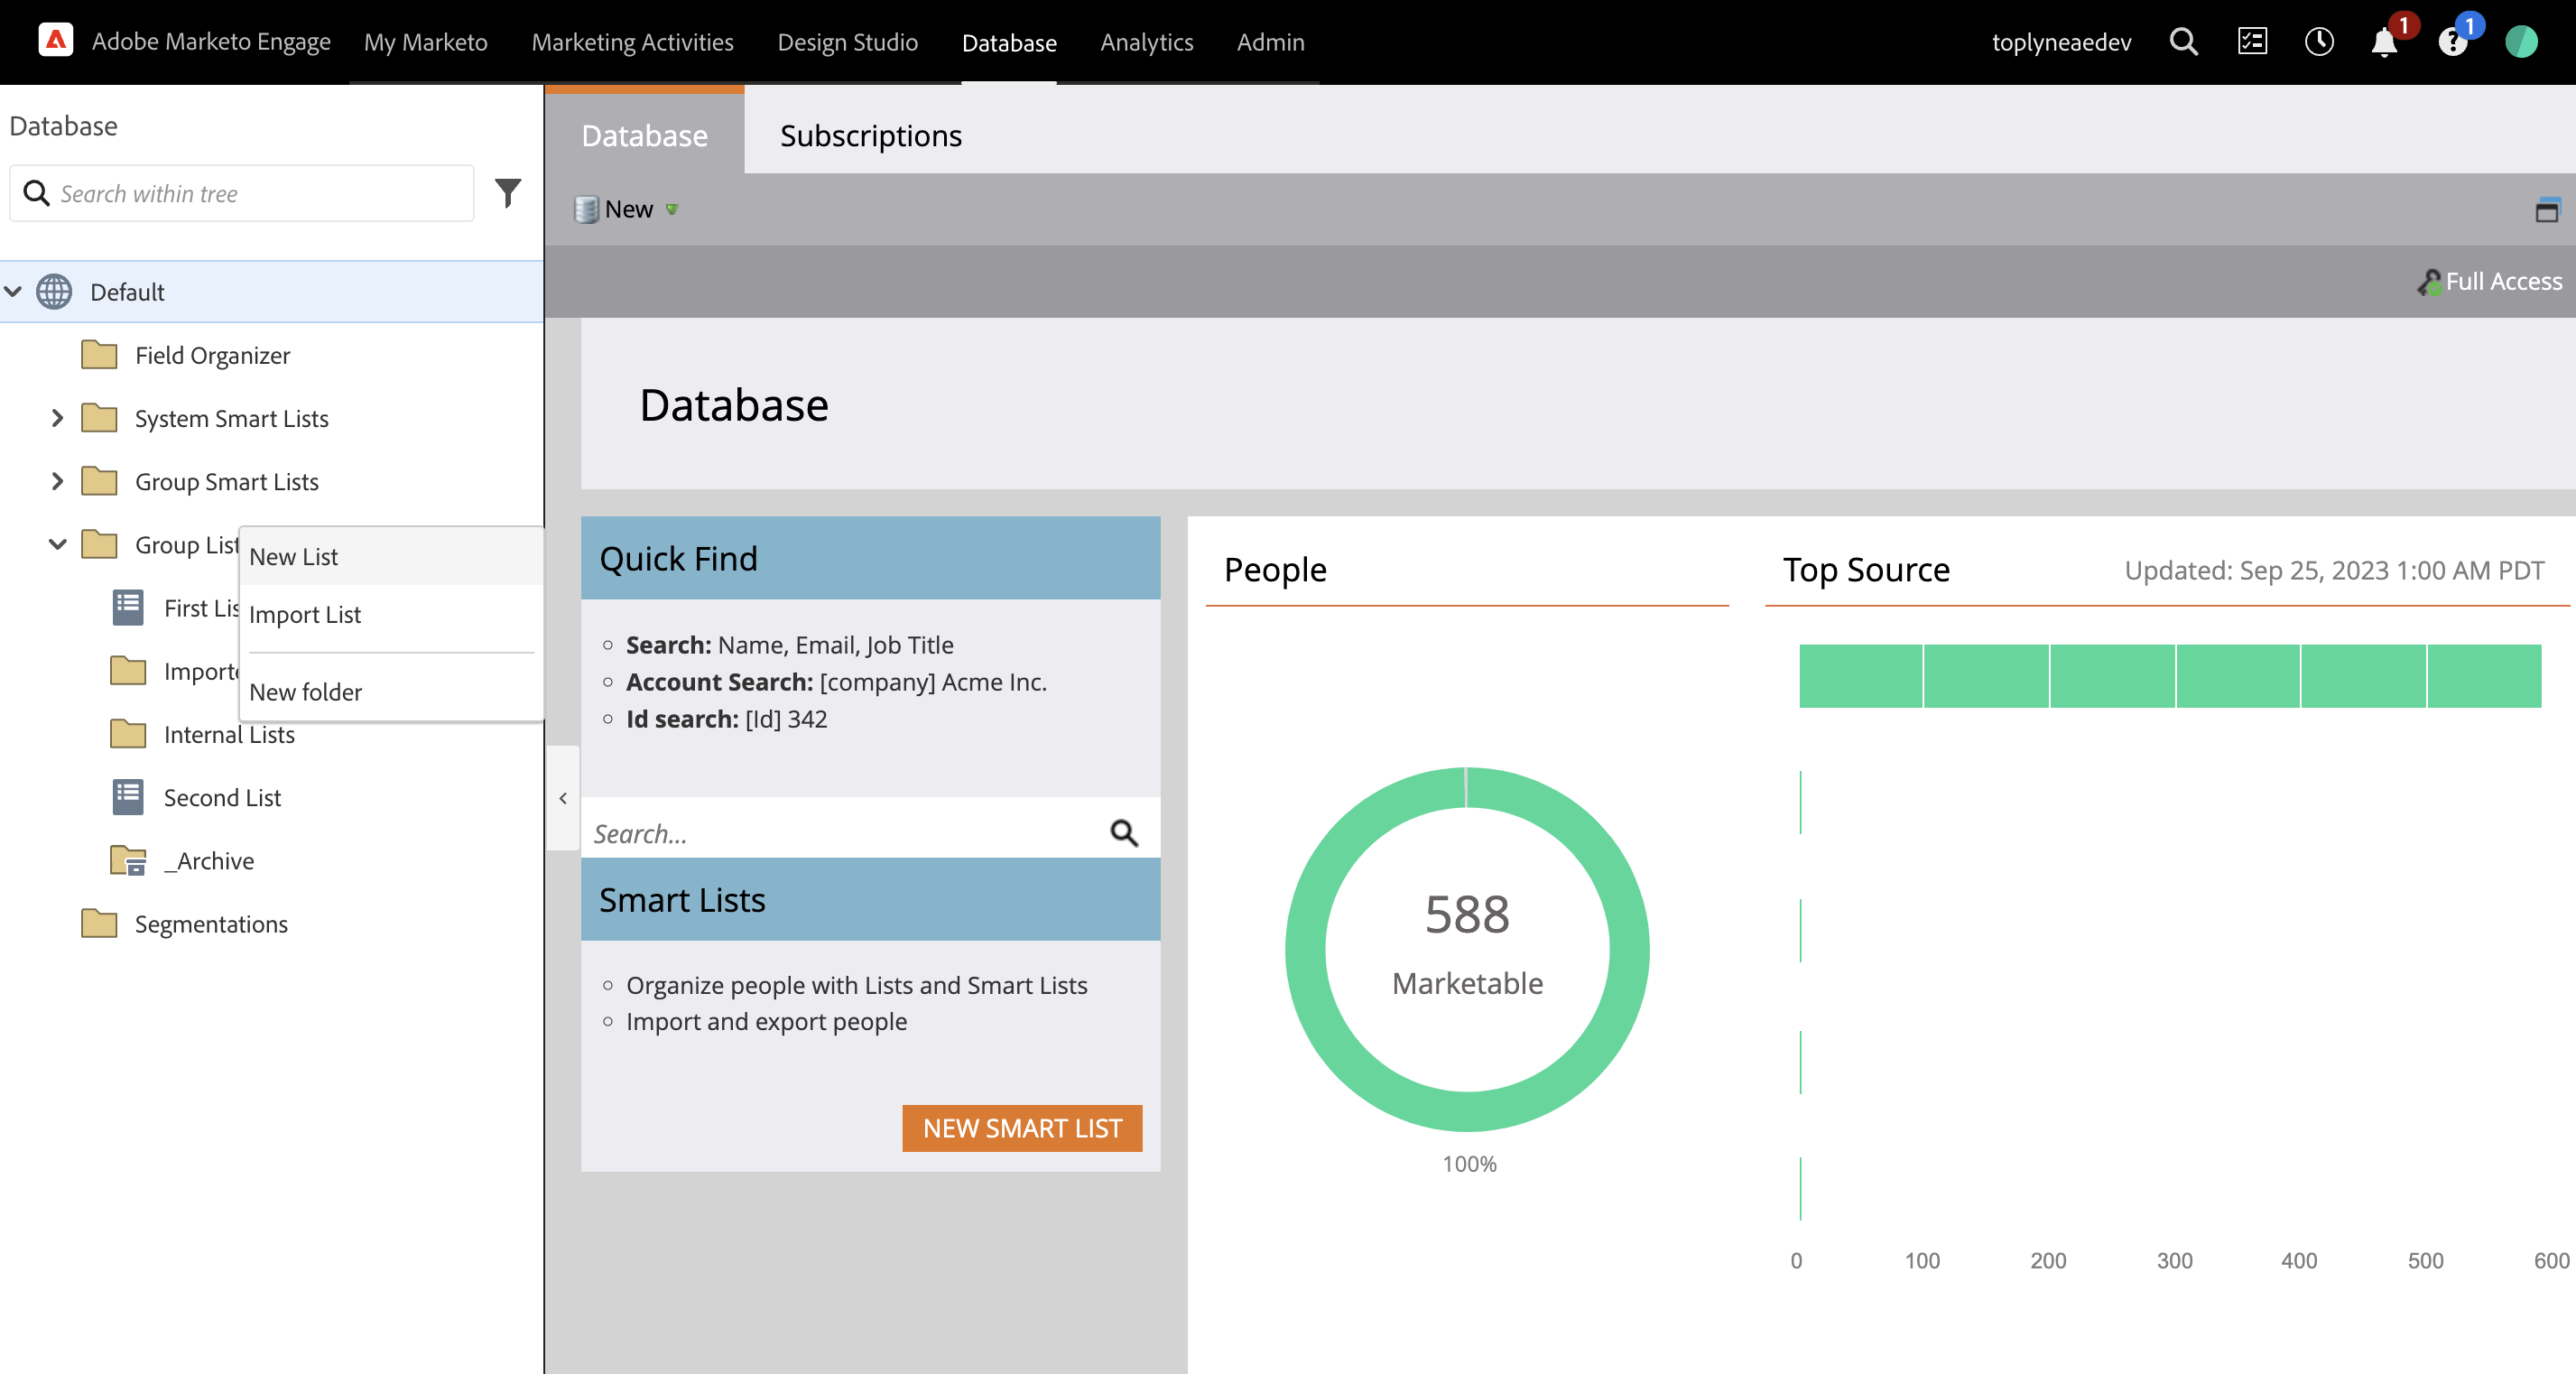
- You need to create the lists in advance by navigating to Database > Group Lists > New List.
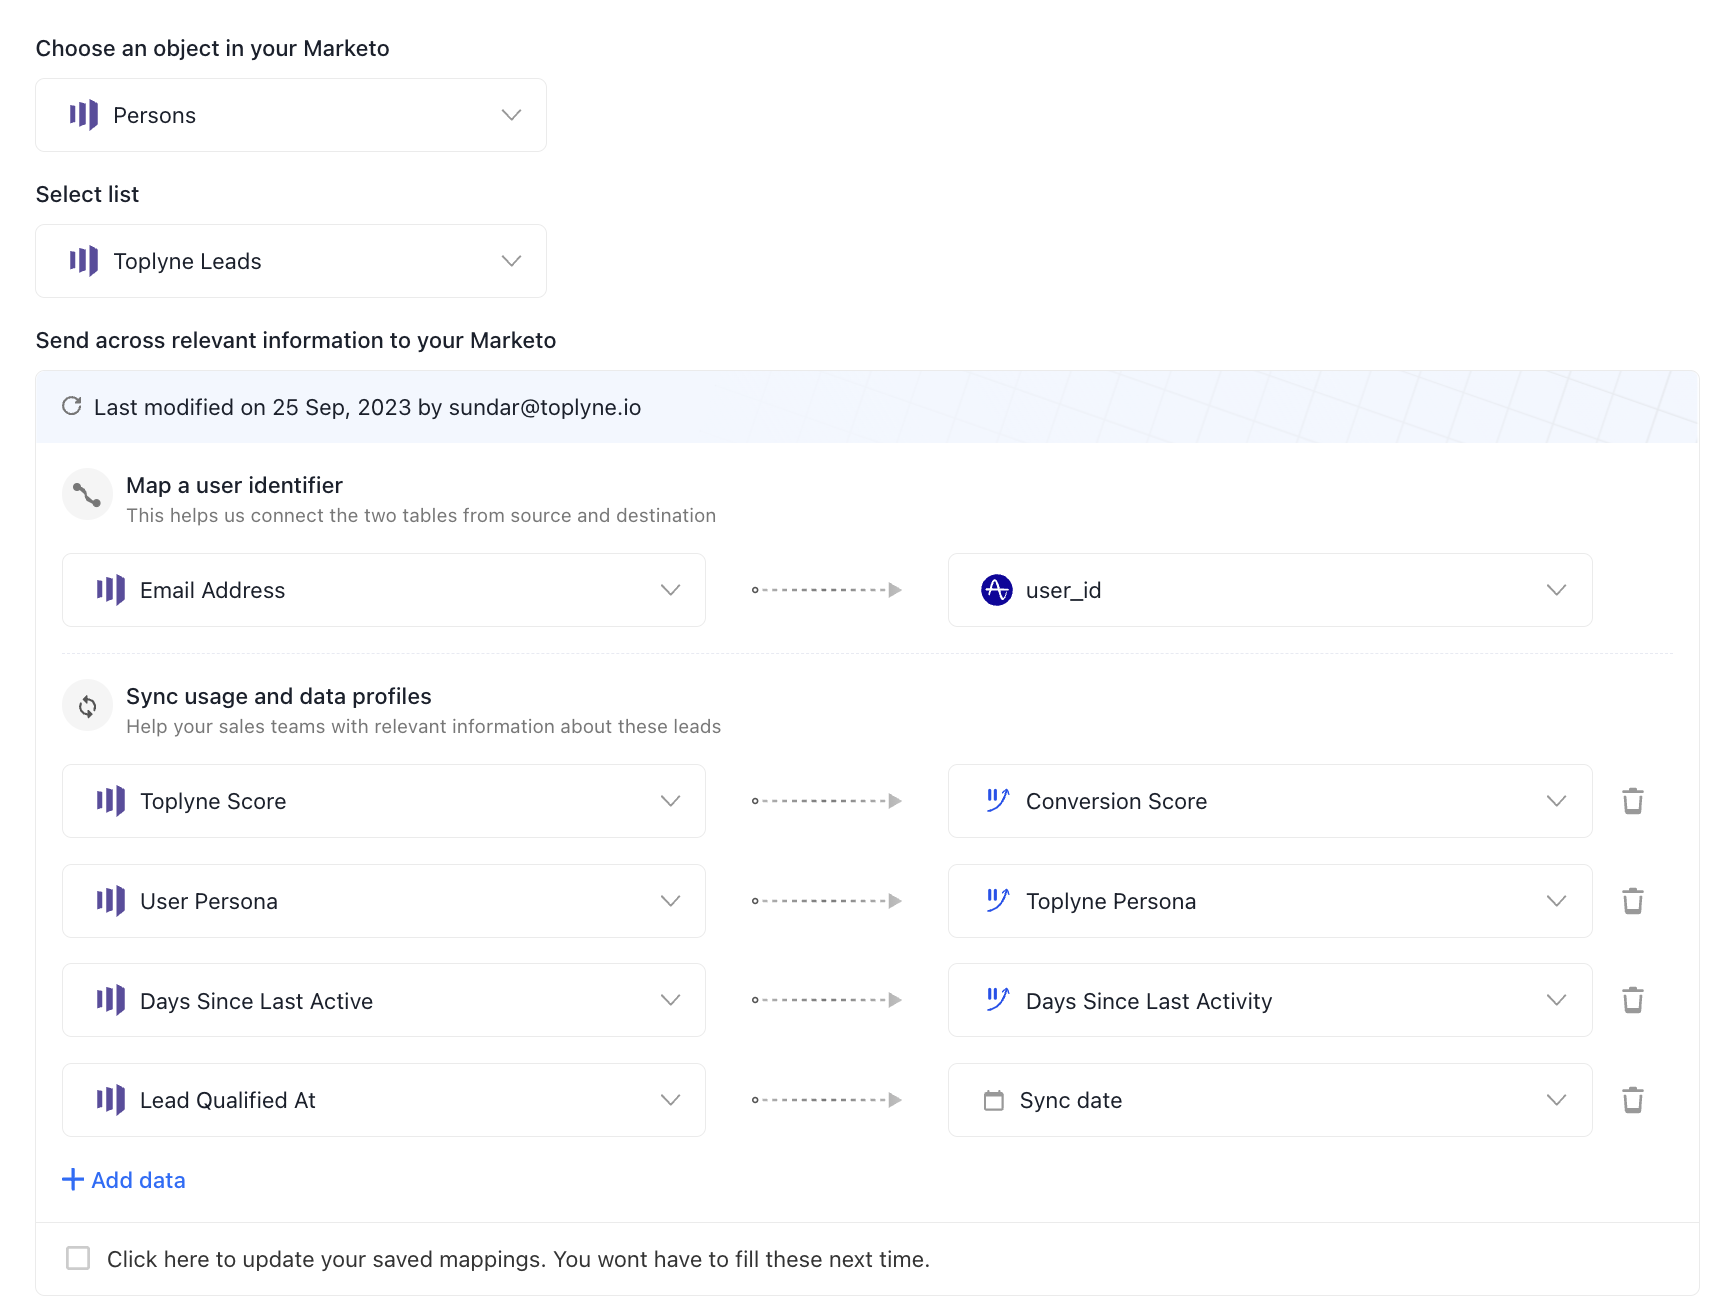
- The fields you create and map in the sync section will update a lead's fields.

- Persons
- The "Persons" operation updates the field against a user on Marketo.
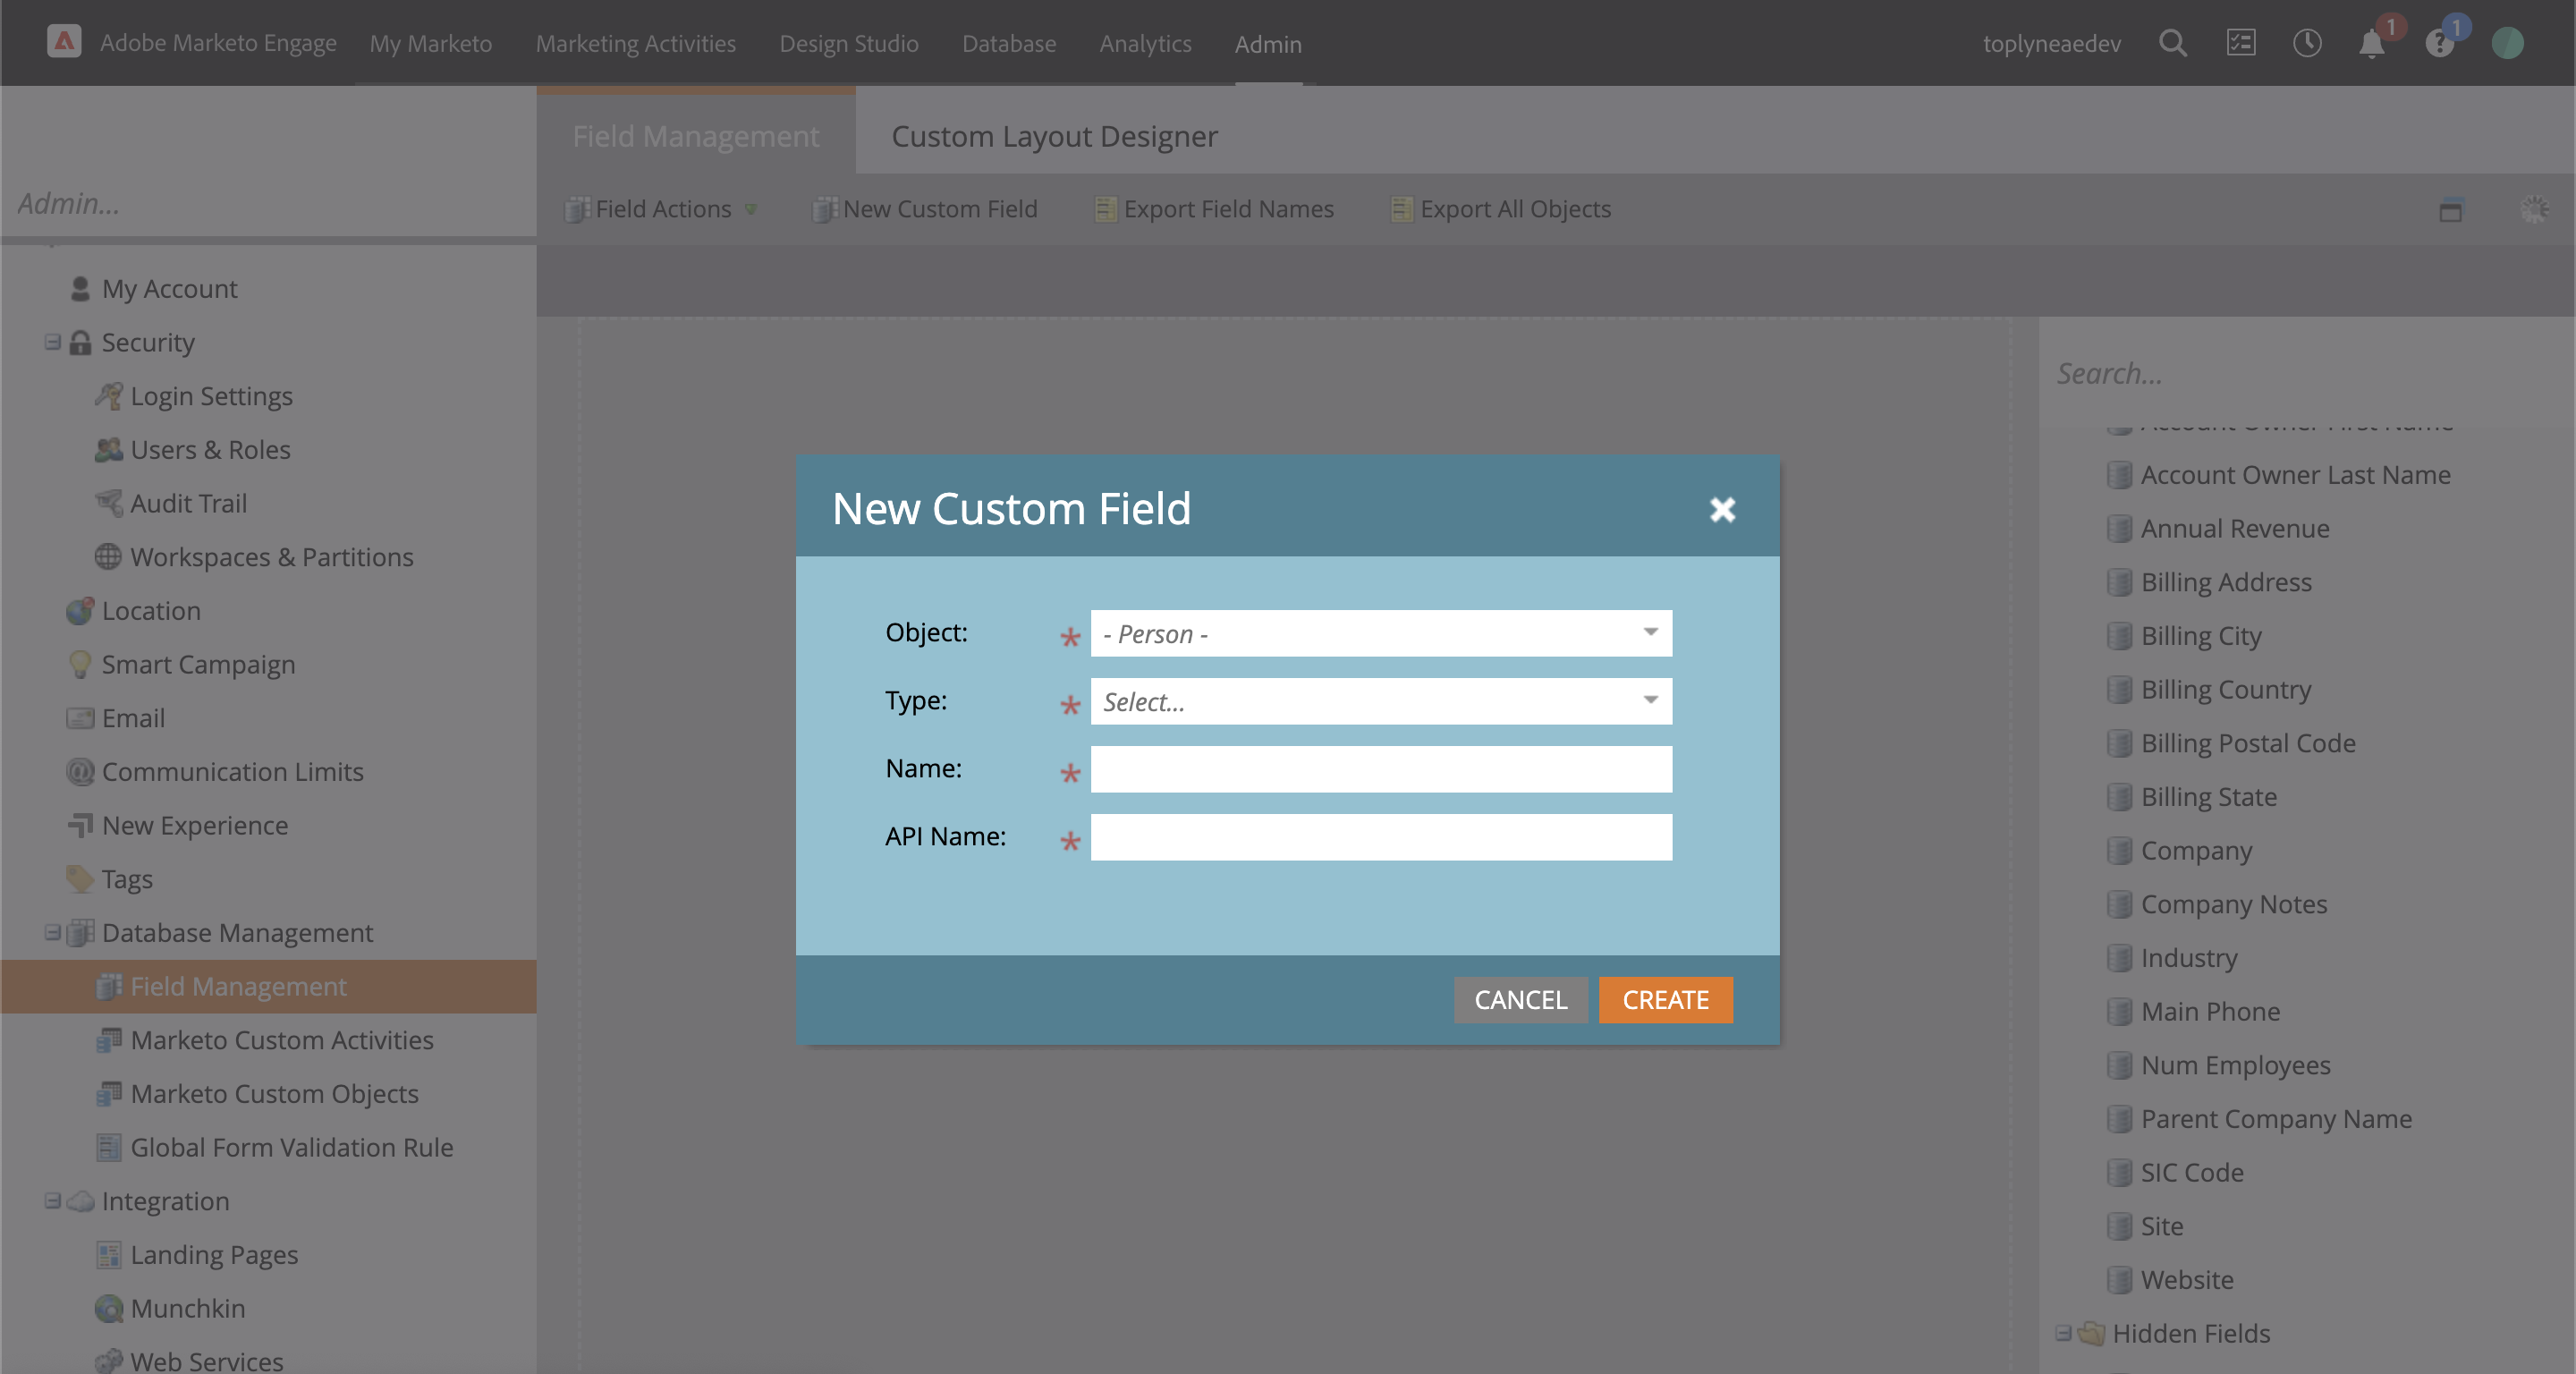
- You need to create the custom fields in advance by navigating to Admin > Database Management > Field Management > New Custom Field.
- The fields you create and map in the sync section will update a lead's fields. Note that existing field values will be overwritten.
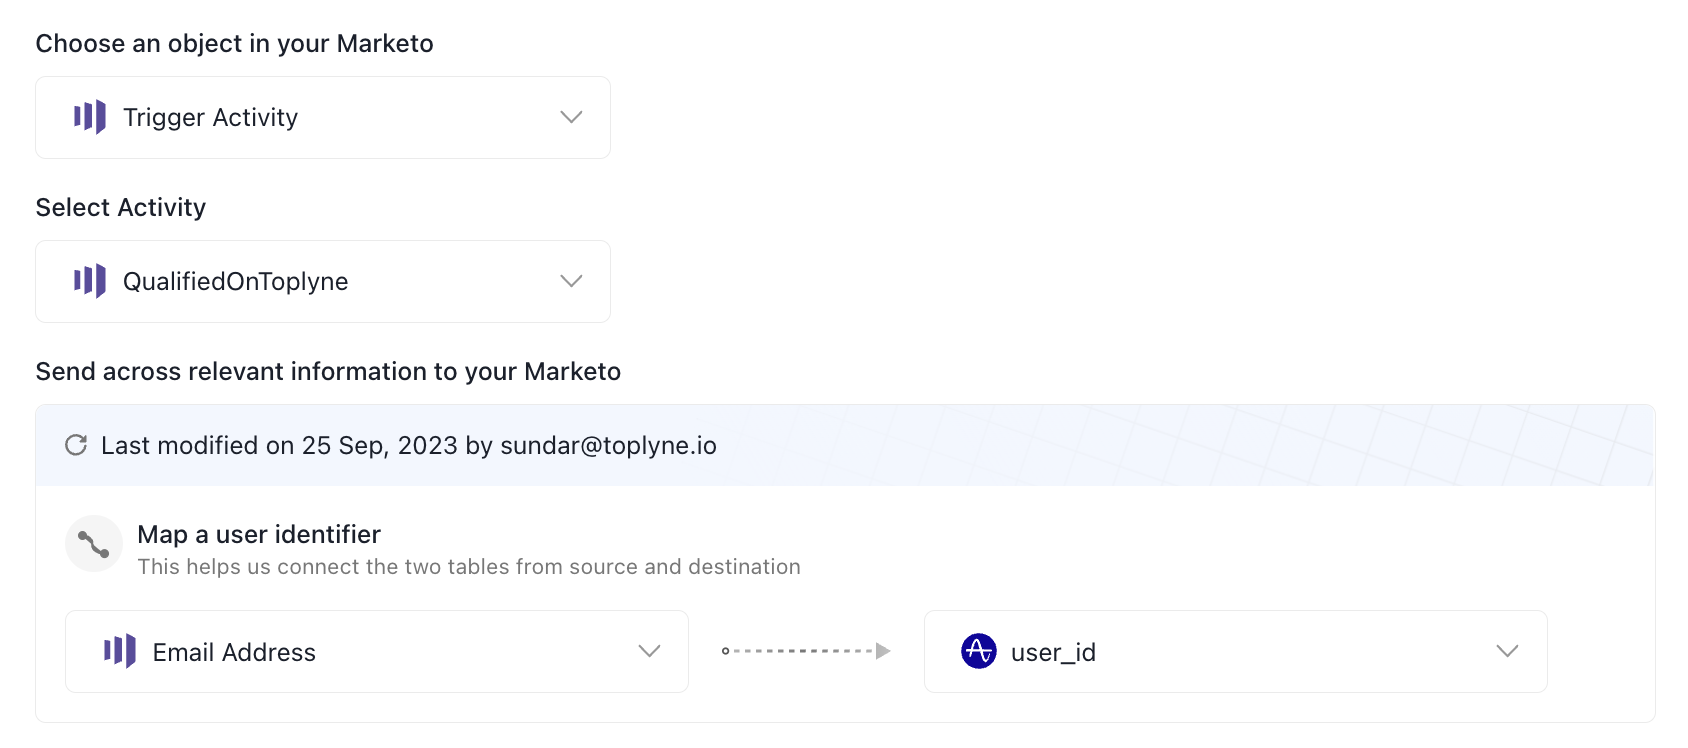
- Trigger Activity
- The "Trigger Activity" operation records an action for the users qualified in the playbook.
- You need to create the Activity in advance by navigating to Admin > Database Management > Marketo Custom Activities > New Custom Activity.
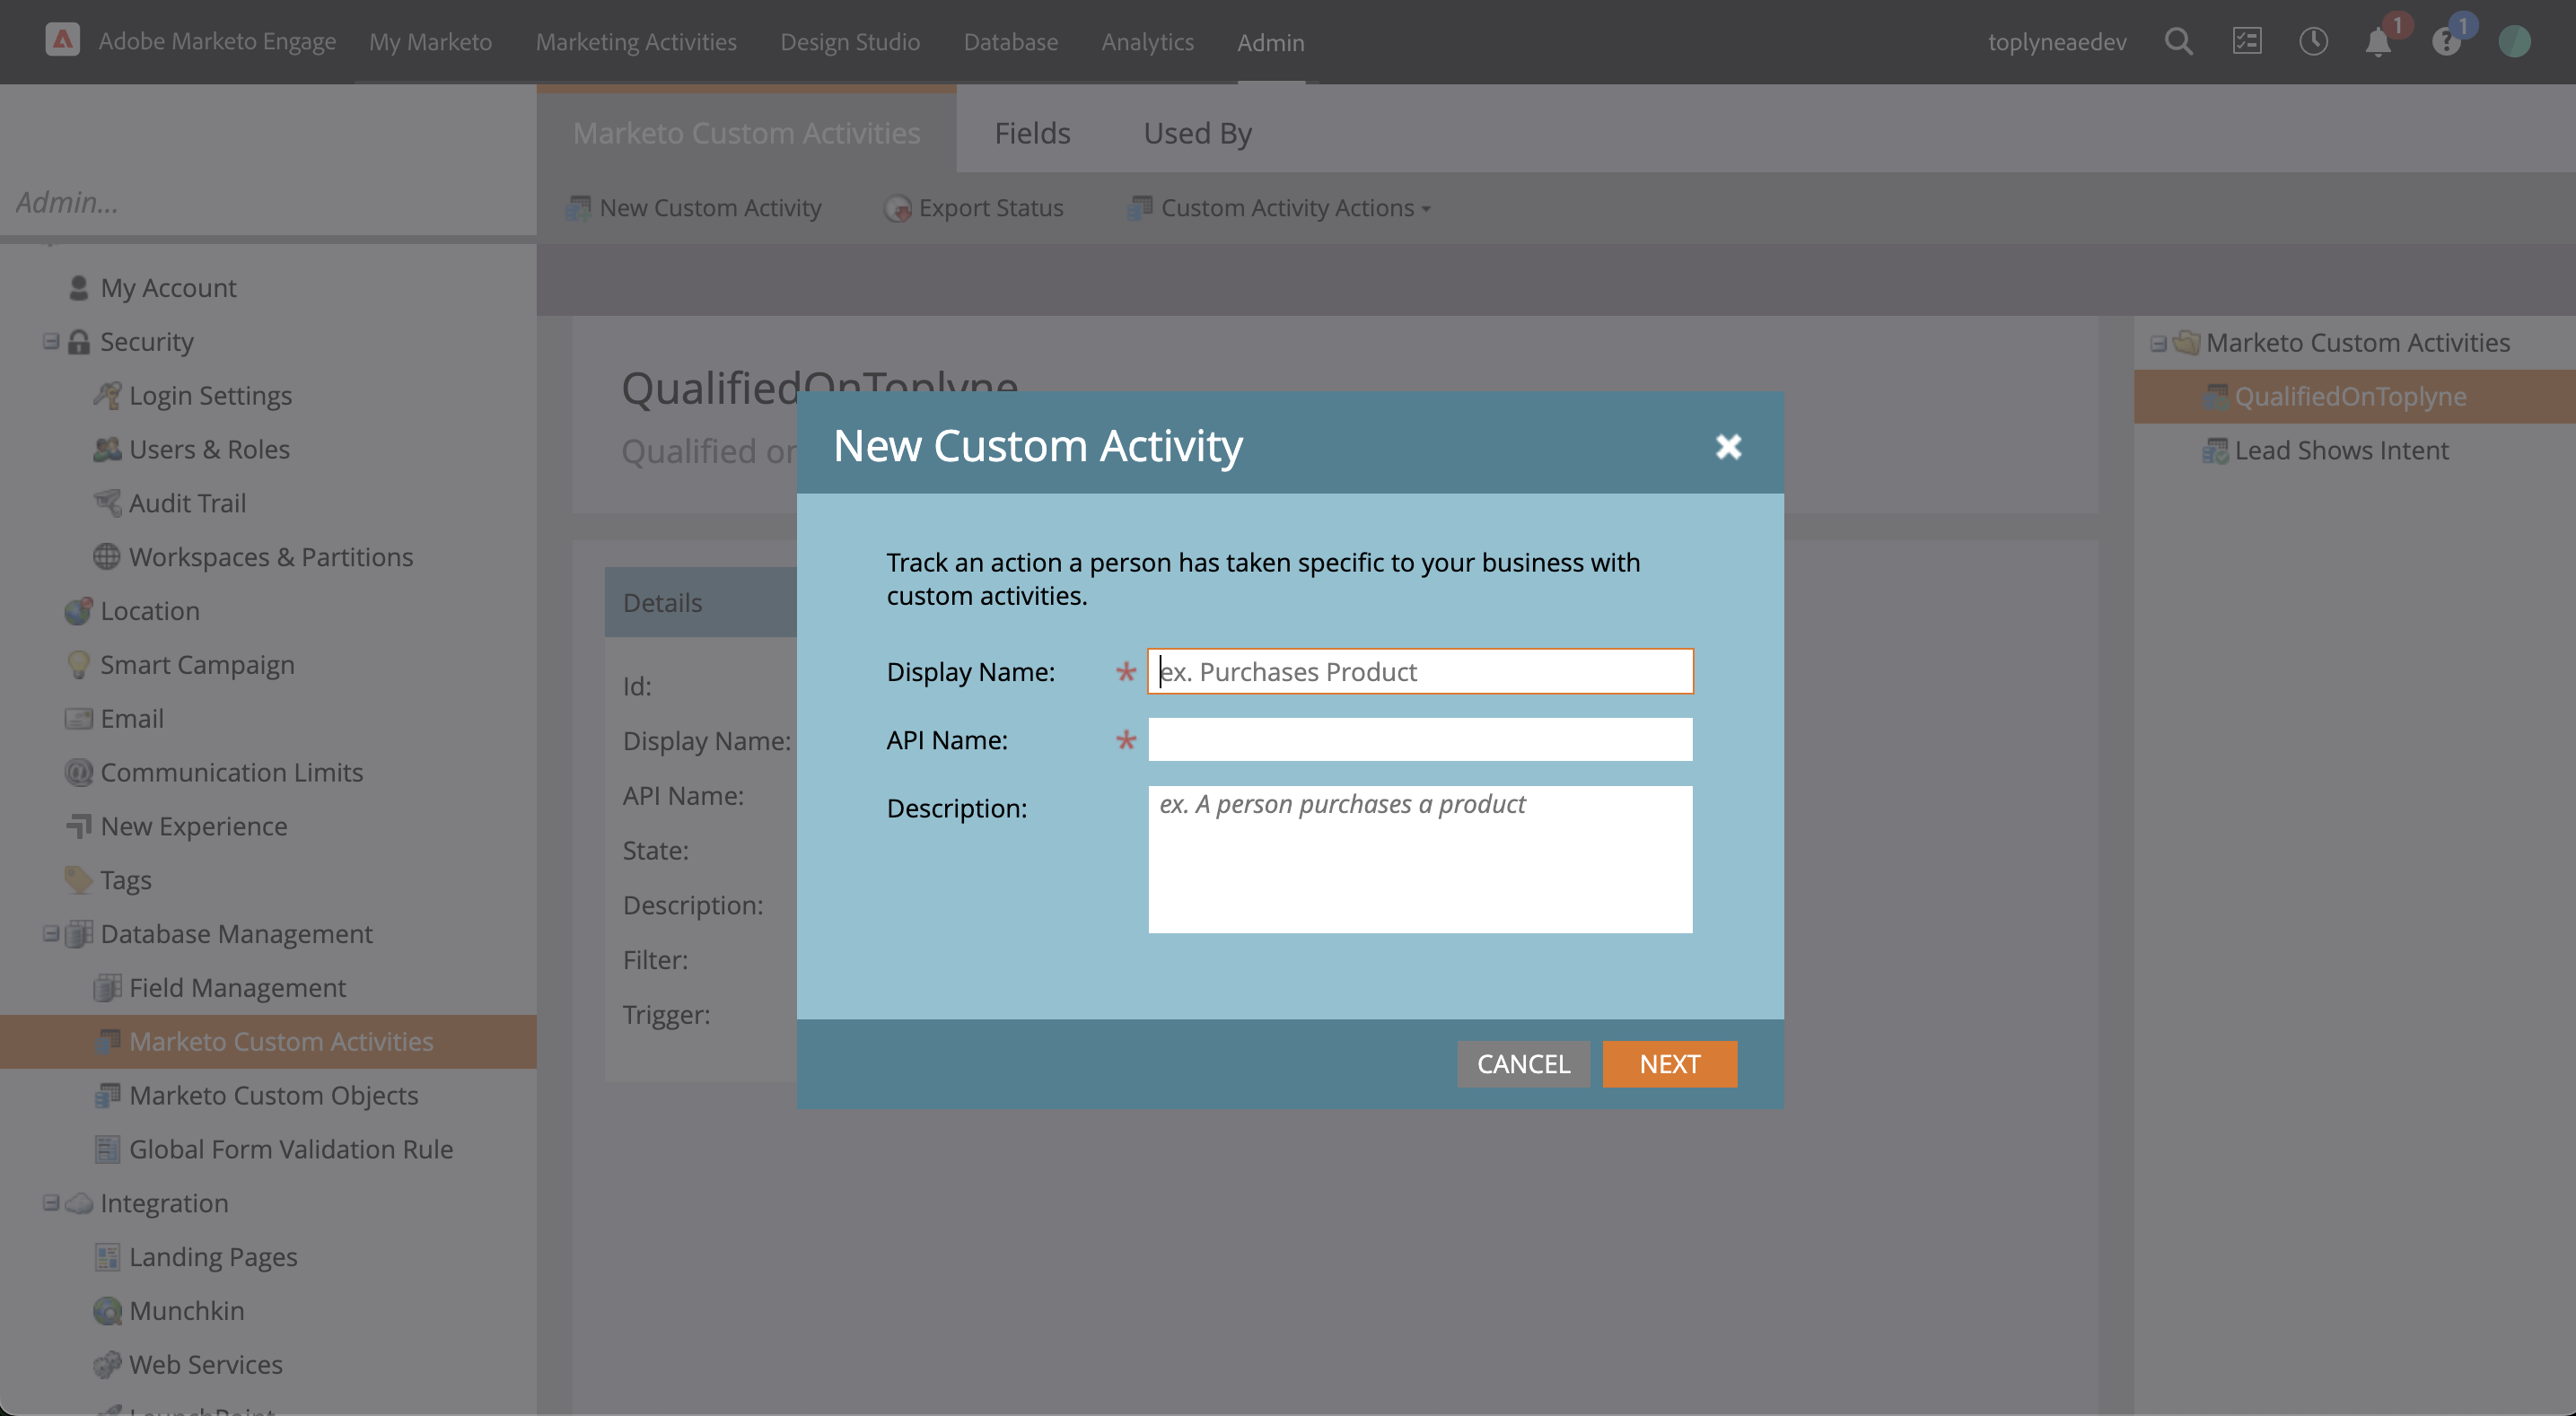
- Choose the activity from the dropdown. Only the Identifier is required, no mapped fields can be passed against an Activity.
- Add to List
- Name your pipeline and finish the setup. You should have the leads updated once your playbook runs!
- Once the playbook runs, you can create custom segments based on the Activity or fields we just updated.
Updated about 1 year ago