Single sign-on (SSO) using Okta
This guide outlines the steps necessary to set up single sign-on integration with Okta.
Pre-requisite
In order to set up SSO, you must be an "Admin" for your Toplyne organization. A member from our team will invite you to Toplyne dashboard. You must first sign-in using Google and then configure SSO using Okta. You must also be able to configure your organization in Okta.
Set up SSO for Toplyne using Okta
To configure SSO for Toplyne using Okta, follow these steps:
-
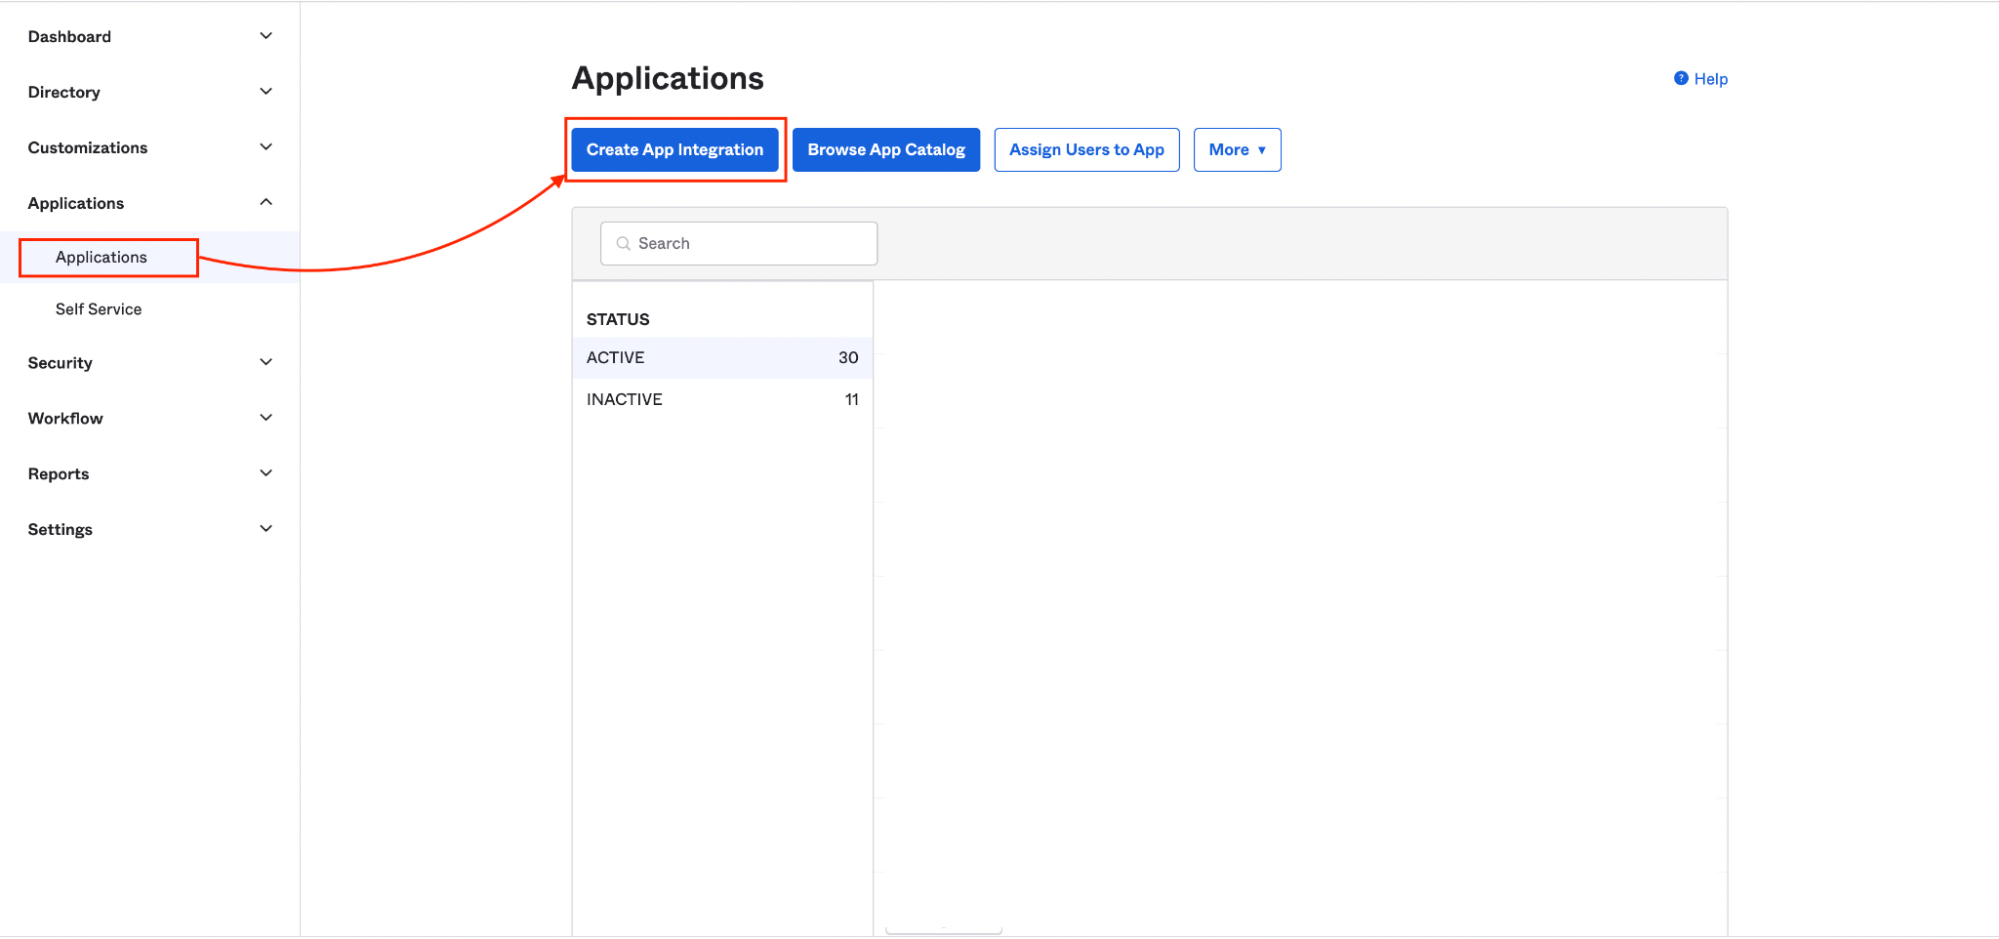
In Okta, navigate to the admin dashboard and click Applications.
-
On the Applications page, click Create App Integration.
-
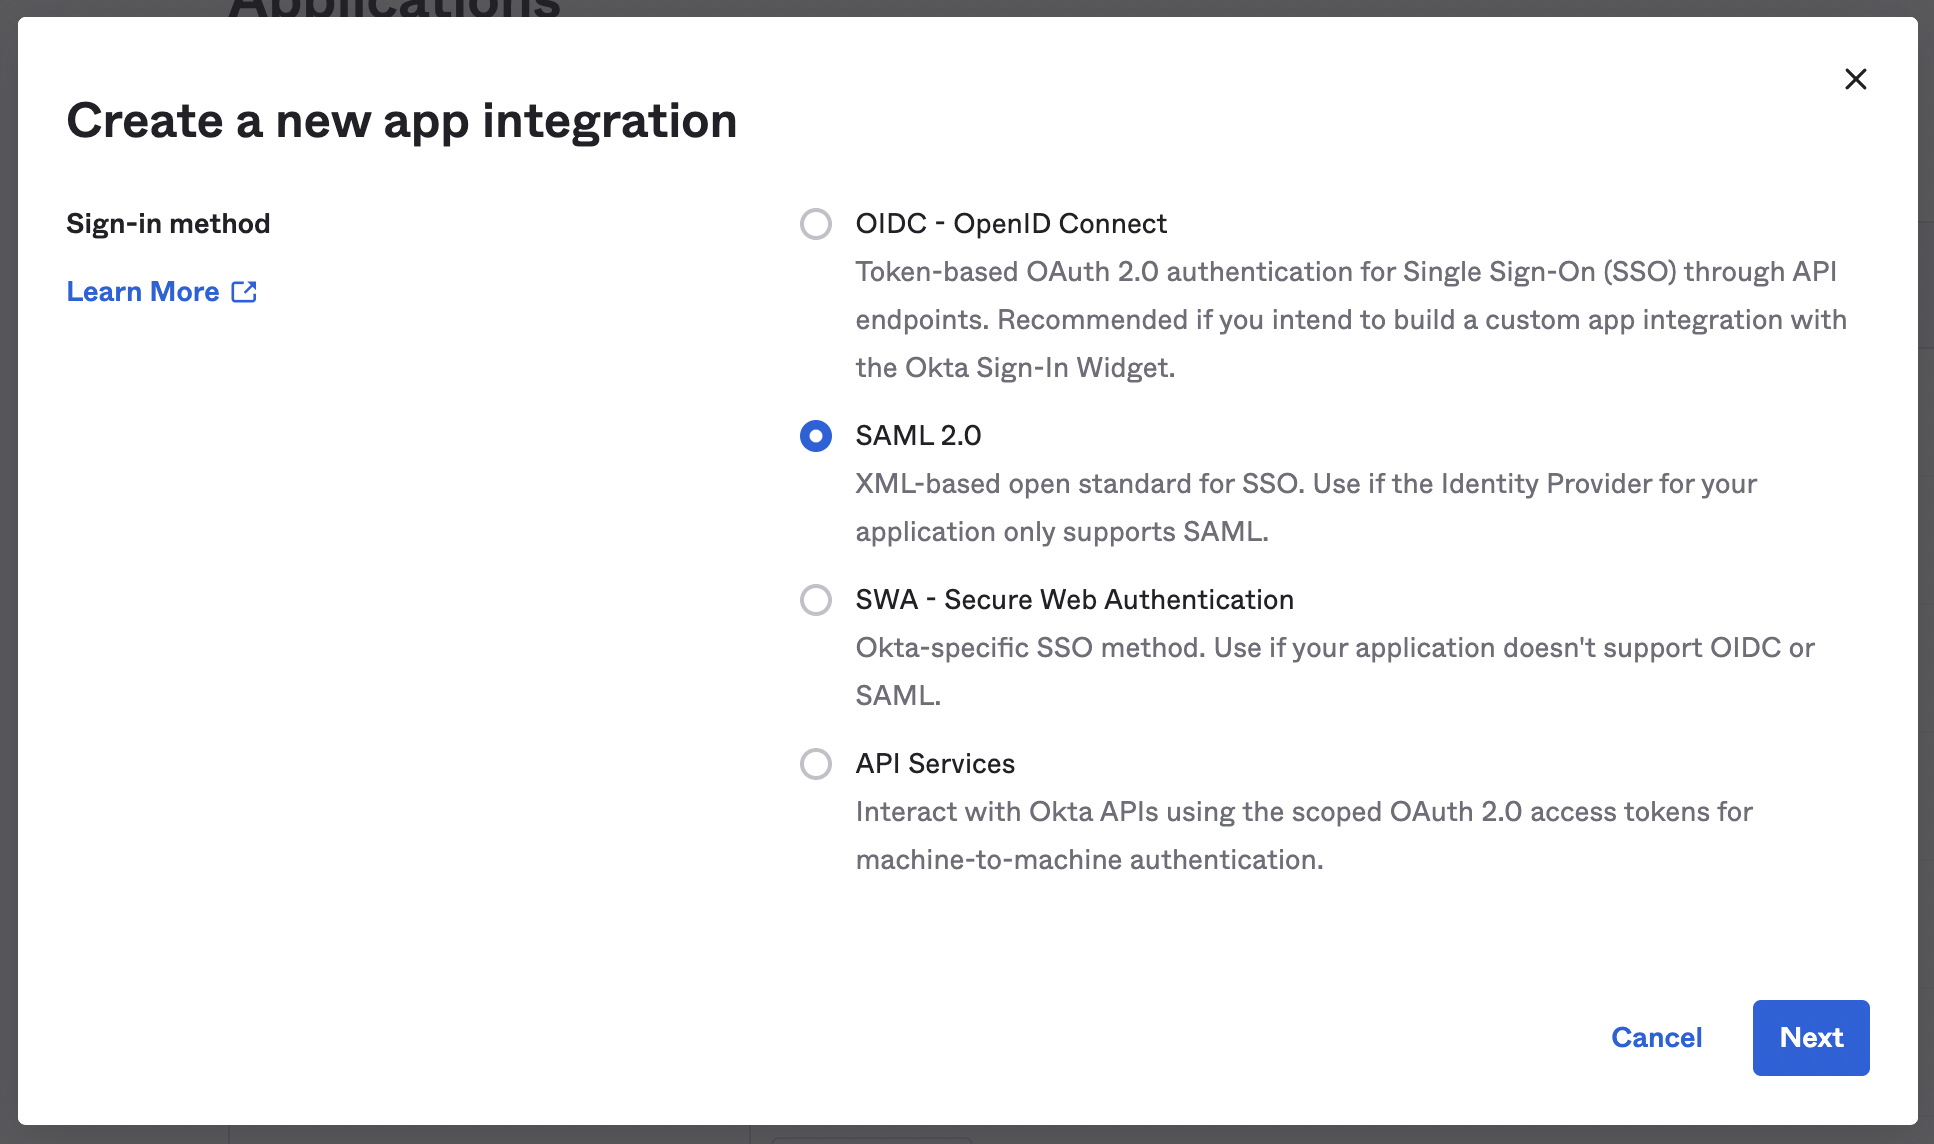
In the modal that appears, select the SAML 2.0 radio button and click Next.
-
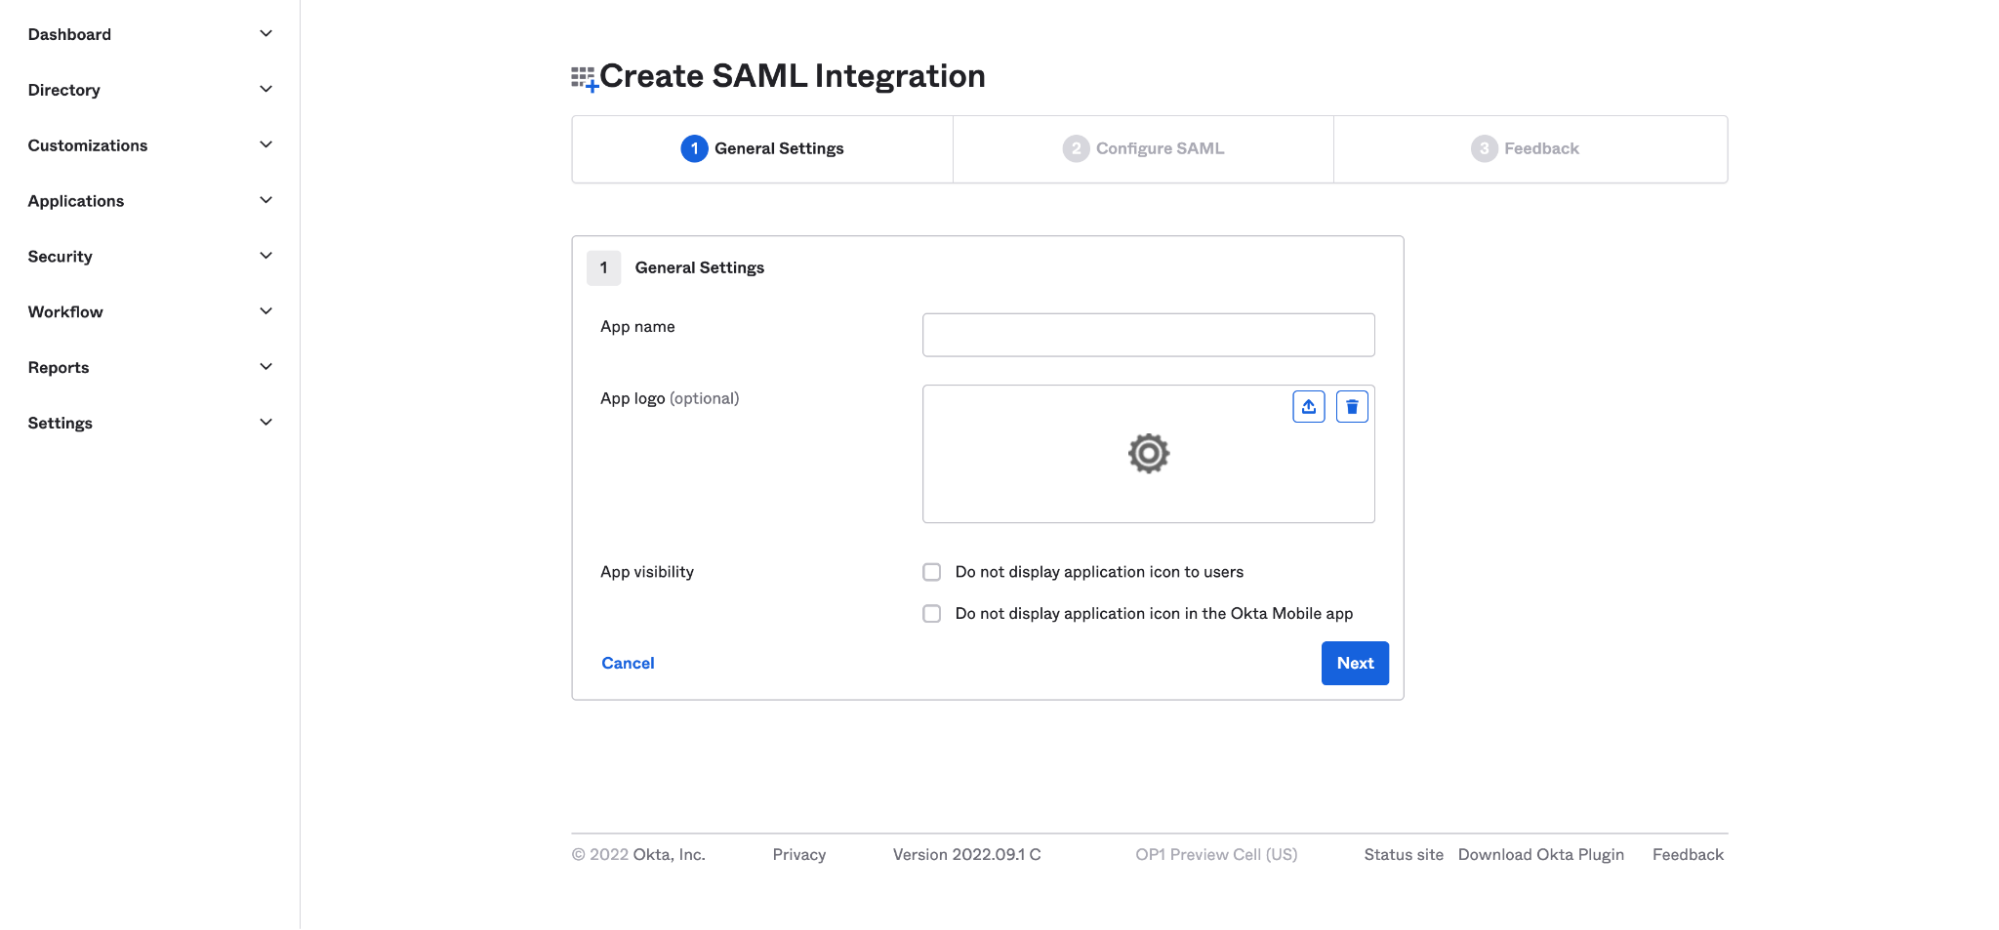
Enter a name for the app. For easier recognition, you can also upload a logo to go with it. Then click Next.
-
Next, you'll configure your SAML settings. Enter the single sign-on URL (ACS URL) and the audience URL (Entity ID) in the appropriate spaces. Then, from the Application username dropdown, select Email.
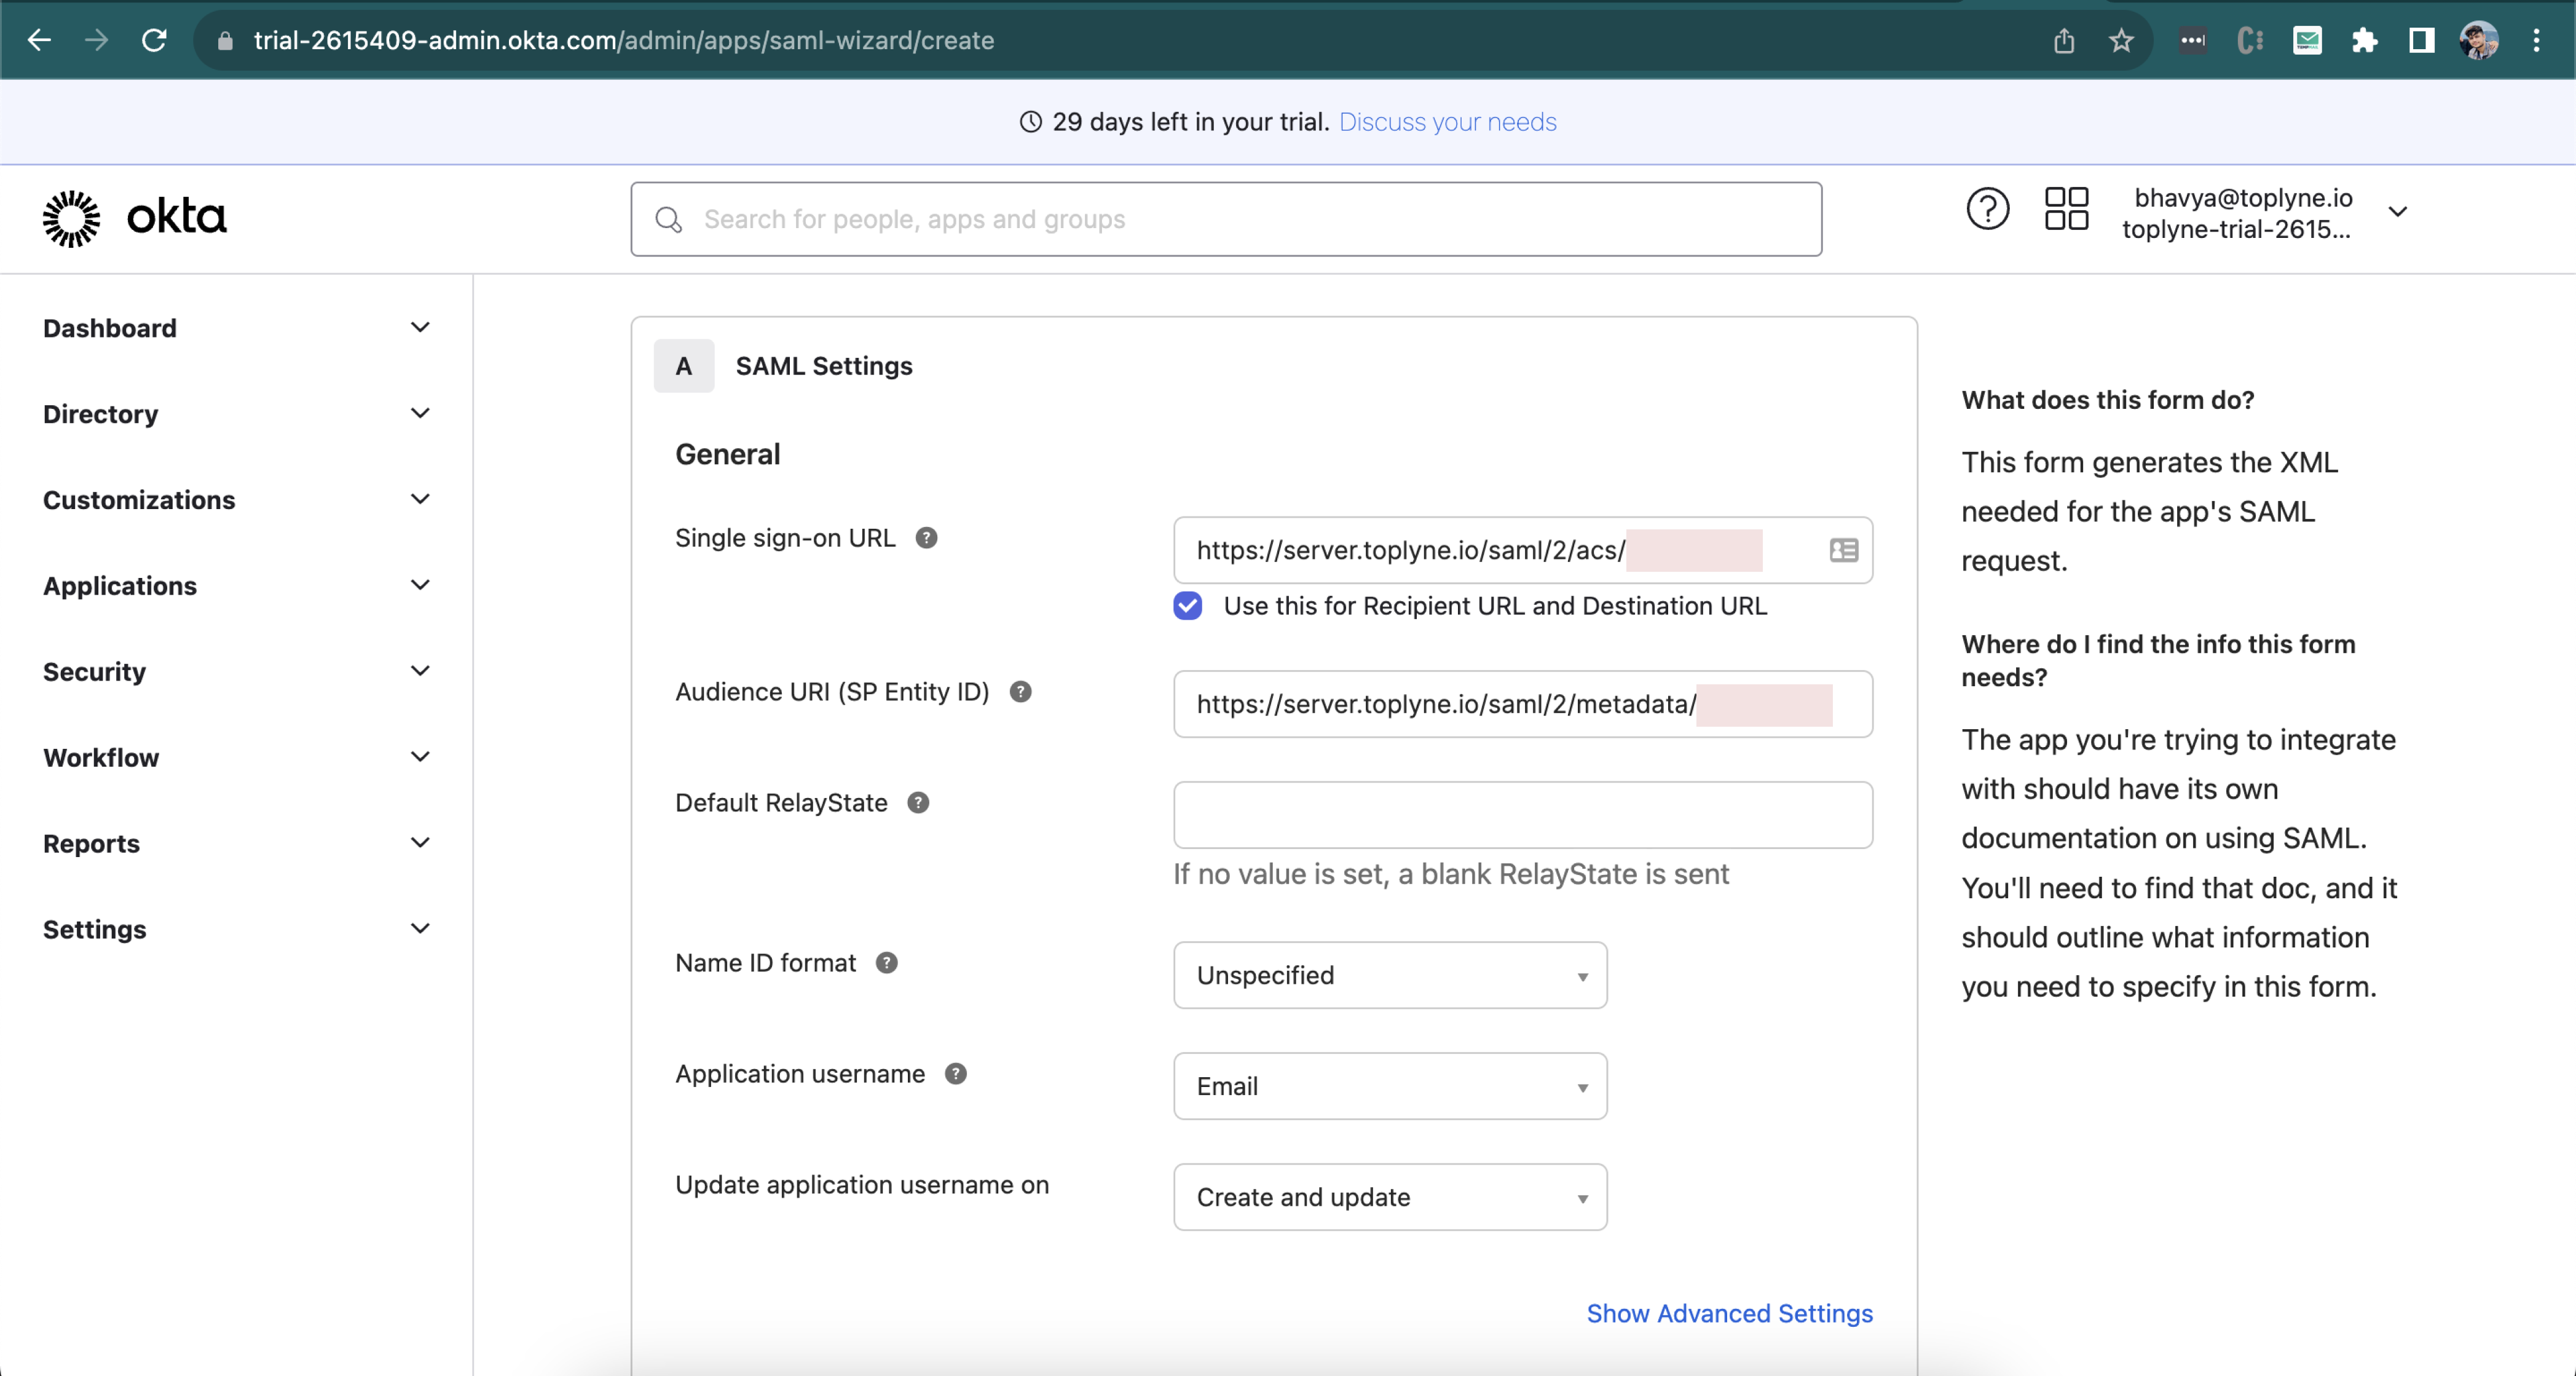
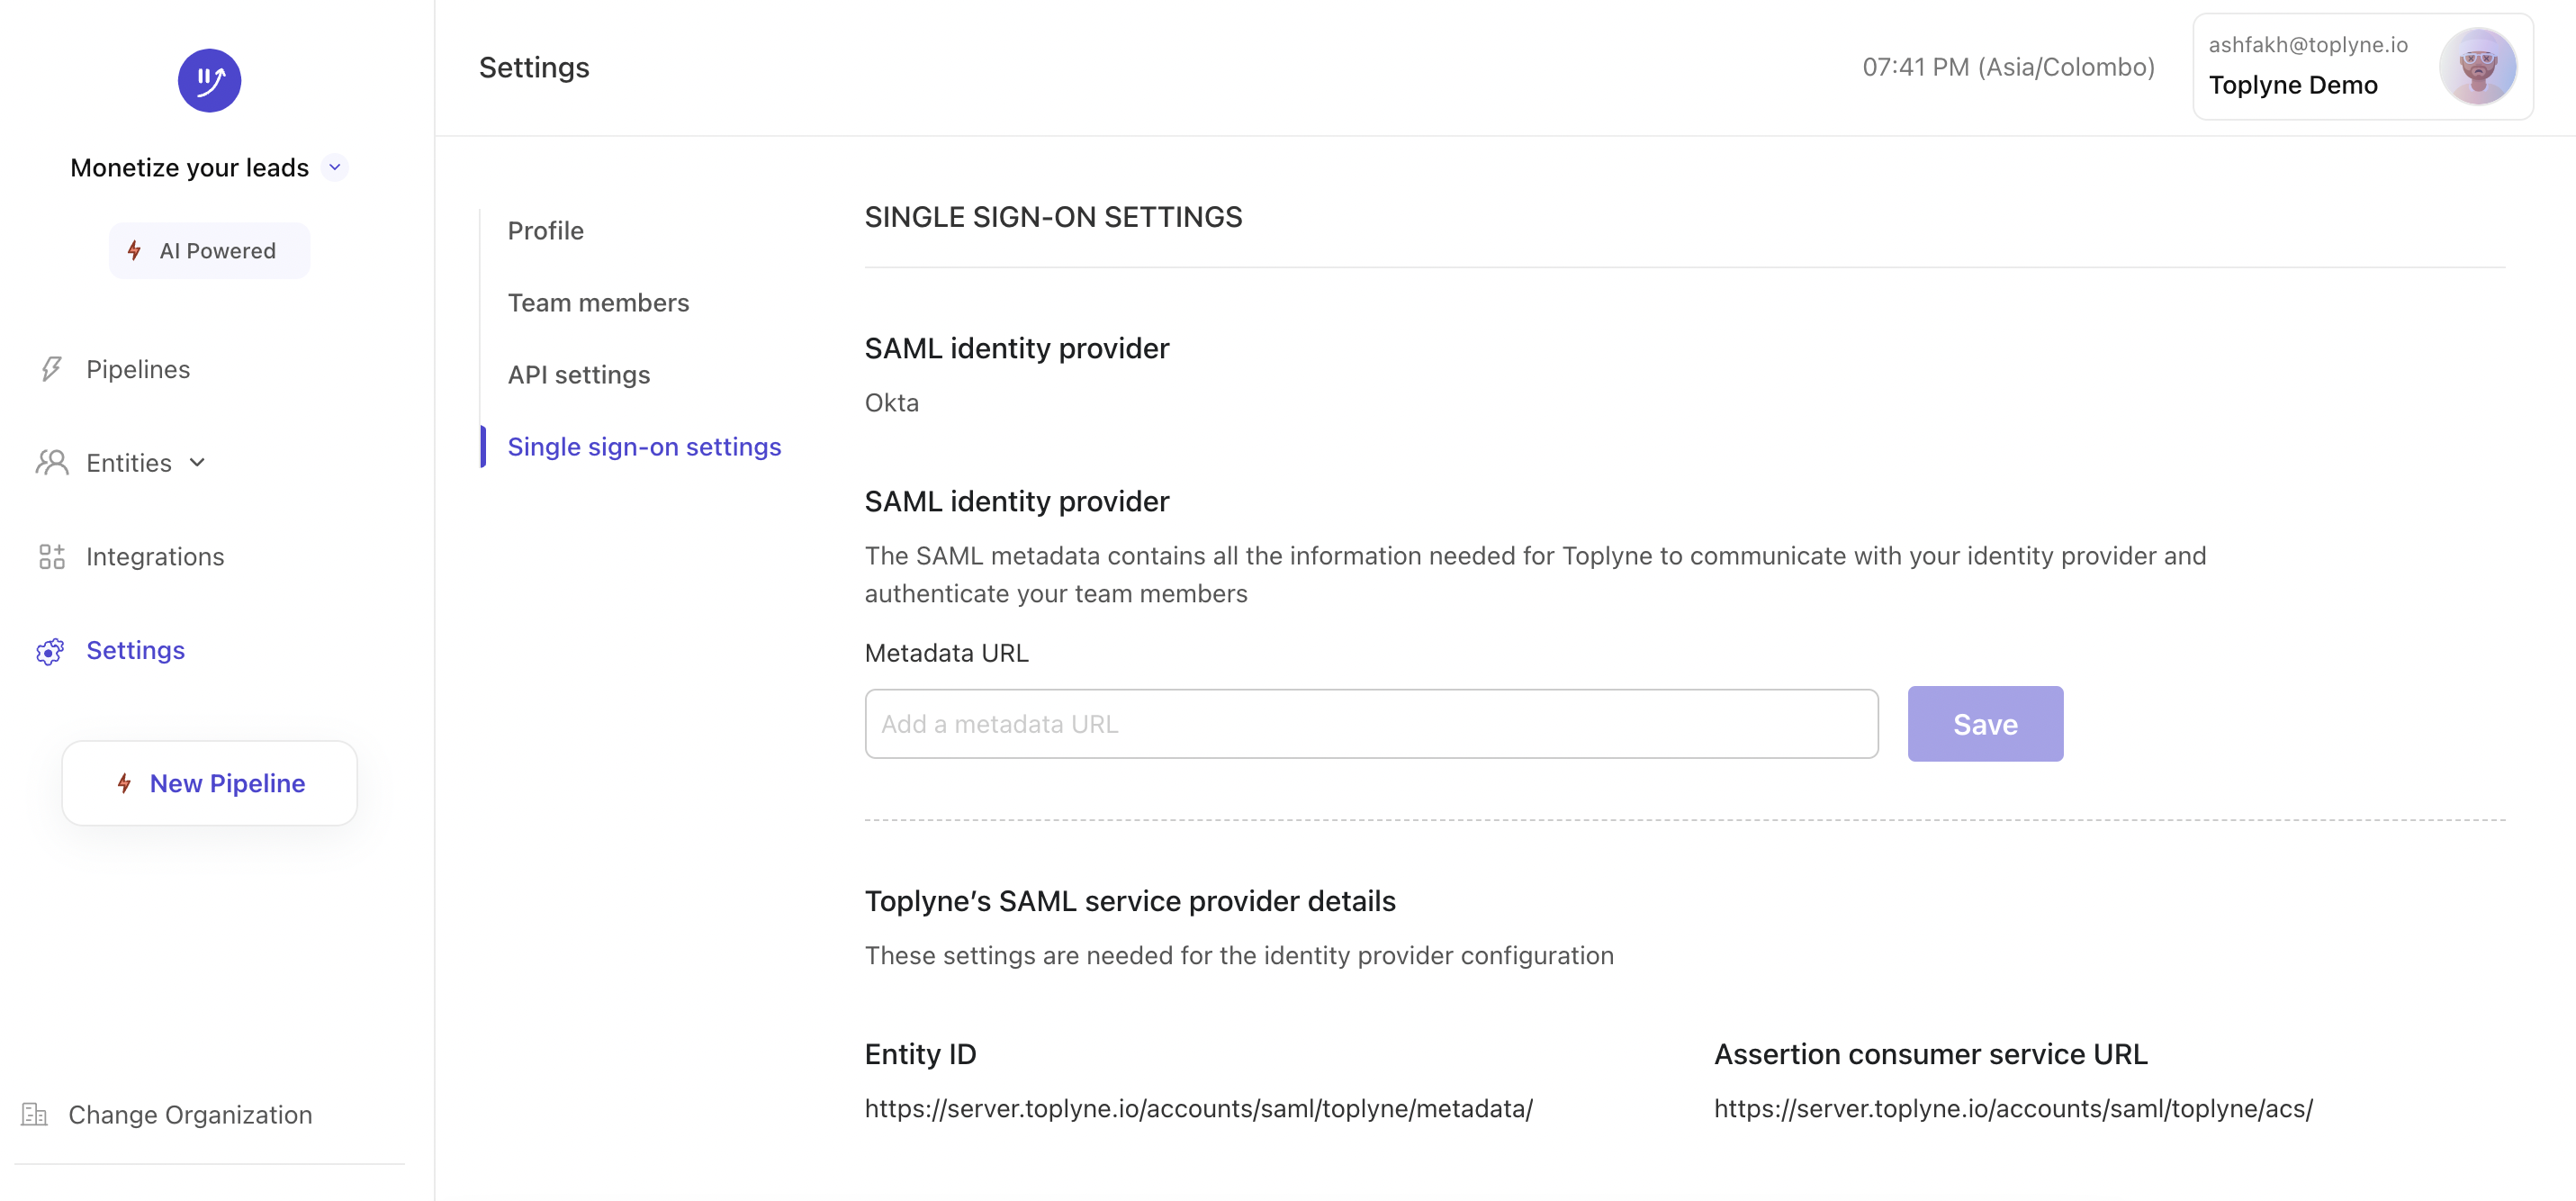
You can find the Entity ID and Assertion Consumer Service URL in Toplyne, under ⚙️ Settings > Workspace > Single Sign-On settings. (at the bottom section of the page)
-
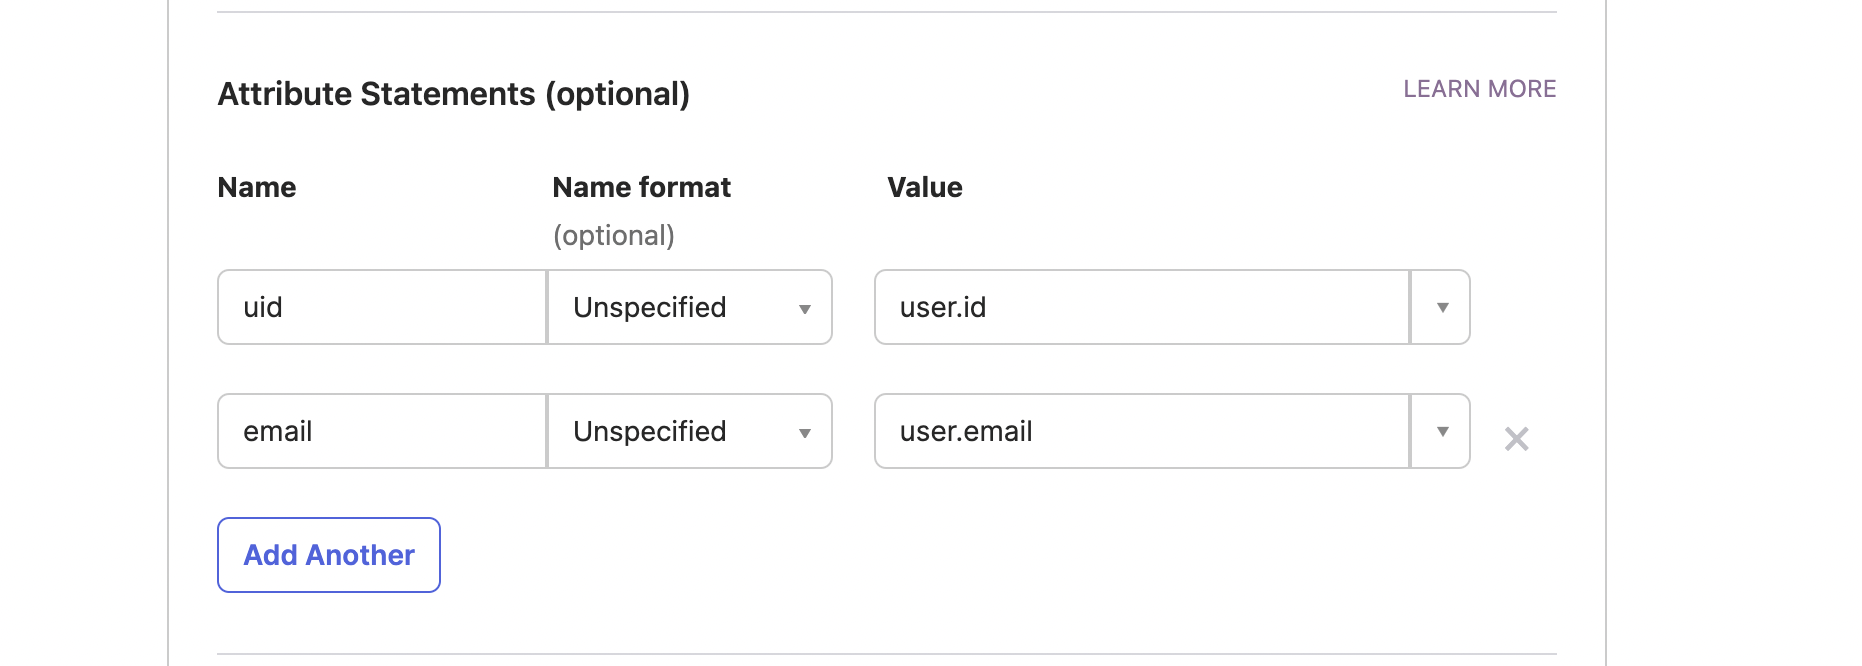
After you finish the previous step, scroll down to add Attributes in Attributes Statement (Optional) section. This step is mandatory. Add
uidwithuser.idas value andemailasuser.emailas value (case sensitive)
-
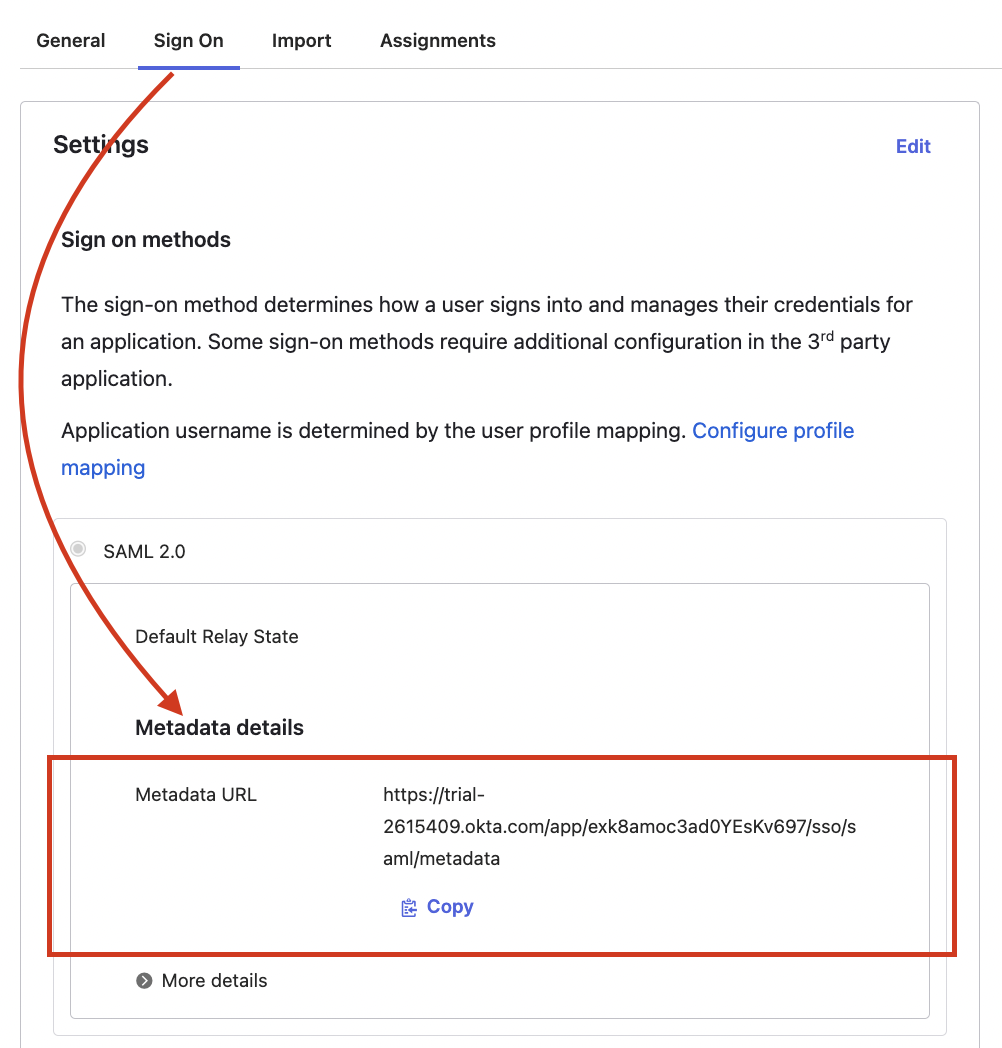
Once the app is created, view the metadata url (found on the Sign On tab in Okta).
-
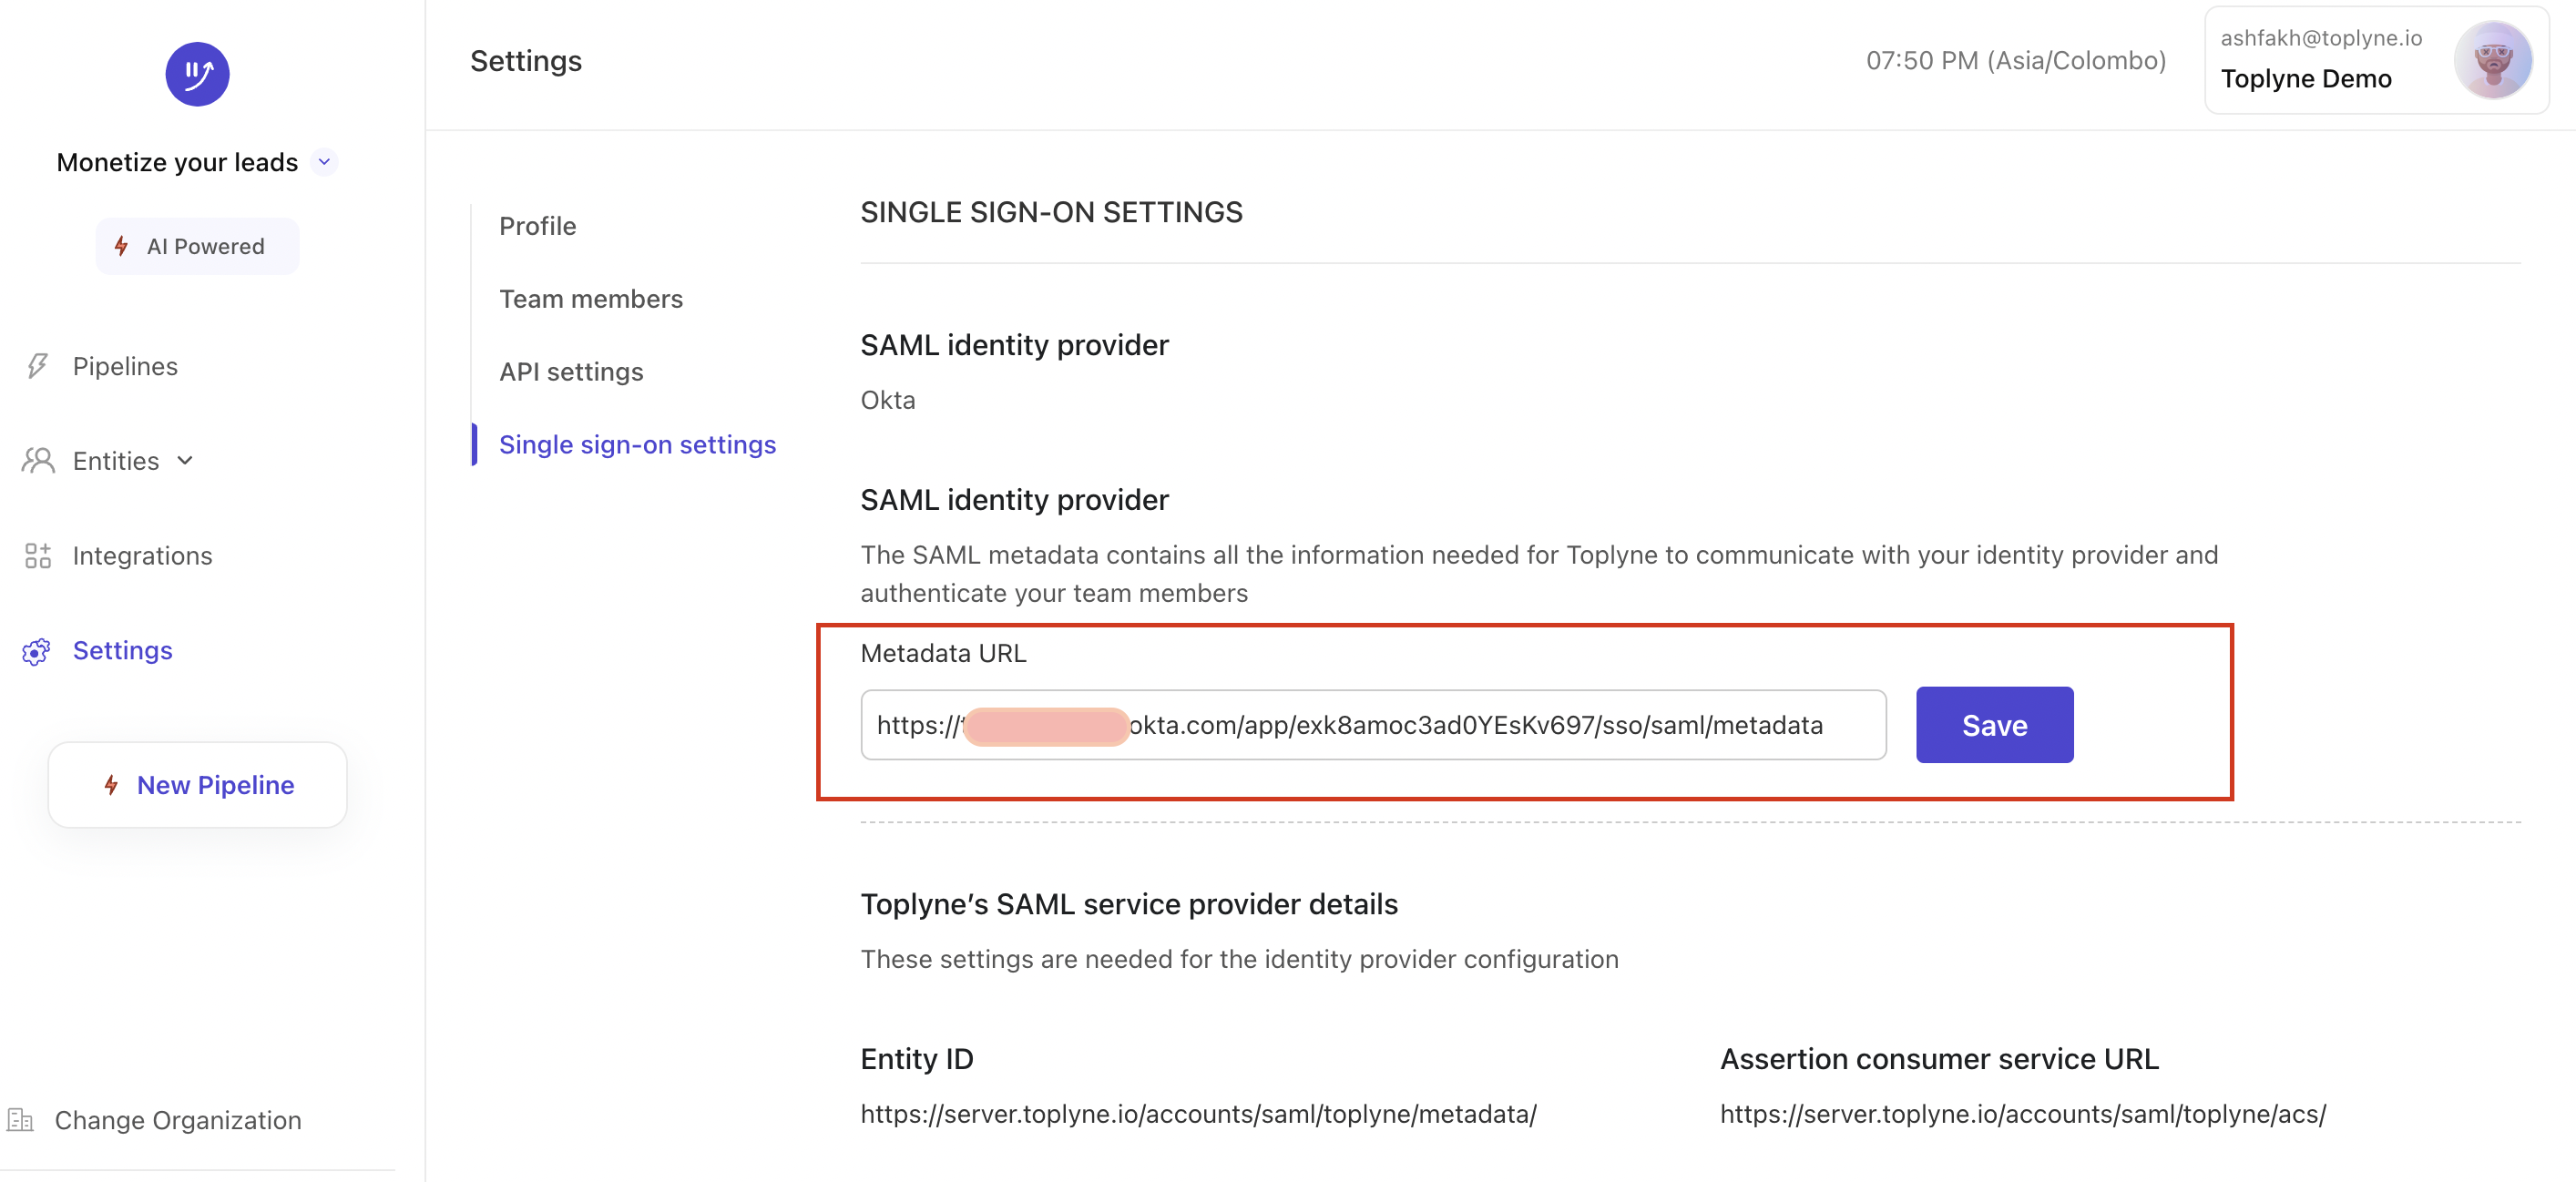
In Toplyne dashboard, navigate to ⚙️ Settings > Workspace > Single Sign-On settings. and paste the metadata url in the given field
-
Click on Save to enable SSO for your org.
Once you've added the team members in settings, assign them to the app you created in Okta dashboard for them to be able to log in to Toplyne.
Updated about 1 year ago