Braze
Through a simple integration, you can use Toplyne segmentation to better target potential users using in-app nudges on Braze to convert promising leads, motivate your champions to purchase more and re-engage with users at risk of churning. Follow our step-by-step integration guide to get started!
Setting up Braze as a destination 🔩
- Select Integrations from the left pane. Search for Braze and select it from the list of destinations.
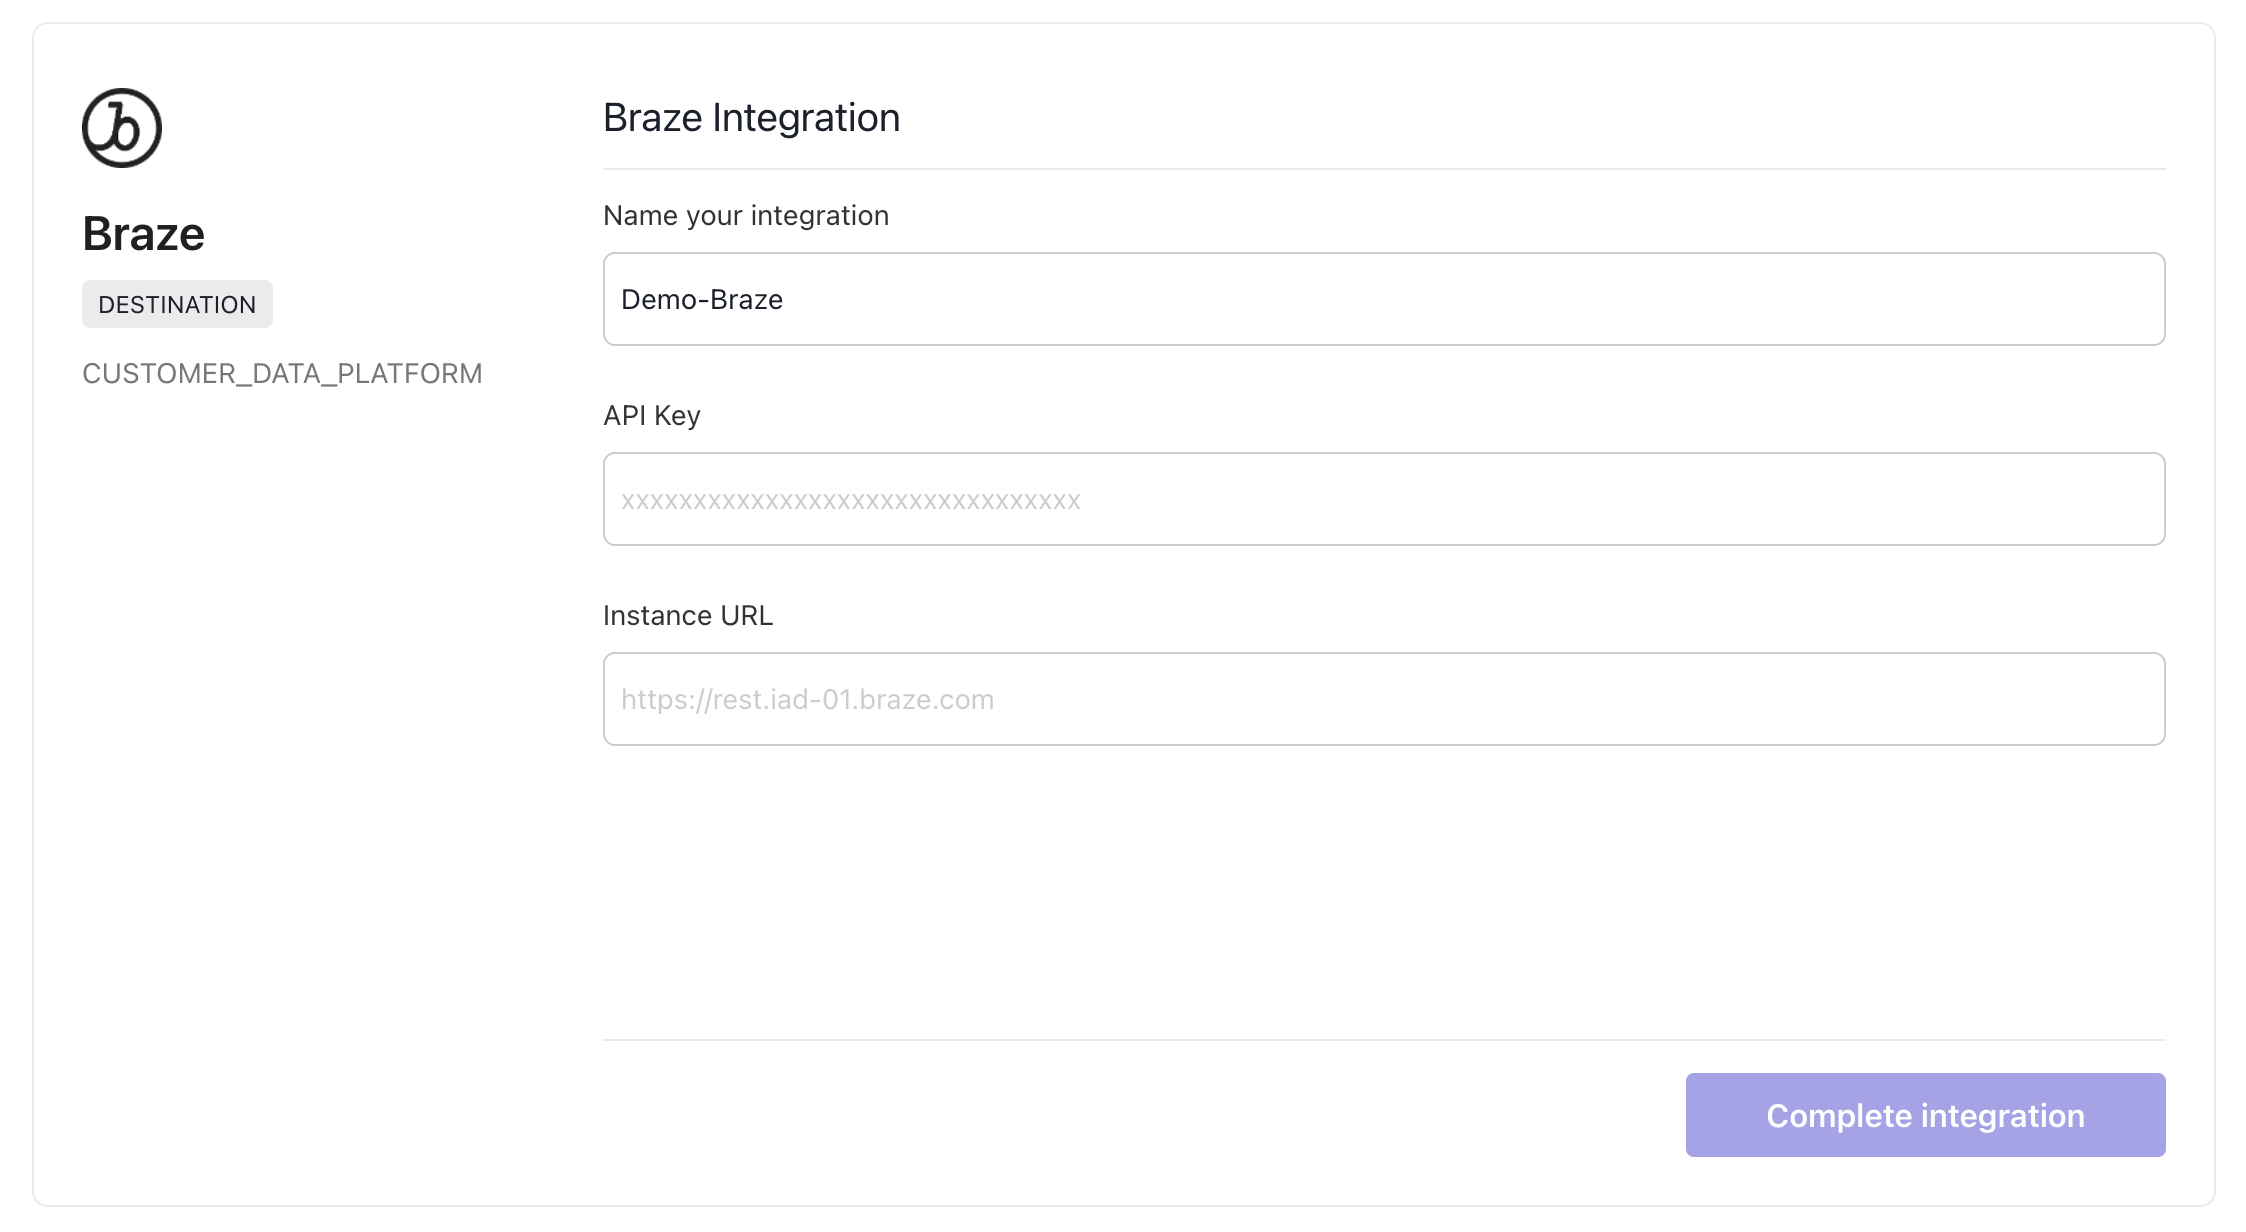
- On the Braze integration page, name your integration.
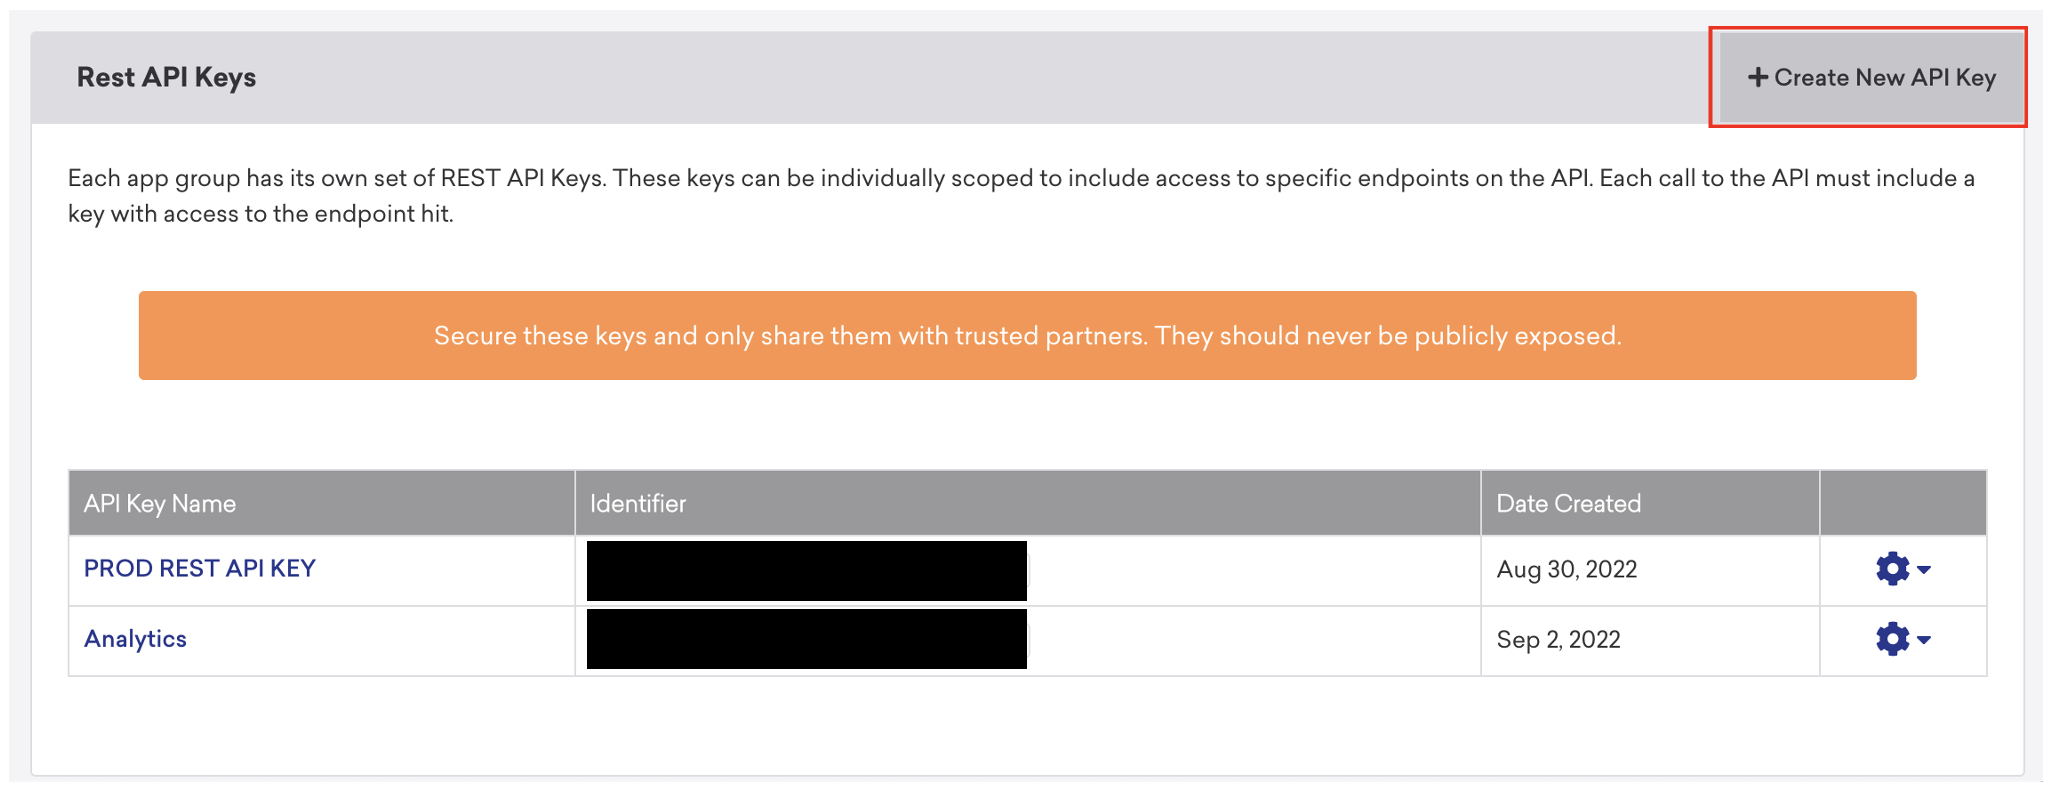
- Filling additional information - a Braze detour. To fetch the API Key, navigate to Braze Dashboard > Developer Console > Account Settings > API Credentials. Under Rest API Keys, click on + Create New API Key.
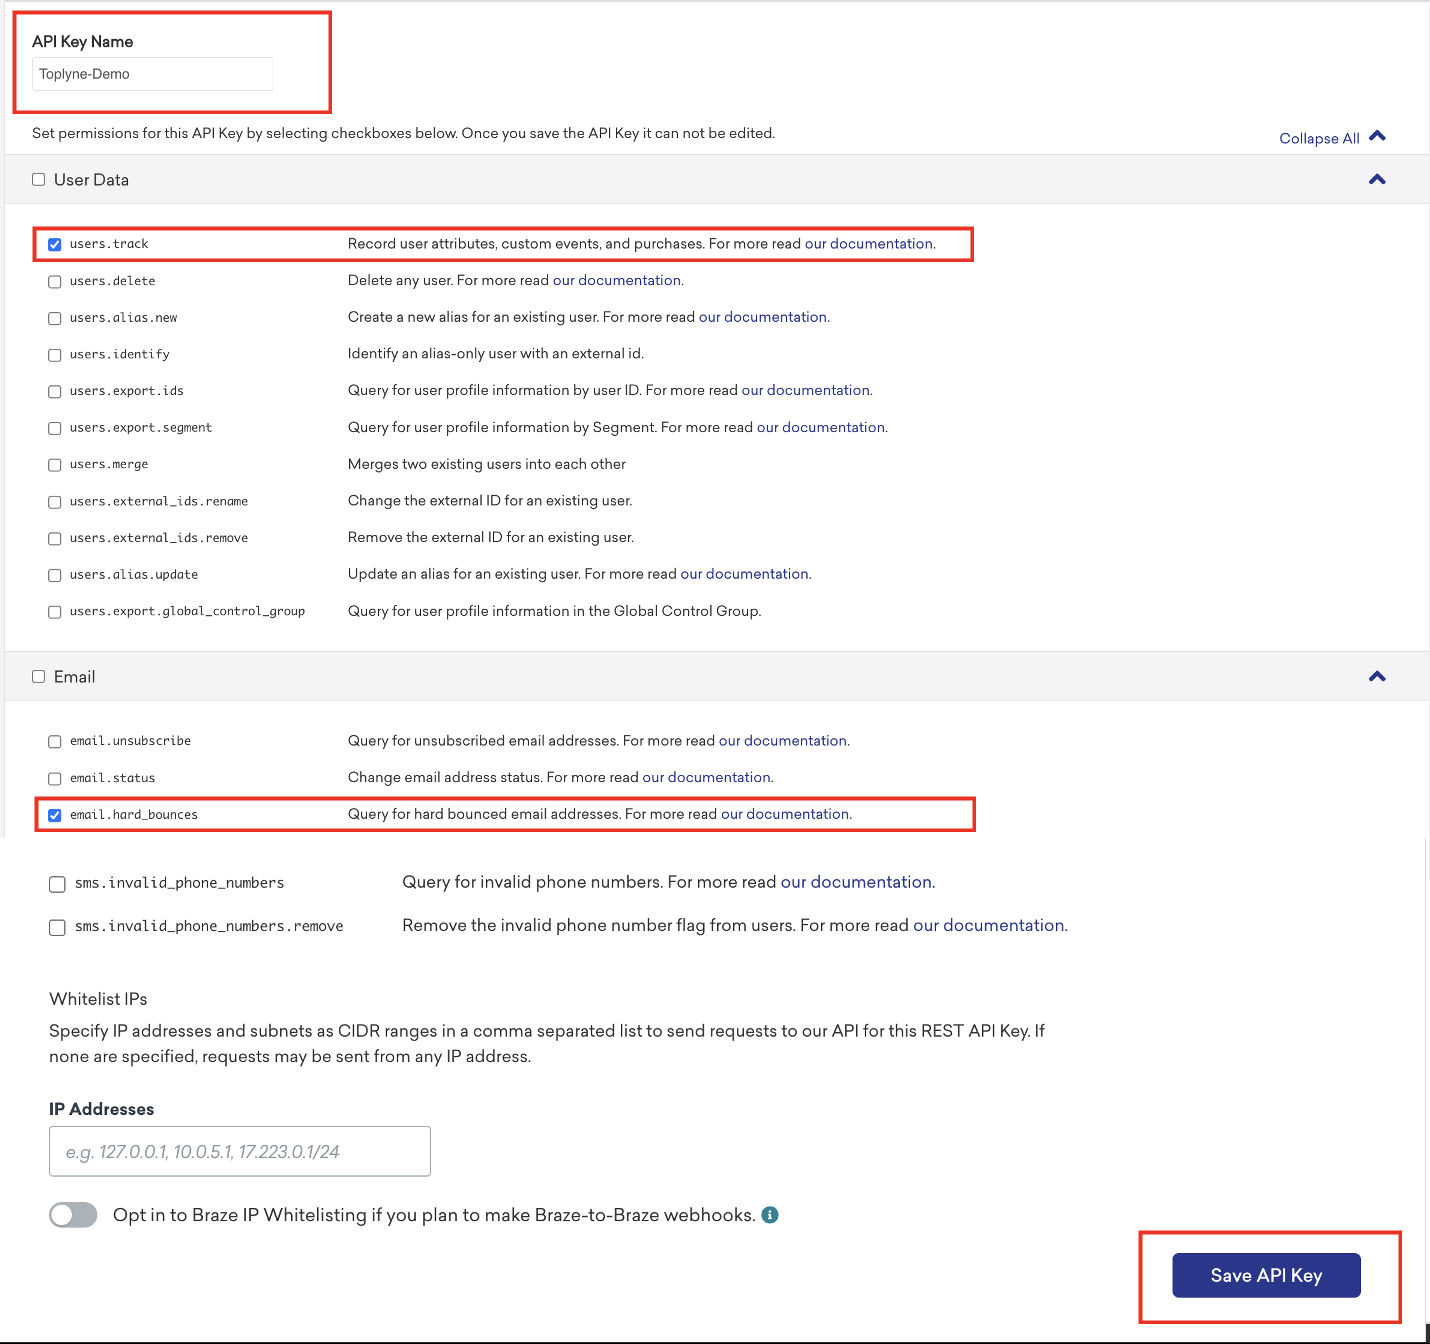
- Provide a name for the integration, and check users.track and email.hard_bounces accesses. Then click on Save API Key at the end.
- Copy the identifier corresponding to your created API Key. This will be your API Secret Key.
- To get your Instance URL, head to the endpoints section in Braze API documentation. Copy the REST endpoint against your URL. This will be your Instance URL.
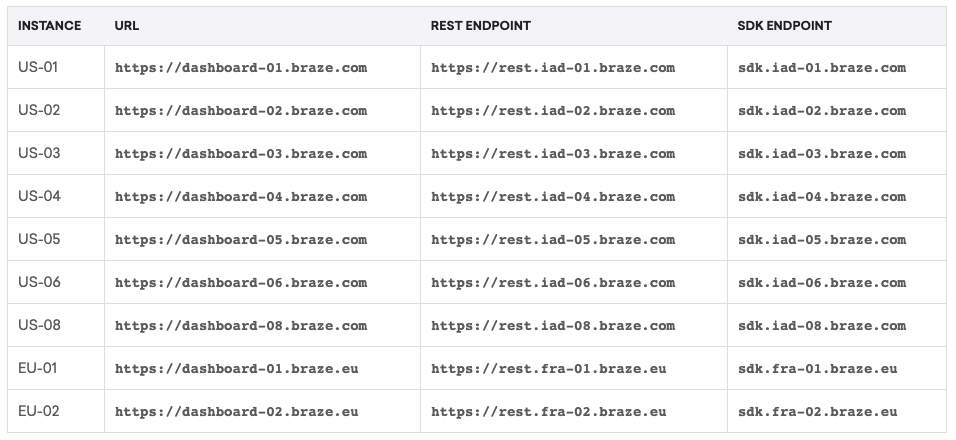
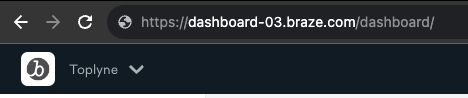
- You will find the URL prefixed in the URL when you are using Braze. In Toplyne's case, the URL is
https://dashboard-03.braze.com/and hence, the REST endpoint would behttps://rest.iad-03.braze.com. This should be entered under the Instance URL section on Toplyne.
- Click on Complete Integration, and you're done!
Using Braze as a destination 🔀
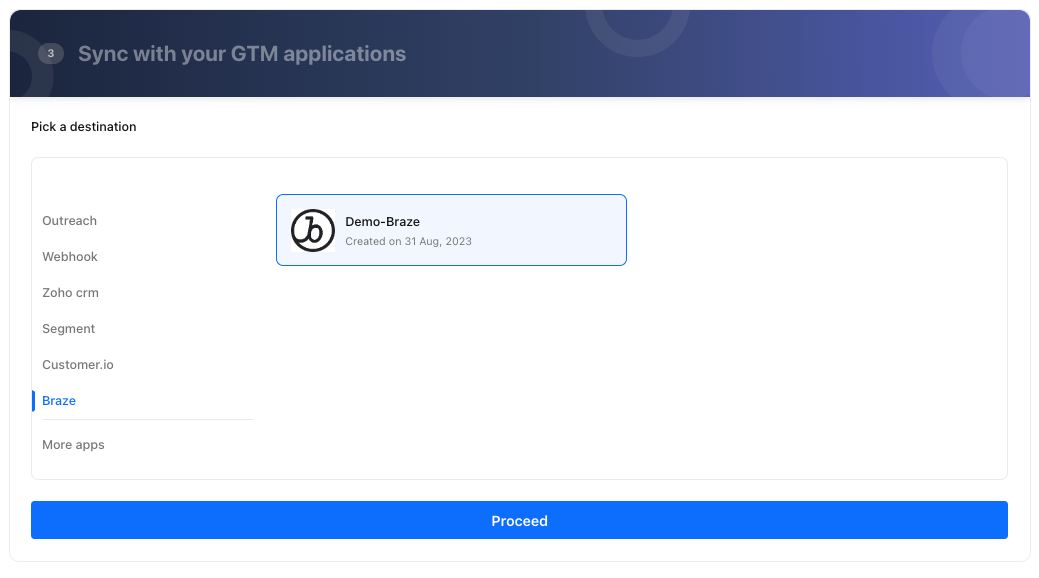
- Select the destination you just created on the export page
- Select the type of operation you wish to perform.
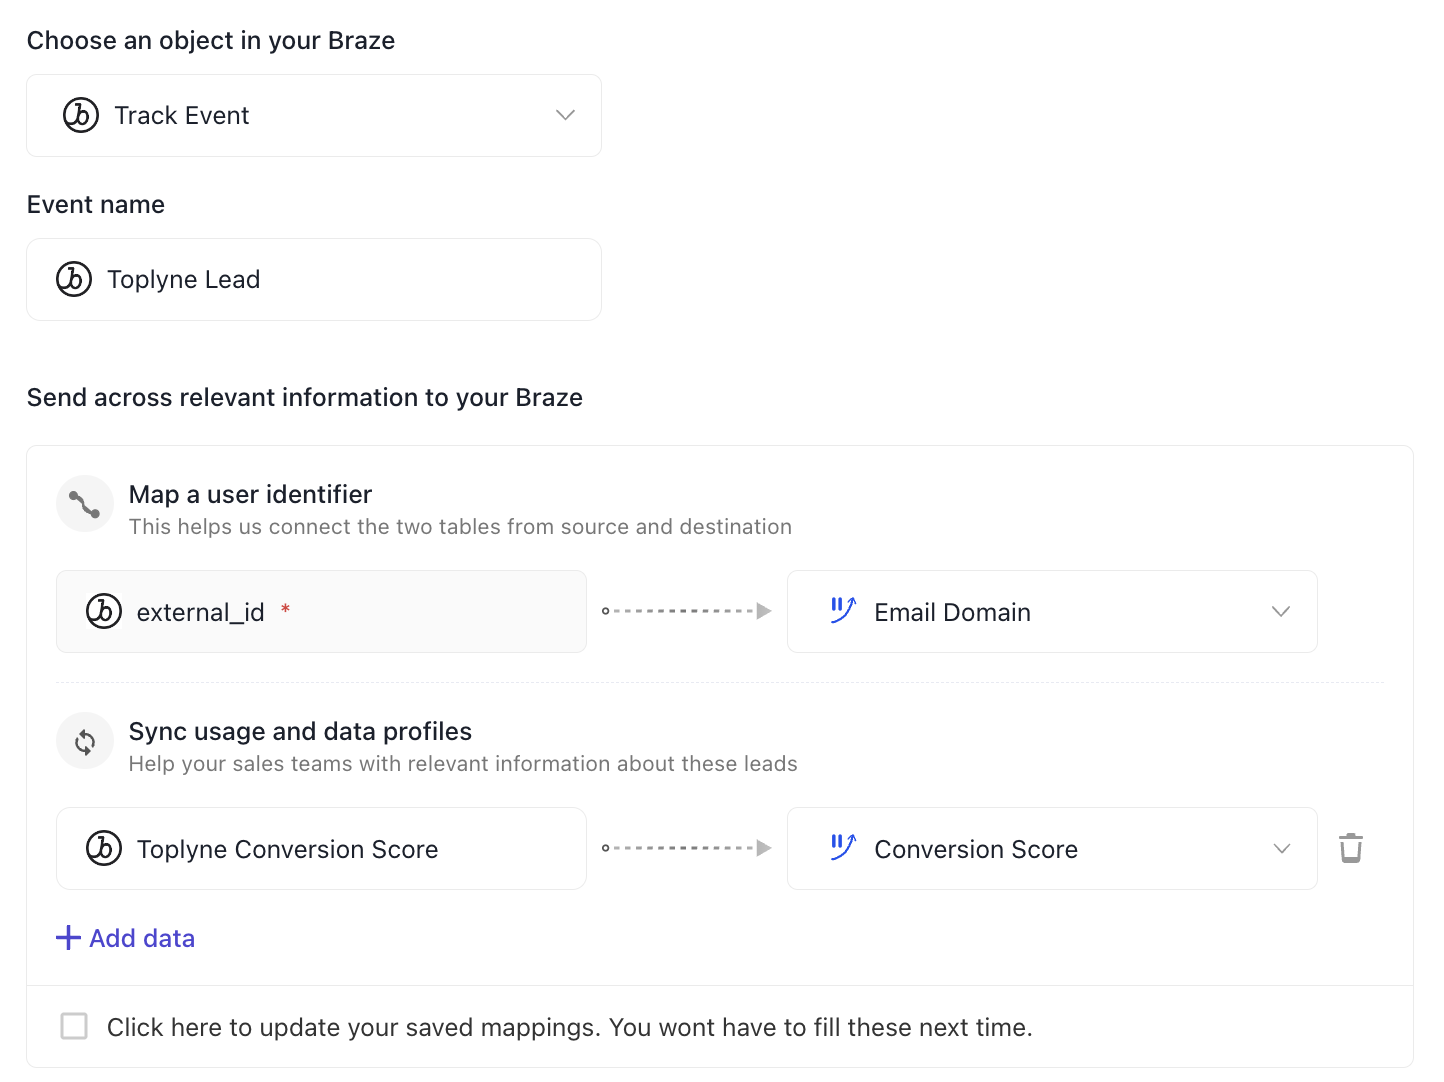
- Track:
The track call records an action for your users and any properties that describe the action.
You will be prompted to enter the event name triggered when the user qualifies for the playbook. Properties are extra pieces of information you can tie to events you track. They can be anything that will be useful while analyzing the events later.
- Track:
- Update User Attributes
This will allow you to update the attributes against a user on Braze. Any new attributes will be automatically created on Customer.io. Existing attributes will be overwritten. This can be used to create segments on Braze to run campaigns.
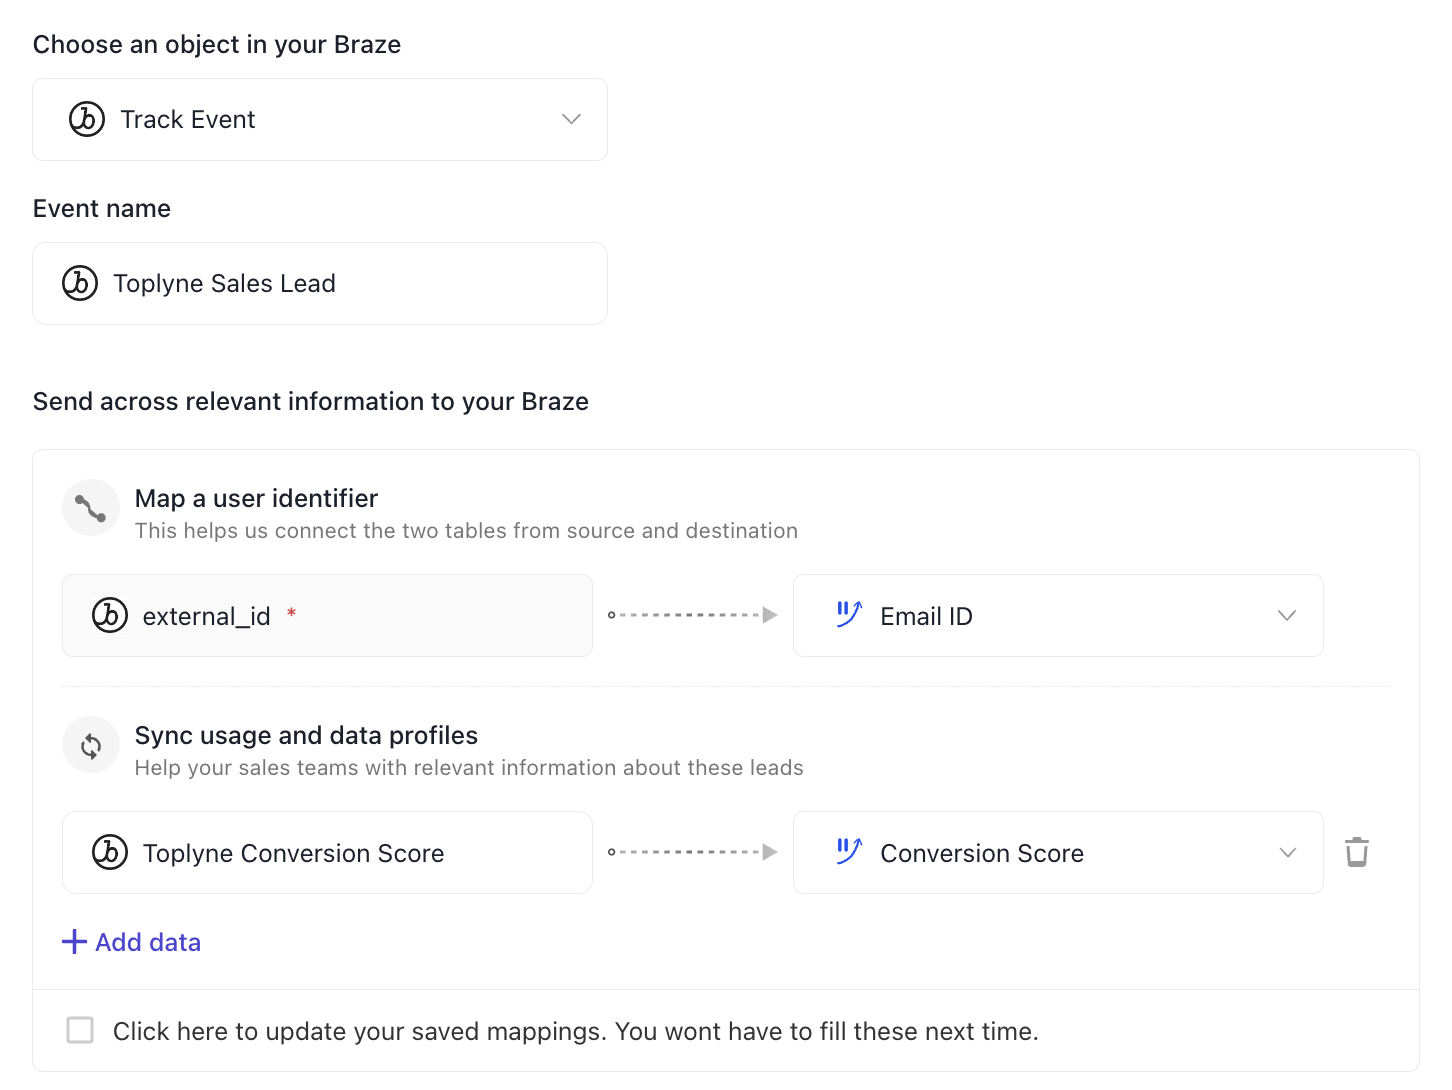
External ID
Note that email ID is mandatory for Braze integration. You must map the corresponding Email ID field to Braze's External ID identifier.
- Name your pipeline and finish the setup. You should have the leads updated once your playbook runs!
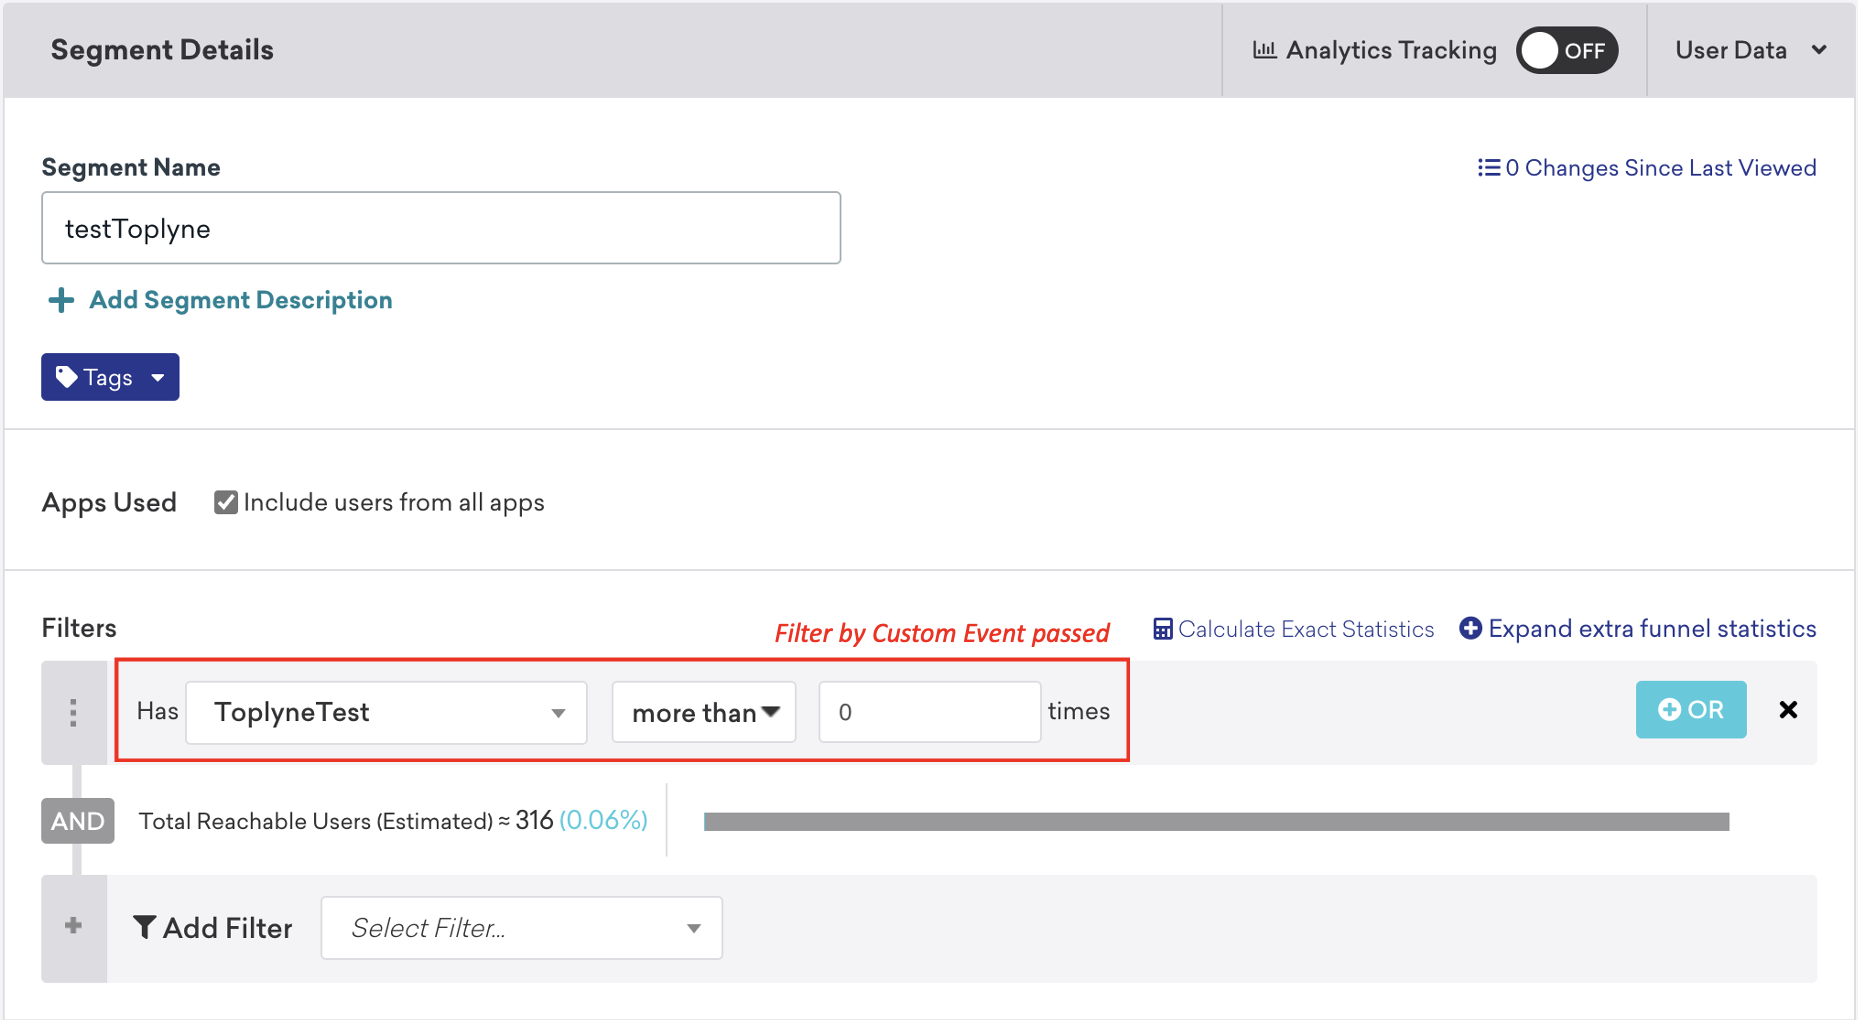
- Once the playbook runs, you can create custom segments based on the event or attributes we just passed. To do so, navigate to Audience > Segments > Create Segment. Name your segment and choose Custom Events, or Custom Attributes to filter for the users targeted by Toplyne.
And that's how you can target specific leads from Toplyne on Braze!
Updated about 1 year ago