Redshift
Prerequisites
- Redshift cluster where the data in question resides should either be serverless or on the RA3 family.
- The cluster should have encryption enabled.
Setting up tables
Data in your warehouse typically resides in tables. When sharing data with Toplyne, the best practice is creating separate tables for event and profile data, partitioned on a time column.
How does Toplyne sync work?
We prefer to ingest your data incrementally. You must add a monotonically increasing timestamp column in your tables. We will use this column to identify all the new data added to the tables and only read that much data for syncing.
You can add a column called UPDATED_AT with TIMESTAMP data type to your table, and this column will highlight when the row in question was added to the table.
If you don't share such a timestamp column, we'll do a daily full scan of your table and sync it entirely.
Event data table
This table will capture a user's action and help answer the question, “What has a user done on your product, and when?” .
Rows
Each row in this table represents an event triggered by a user.
Columns
USER_ID(Required): Key to identify which user has performed the eventACCOUNT_ID(Required for account-level analytics): Key to identify which account the particular user belongs toEVENT_NAME(Required): Name of the eventTIMESTAMP(Required): Timestamp at which the event has occurredUPDATED_AT(Required): UTC timestamp when the row has been updated or added (not the event timestamp)EVENT_PROPERTIES(Optional): Event properties, typically shared as a JSON
with key/value pairs
Partition
Partition this table on the TIMESTAMP column.
Sample Event Table
| USER_ID | ACCOUNT_ID | EVENT_NAME | TIMESTAMP | UPDATED_AT | EVENT_PROPERTIES |
|---|---|---|---|---|---|
| 1298 | 23 | Payment_Initiated | 2022-10-26 07:08:34 | 2023-01-09 17:08:34 | { "paymentid": 123, "amount" : 200, } |
| 1567 | 77 | Trial_Ended | 2022-11-01 20:01:14 | 2023-01-09 17:08:34 | { "accountid": 77 } |
Profile data table
This table will capture any profile information a user or an account has and help answer the question, “Who is this user or account?”.
Rows
Each row in this table is a unique entity.
Columns
USER_ID/ACCOUNT_ID(Required): Key to identify which entities' properties are listed in the row.USER_CREATION_TIME/ACCOUNT_CREATION_TIME(Optional): To identify when the user or account has been active.UPDATED_AT: UTC timestamp when the row has been updated or added (Not the event timestamp)USER_PROPERTIES/ACCOUNT_PROPERTIES: Each subsequent column is a profile key; against it, you will have its value. For example, you may include the email address, geographical location, account name, current billing plan they are on, etc.
Partition
Partition this table on the UPDATED_AT column.
Sample User Table
| USER_ID | USER_CREATION_TIME | UPDATED_AT | COUNTRY | PLAN | |
|---|---|---|---|---|---|
| 1296 | 2022-10-26 07:08:34 | 2022-11-26 07:08:34 | [email protected] | UK | Annual Plan |
| 2676 | 2022-11-01 20:01:14 | 2022-12-01 20:01:14 | [email protected] | UK | Monthly Plan |
Sample Account Table
| ACCOUNT_ID | ACCOUNT_CREATION_TIME | UPDATED_AT | ACCOUNT_NAME | COUNTRY | PLAN |
|---|---|---|---|---|---|
| 23 | 2022-10-26 07:08:34 | 2022-11-26 07:08:34 | Queen | UK | Annual Plan |
| 56 | 2022-11-01 20:01:14 | 2022-11-26 07:08:34 | Beetles | UK | Monthly Plan |
Important information regarding Redshift Share
- If you want to share additional tables or views, you can alter your datashare and set the option
INCLUDENEW = True.- If you want to ensure that the views are not invalidated upon recreation of the underlying tables, then use the option
WITH NO SCHEMA BINDING.- Also, if you are sharing views, please ensure that you include the schemas where underlying tables reside in the datashare as well.
For example, if you create a view
TOPLYNE.EVENTSwhich is created by joining these tablesANALYTICS_1.EVENTS&ANALYTICS_2.EVENTS, then please ensure that the schemasANALYTICS_1andANALYTICS_2are part of the datashare as well.
- As far updates to data are concerned, we classify the data into two categories:
- Events data: e.g., events data coming from clickstream. We don't handle updates in these datasets, so we would prefer you notify us if you do any significant updates to such data.
- Profiles data: e.g., Data regarding users/accounts/teams/workspaces, etc. This data will include some personal information like, device info, country info, metadata about an entity, etc. You can keep updating such data in your source and we seamlessly handle updates to these data points.
Step-by-step guide
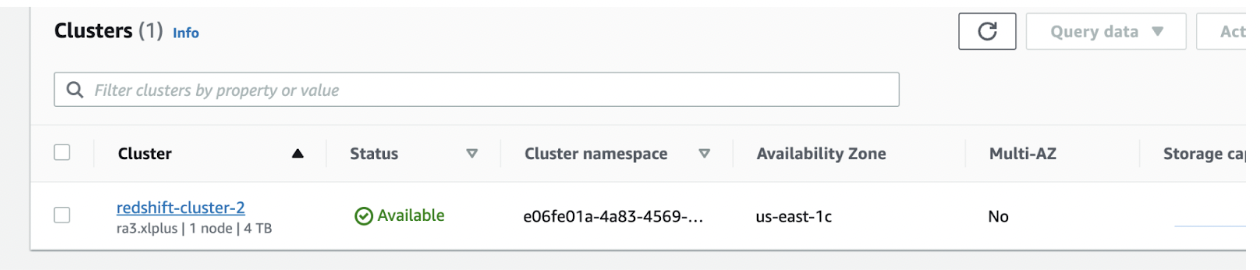
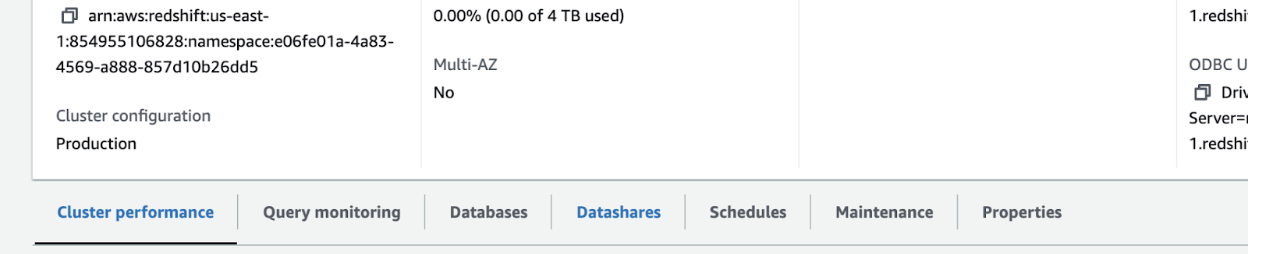
- Begin by navigating to the Cluster where your Redshift database is located.
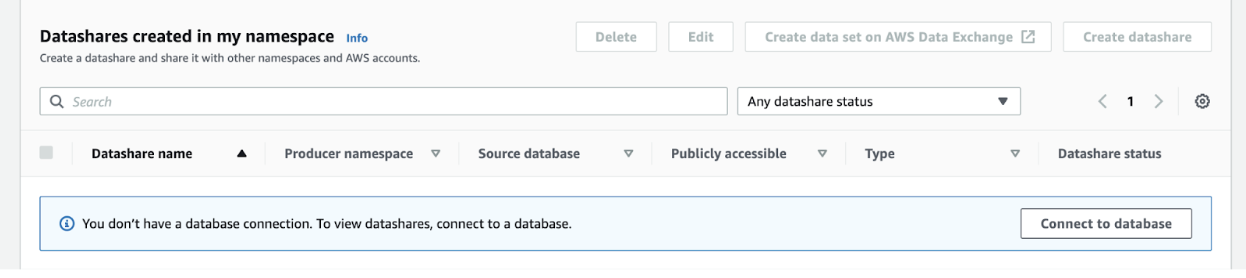
- Select the Datashares tab to access data-sharing settings.
- Click on the option to create a new datashare, then hit Connect to database.
-
You'll encounter a form where you can set temporary credentials for the database upon which the datashare will be built.
-
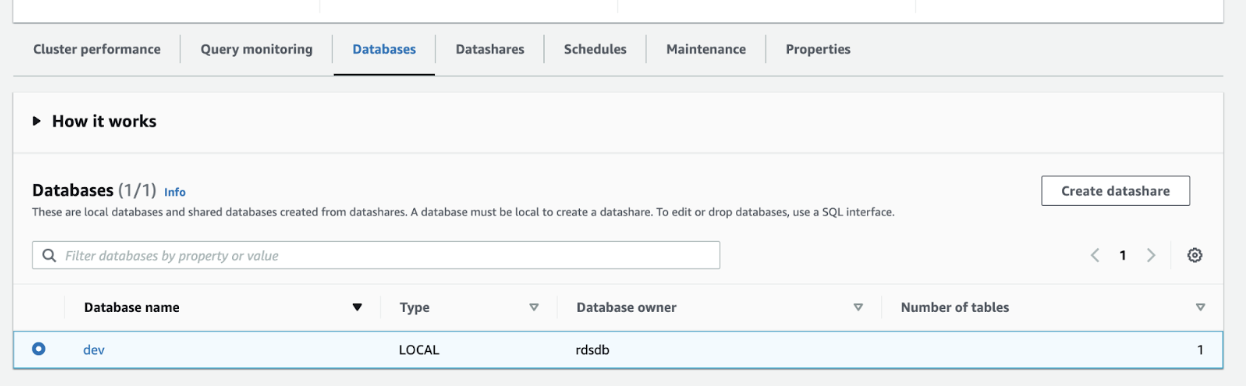
Under the Database section, choose the specific database that you intend to share.
-
Proceed by selecting the Create datashare option.
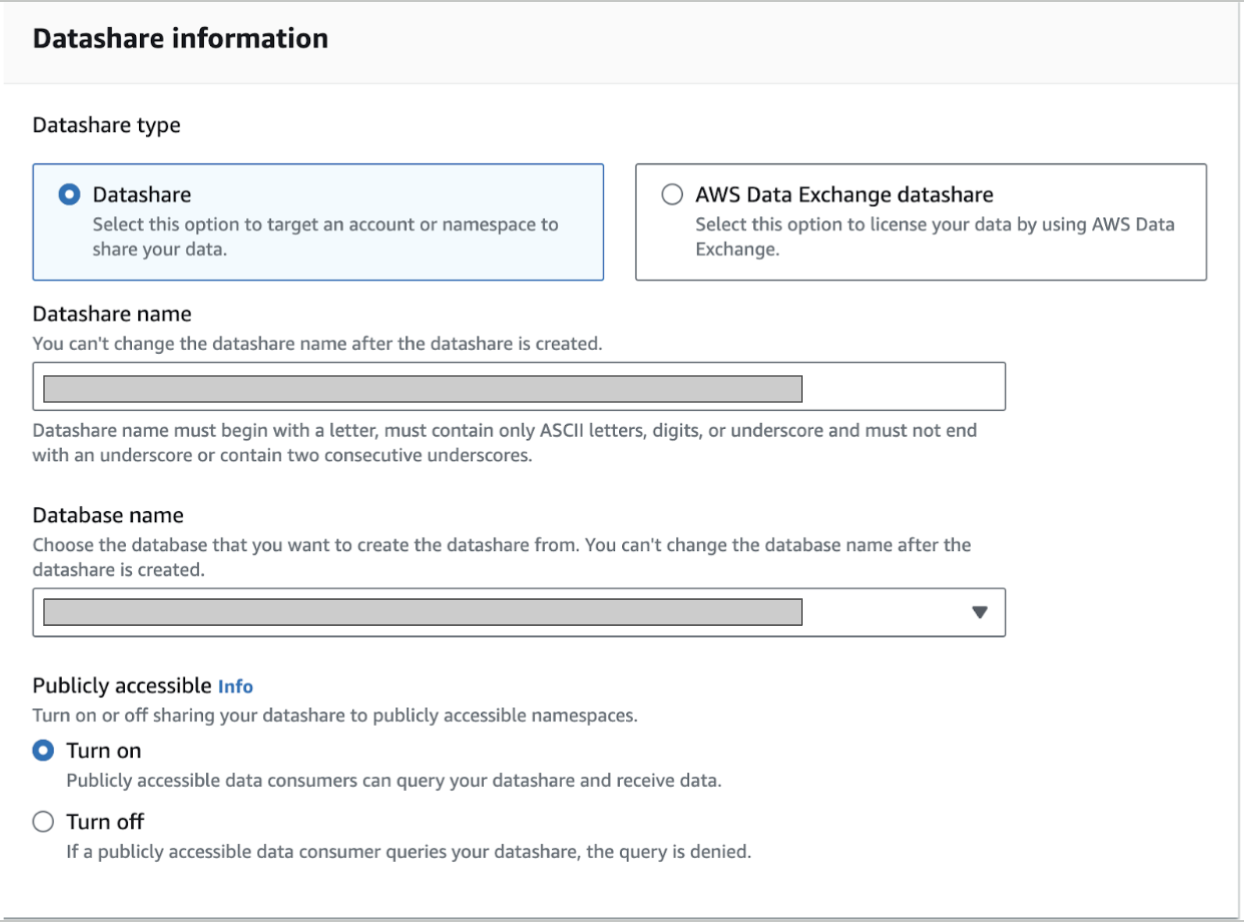
-
On the form that appears, define a suitable name for the datashare and ensure to turn on the Public accessible option.
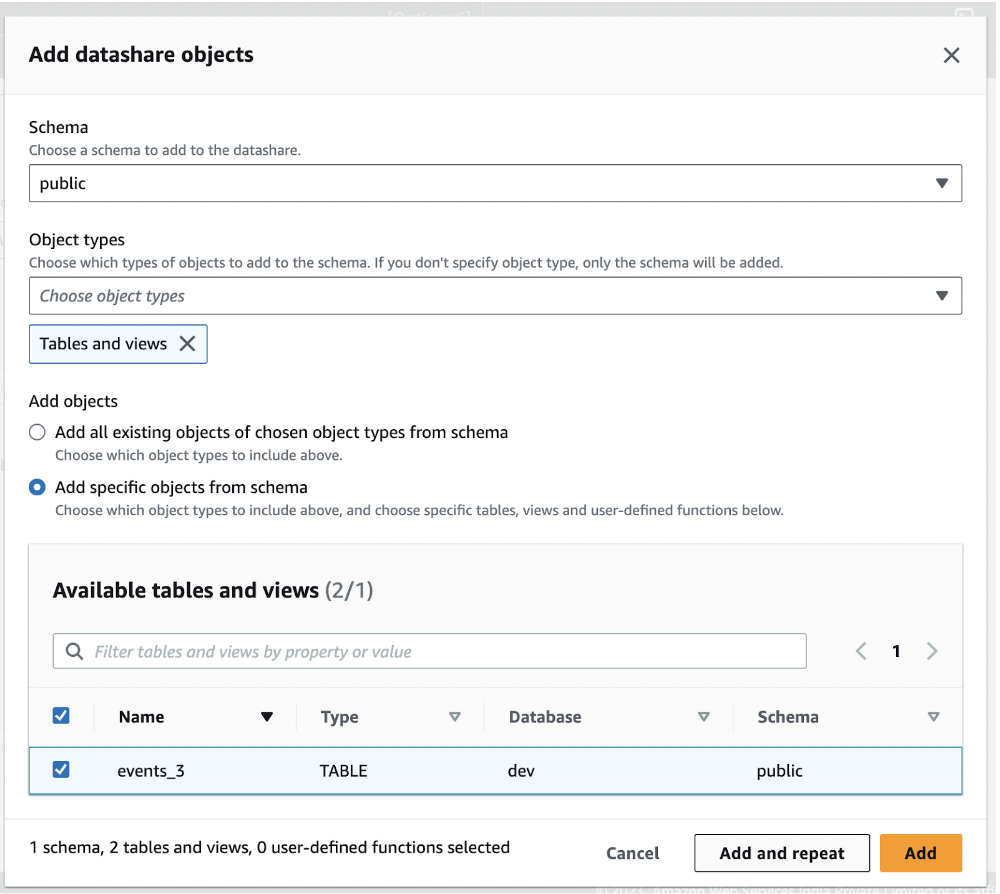
- Add the tables you wish to share with Toplyne, one at a time. Utilize the Add and Repeat actions for seamless inclusion.
Reiterating points to keep in mind while sharing
- If you want to share additional tables or views, you can alter your datashare and set the option
INCLUDENEW = True.- If you want to ensure that the views are not invalidated upon recreation of the underlying tables, then use the option
WITH NO SCHEMA BINDING.- Also, if you are sharing views, please ensure that you include the schemas where underlying tables reside in the datashare as well.
For example, if you create a view
TOPLYNE.EVENTSwhich is created by joining these tablesANALYTICS_1.EVENTS&ANALYTICS_2.EVENTS, then please ensure that the schemasANALYTICS_1andANALYTICS_2are part of the datashare as well.
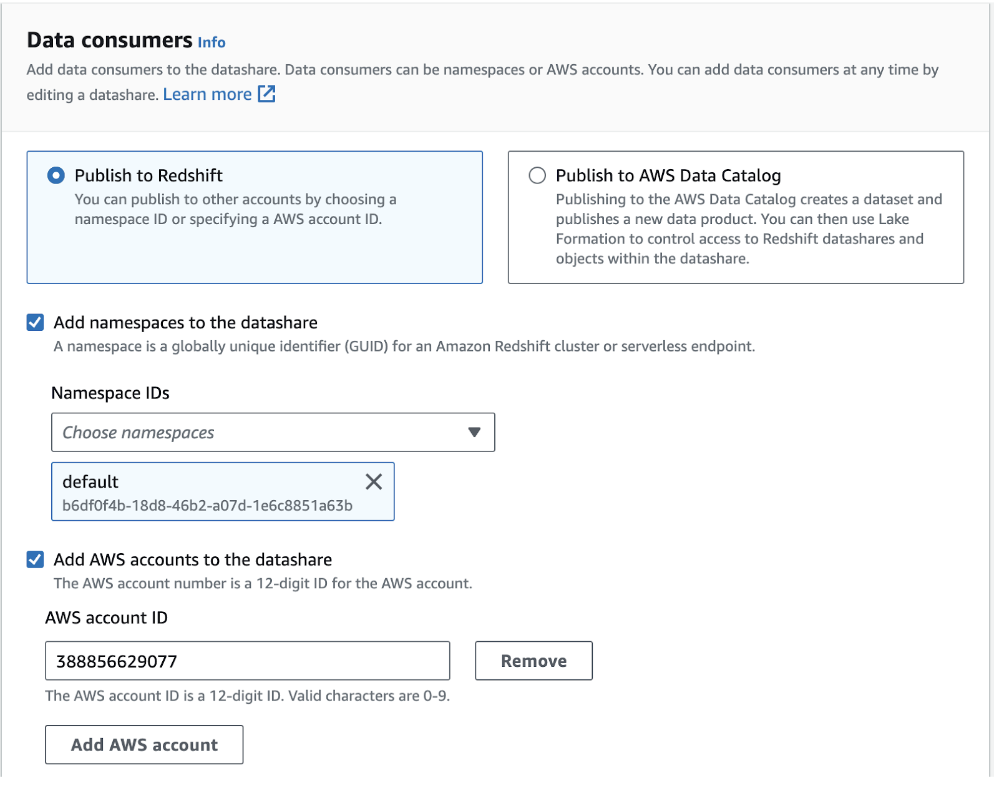
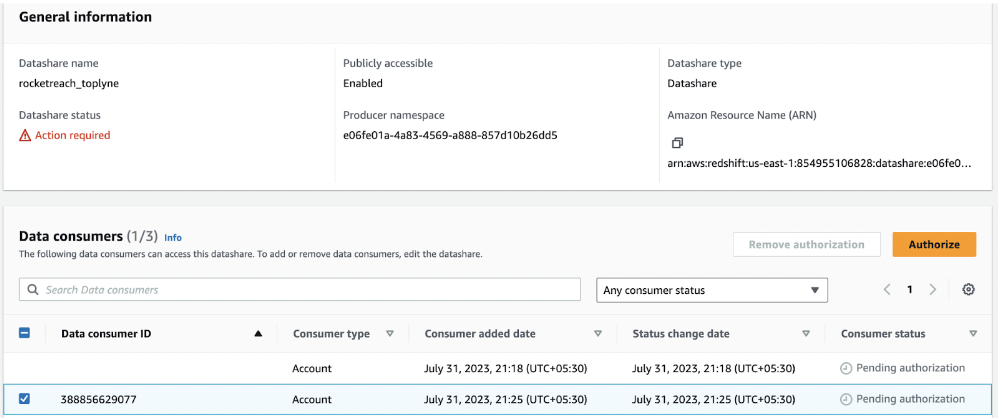
- Within the Data Consumers section, designate the Toplyne AWS account (Account ID: 388856629077) as the data consumer. Set the default namespace and create the cluster.
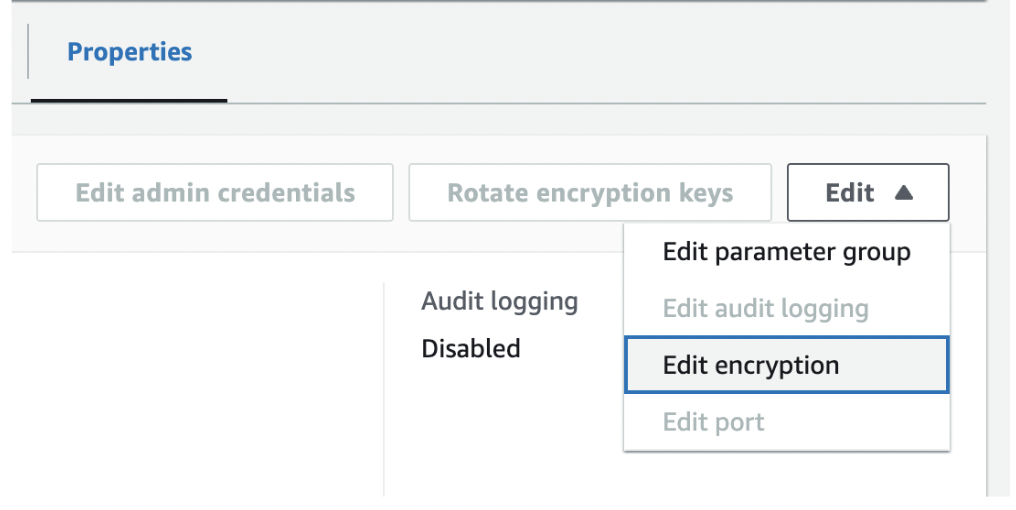
- Before proceeding, confirm that encryption is enabled for your cluster. Access the encryption option within the cluster properties tab and enable it. Then, revisit step 9.
- Head back to the left menu and select Datashare. Choose the newly created datashare to proceed.
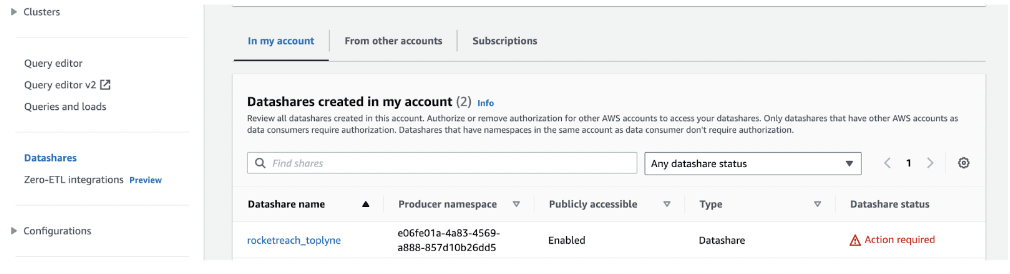
- You must Authorize the Toplyne data consumer to complete the process. And you're set!
Updated 11 months ago