Salesforce
Integration with Salesforce allows Toplyne to send data to Salesforce as well as read data from Salesforce
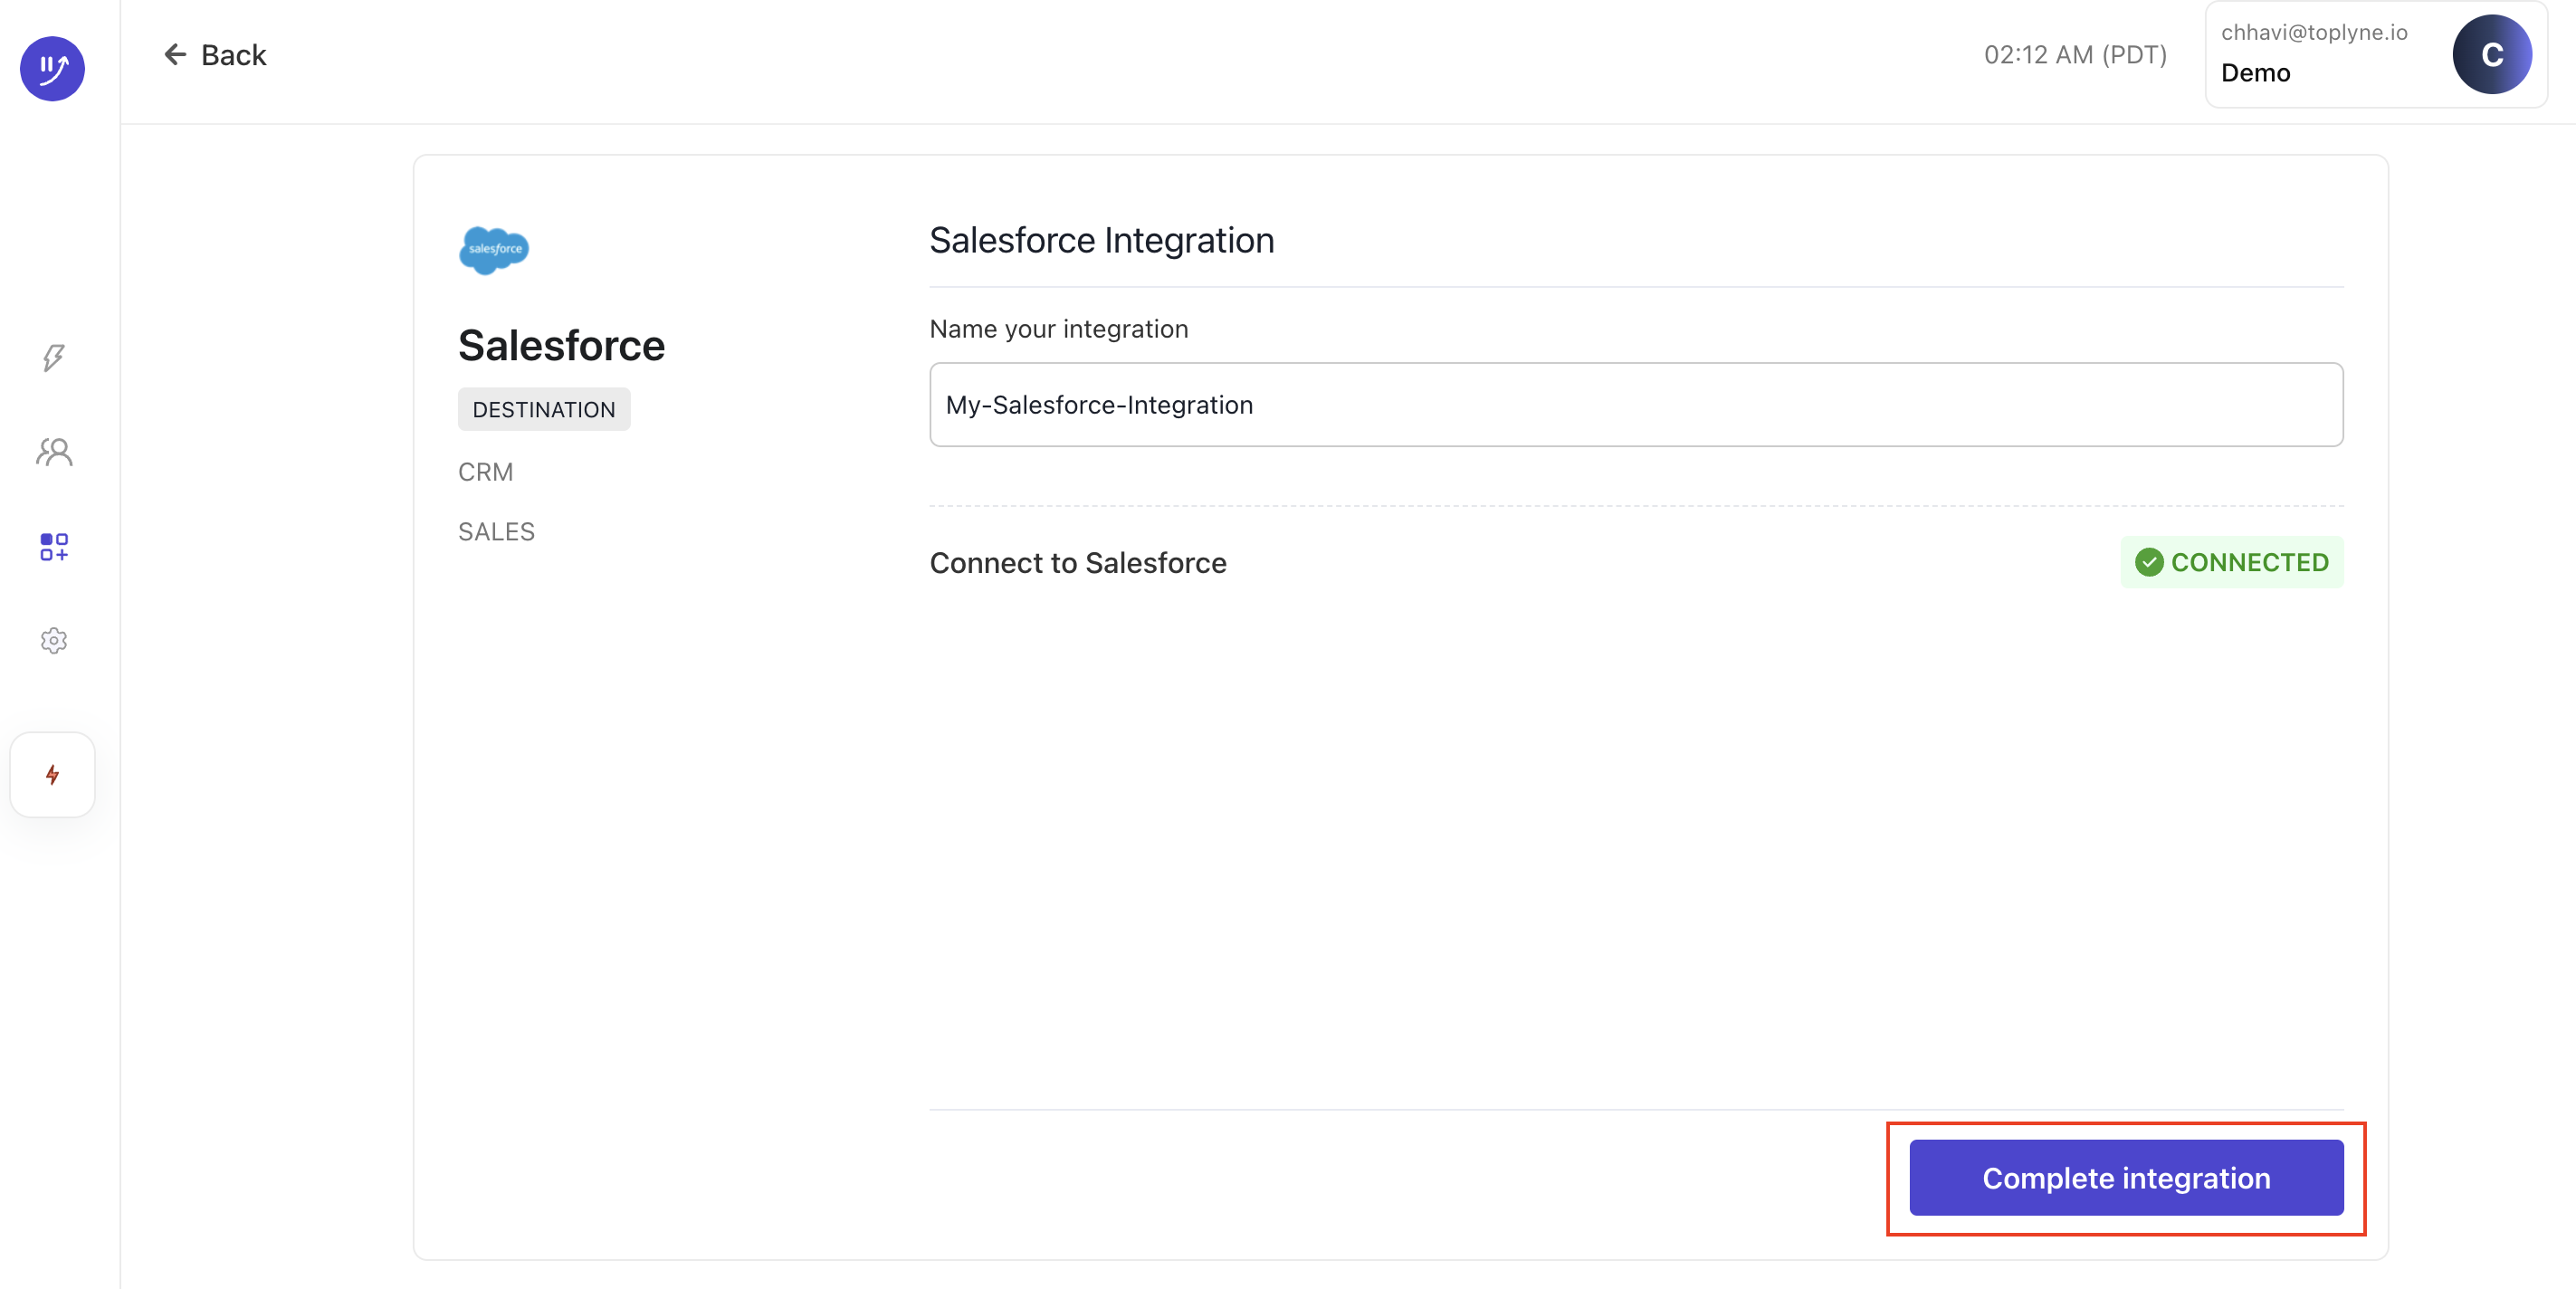
Integrating Salesforce
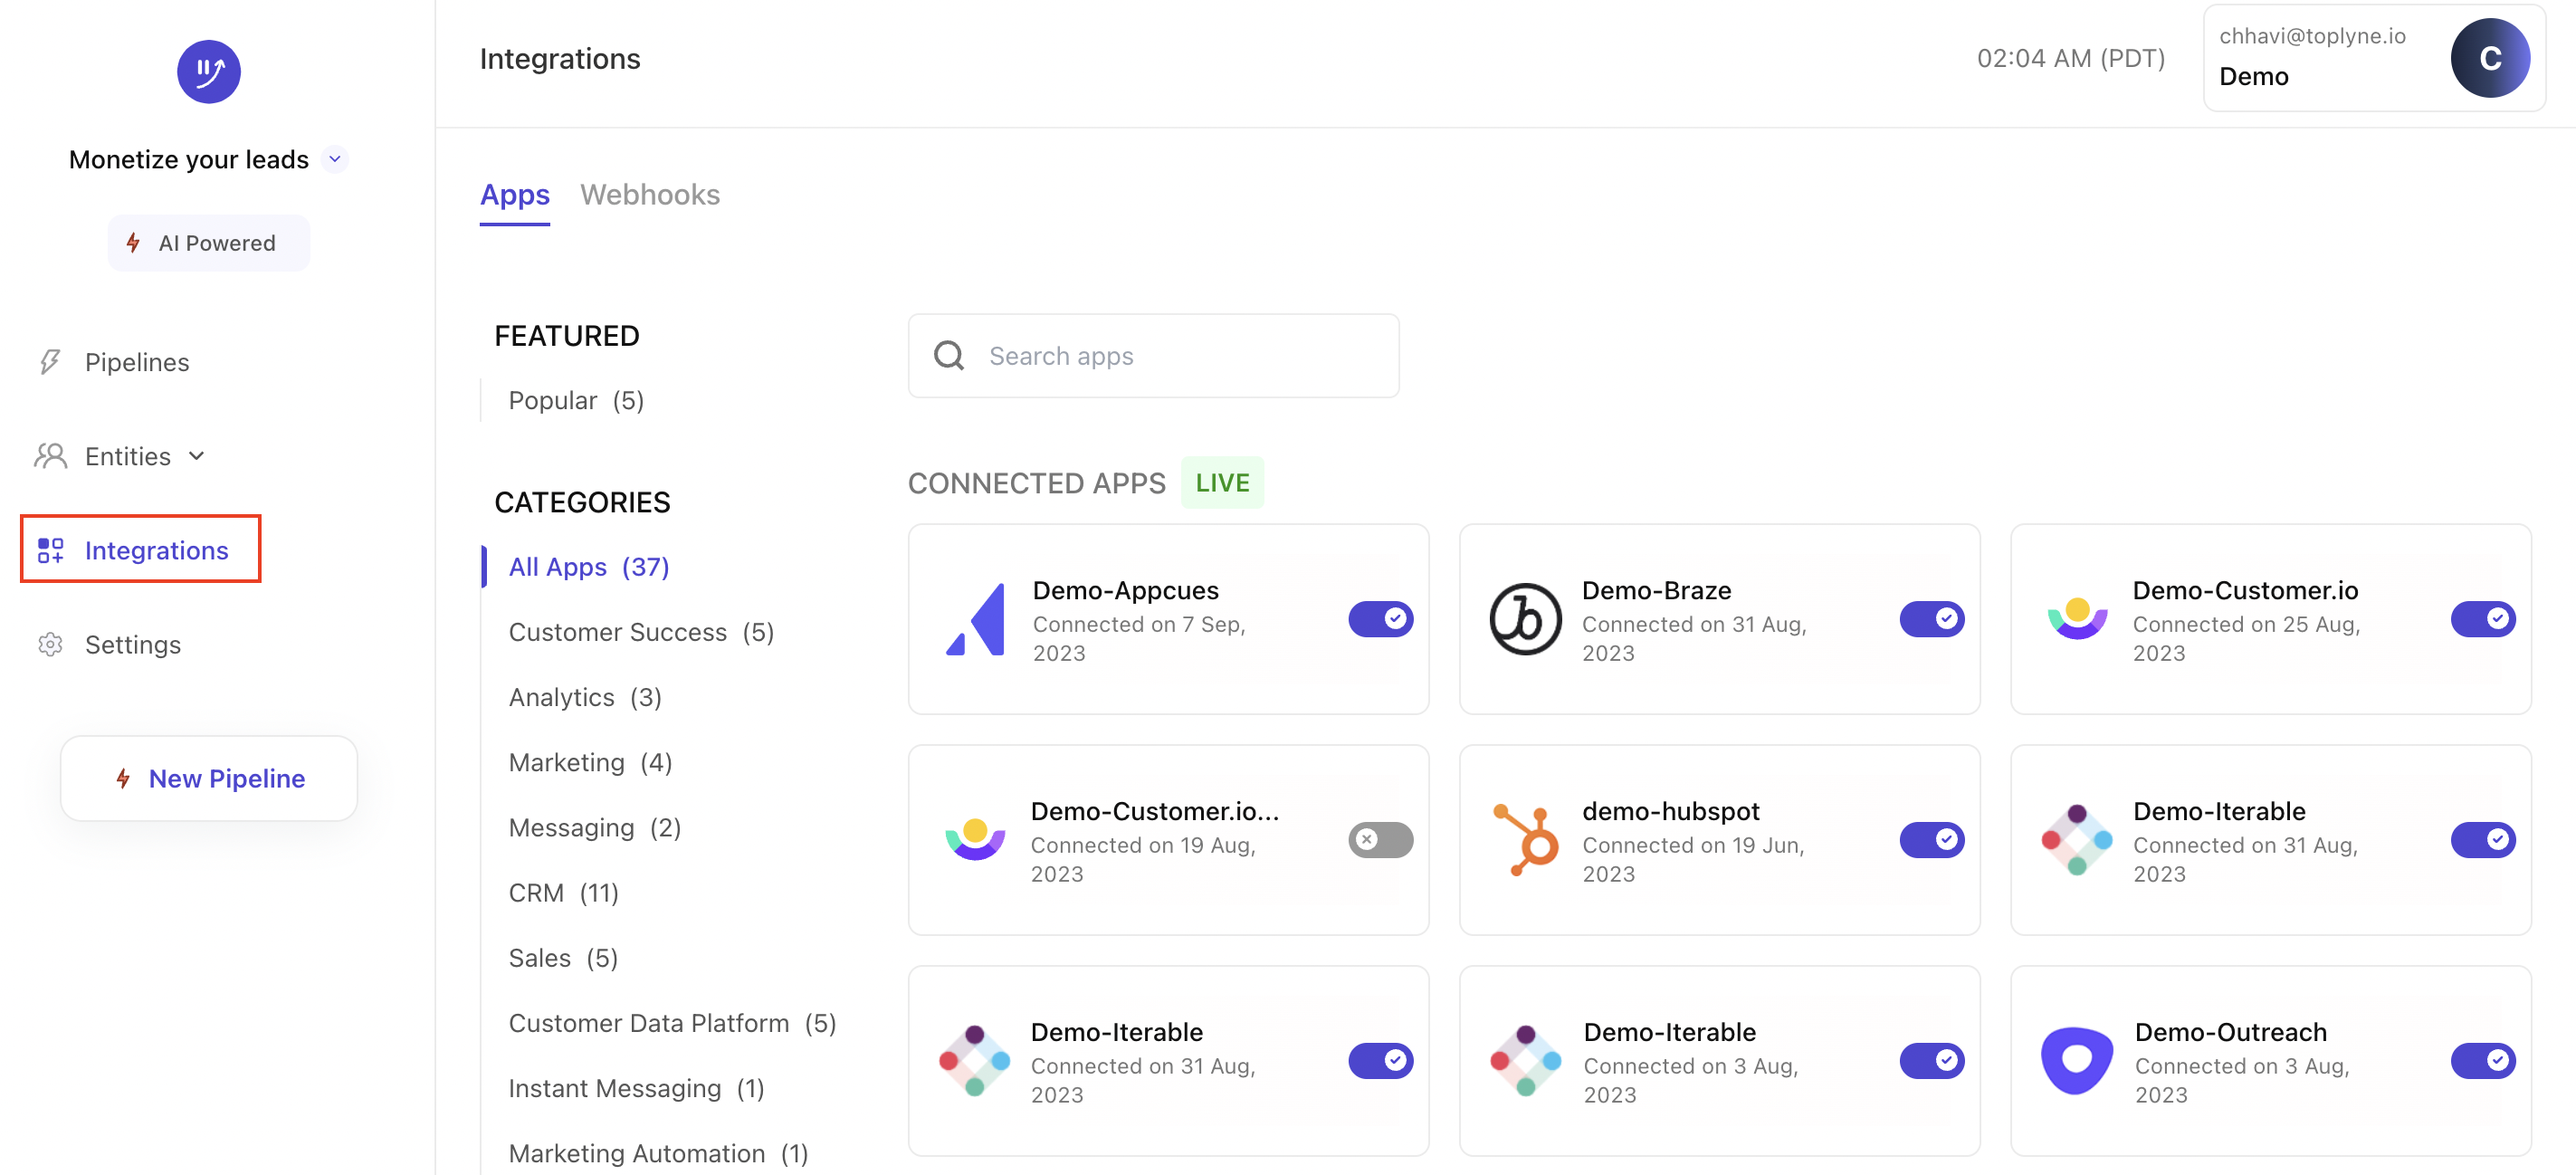
- Select ‘Integrations’ from the left pane.
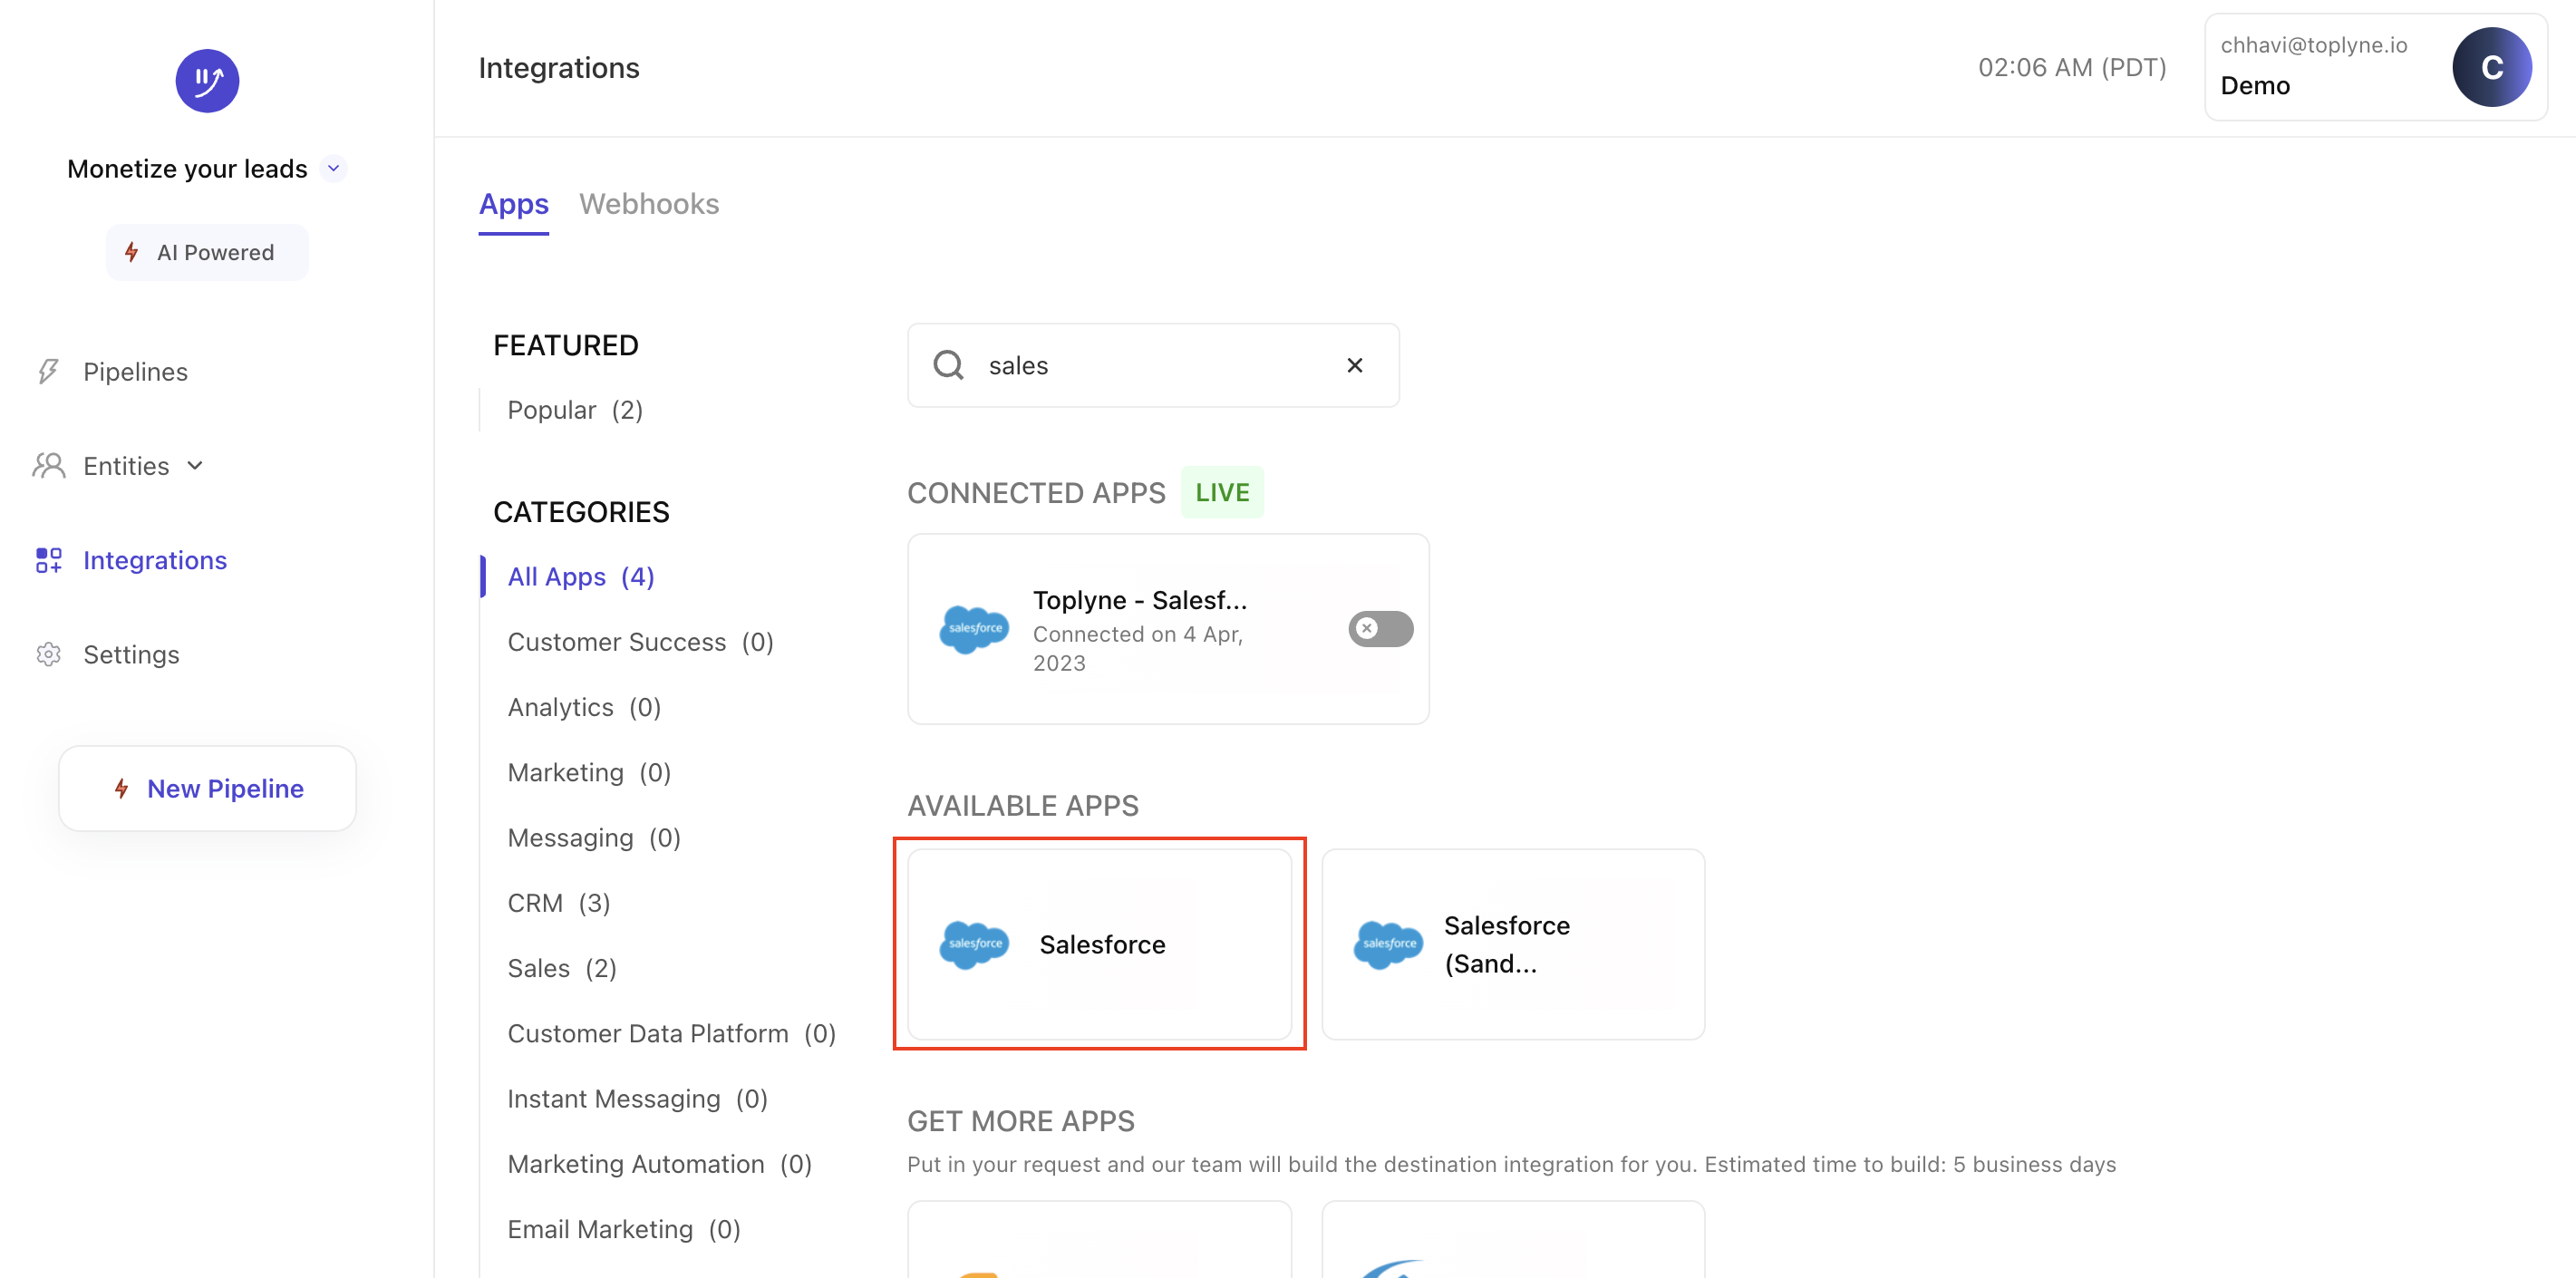
- Search for ‘Salesforce’ and select it under 'Available Apps' section.
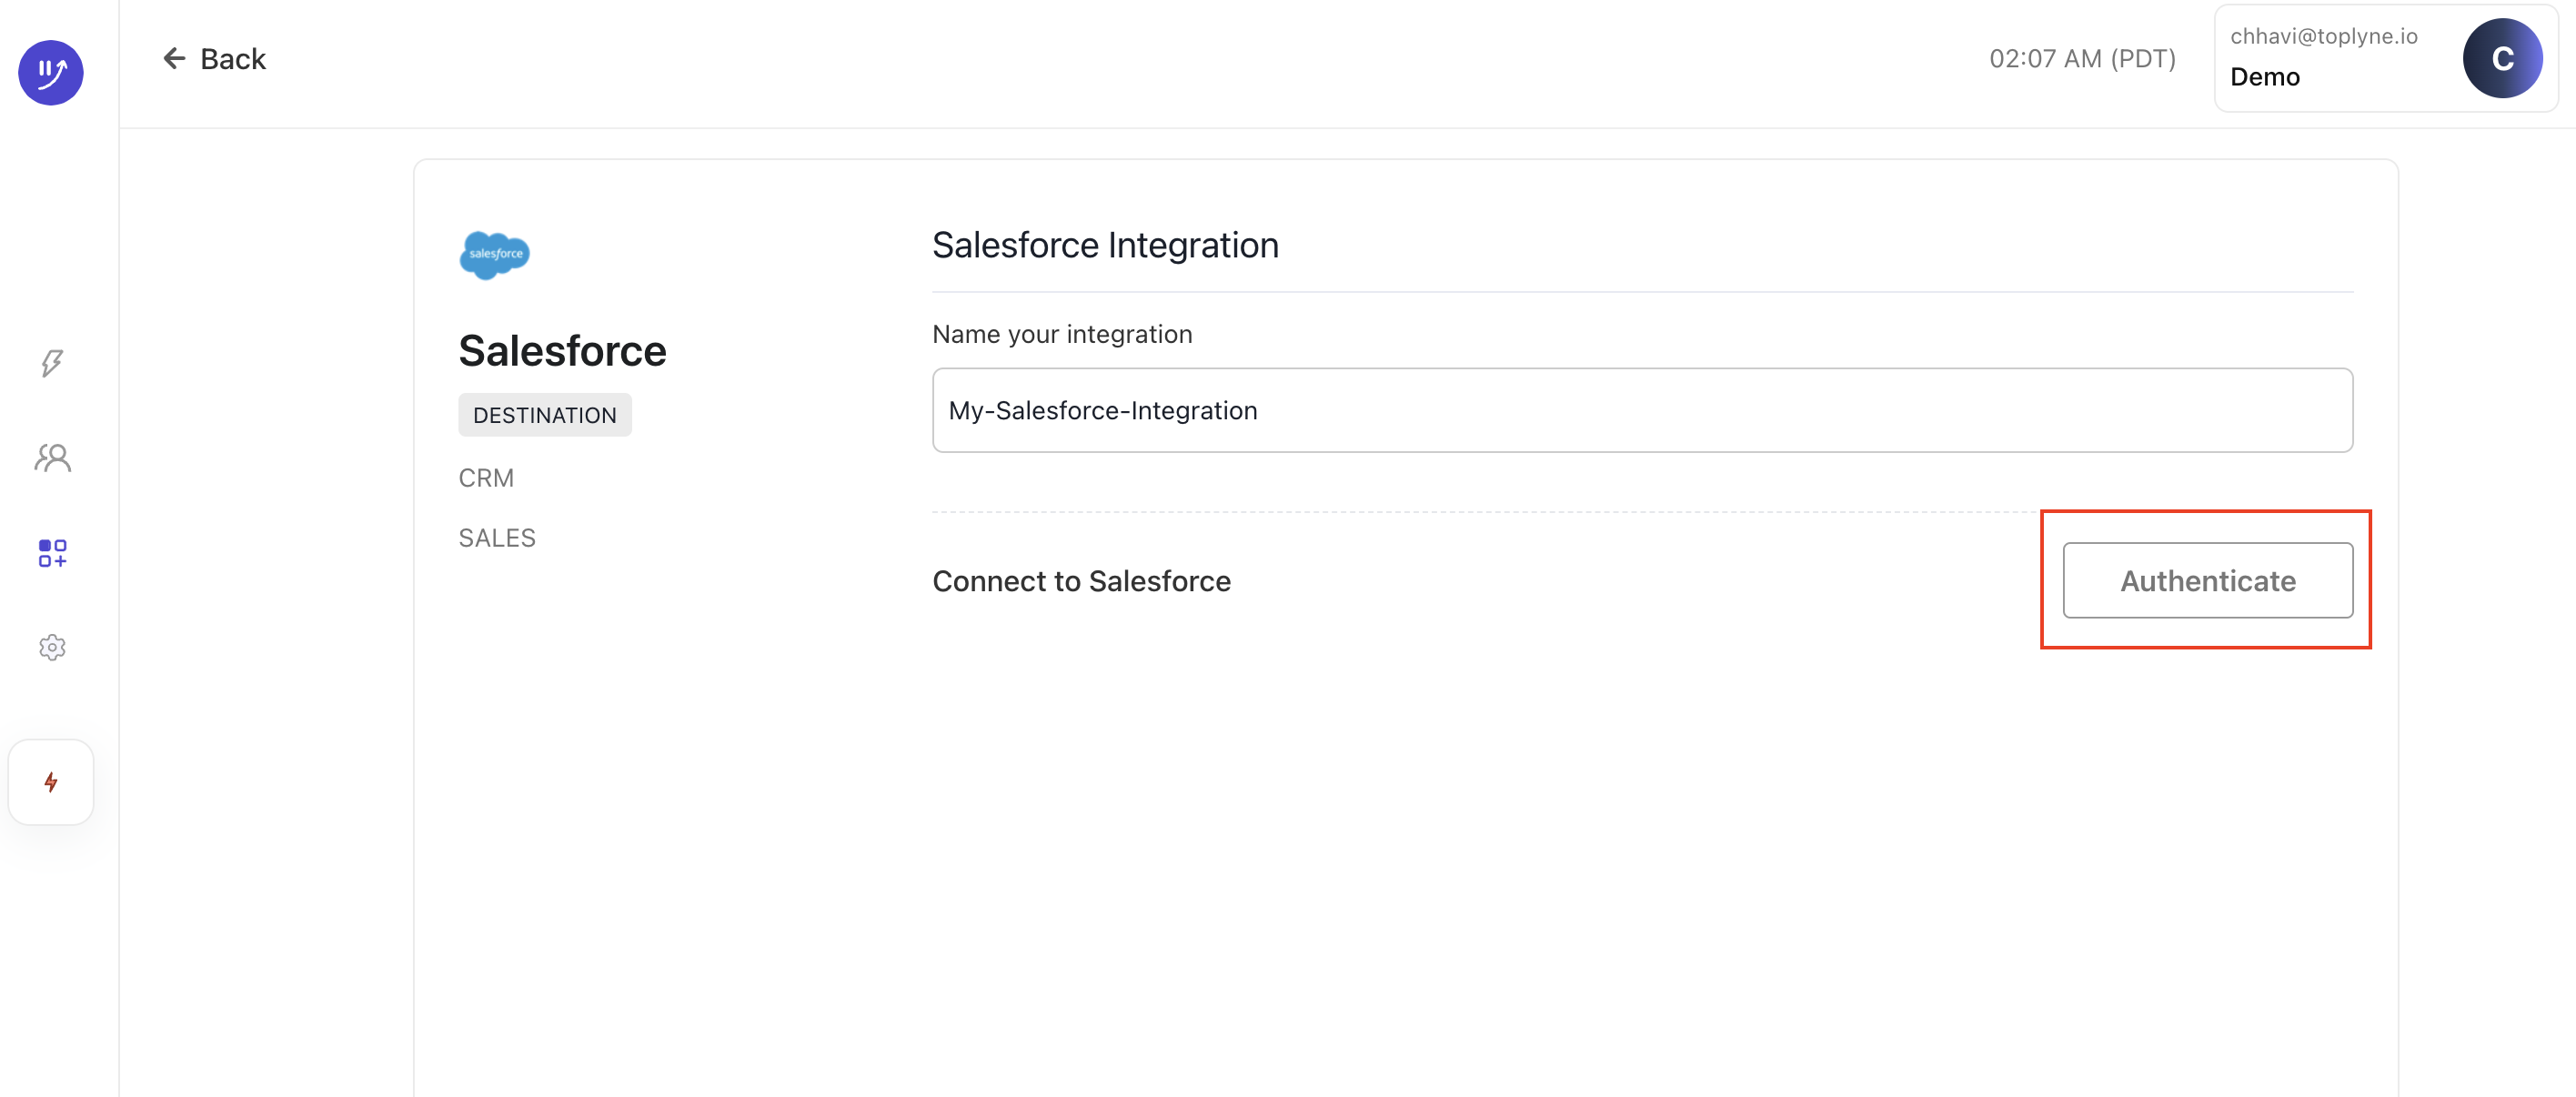
- Name integration and click on ‘Authenticate’.
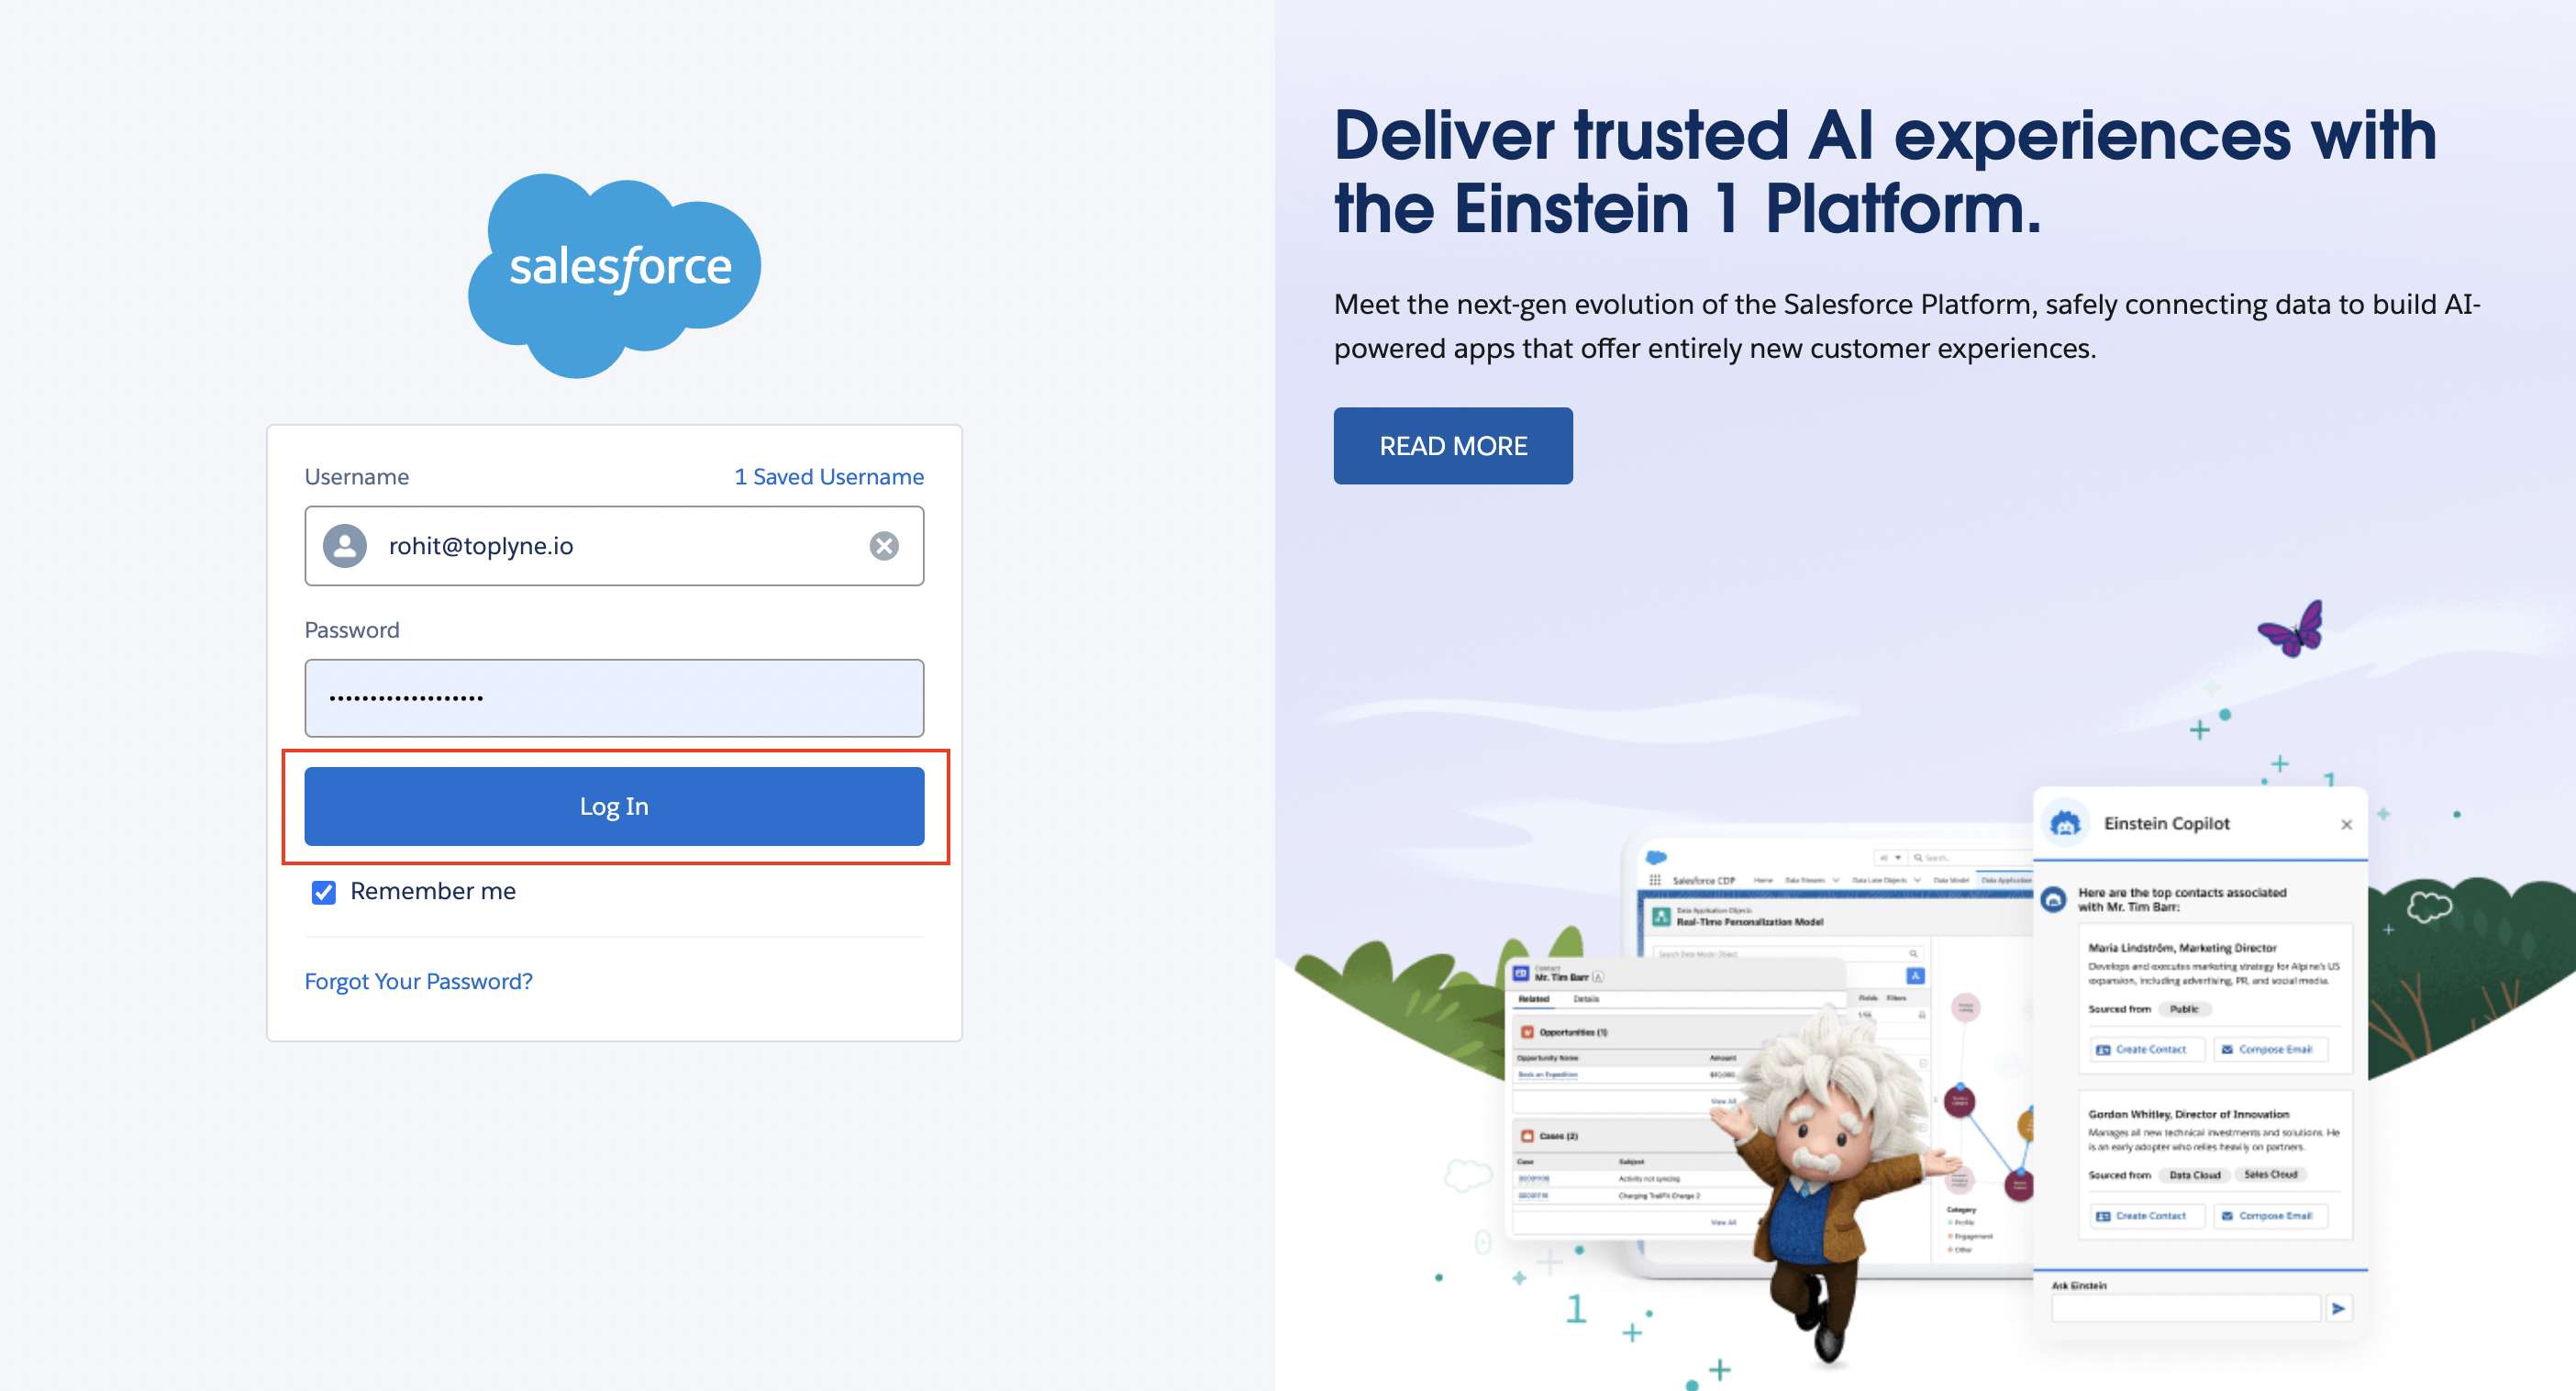
- Log in to Salesforce and choose the account to integrate with.
- Click on ‘Allow’ in the access popup
- Click on ‘Complete Integration’
Sending data to Salesforce
With the integration, data can be sent to any object in Salesforce
Toplyne uses an "upsert" operation. This means that if a record doesn't exist in the object then it gets created else the existing record gets updated with the information sent from Toplyne
Exporting data from Toplyne to Salesforce involves two steps:
- Record mapping
- Field mapping
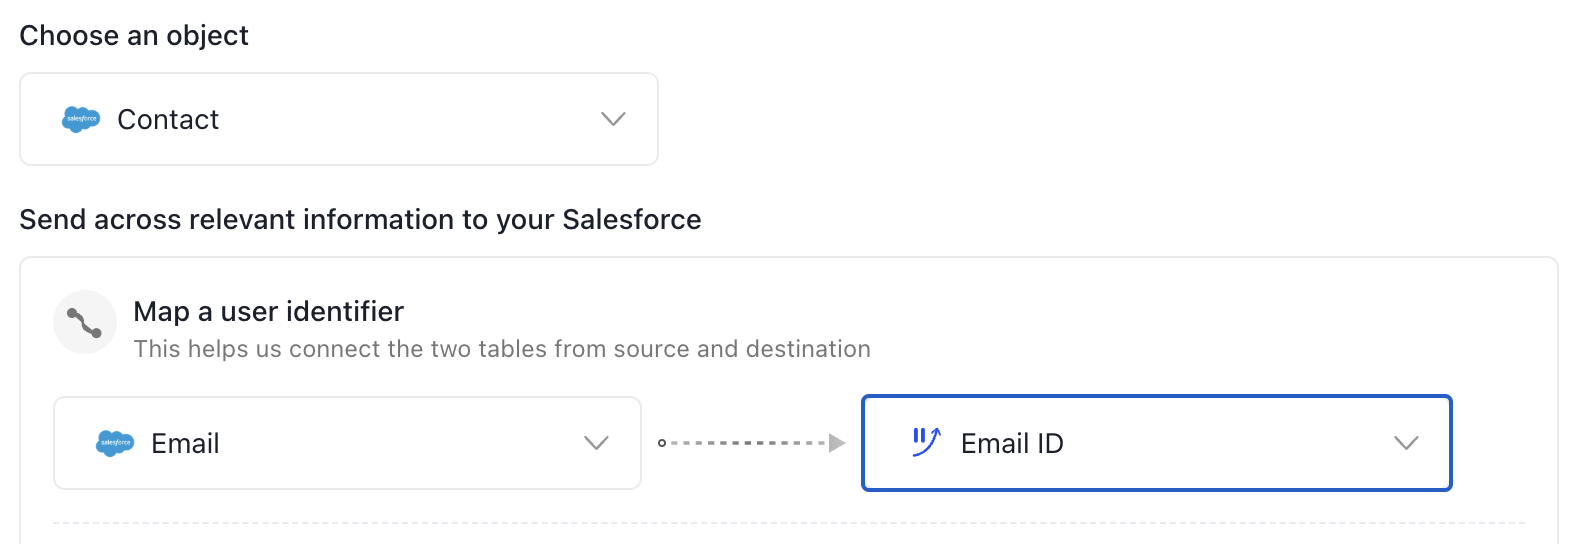
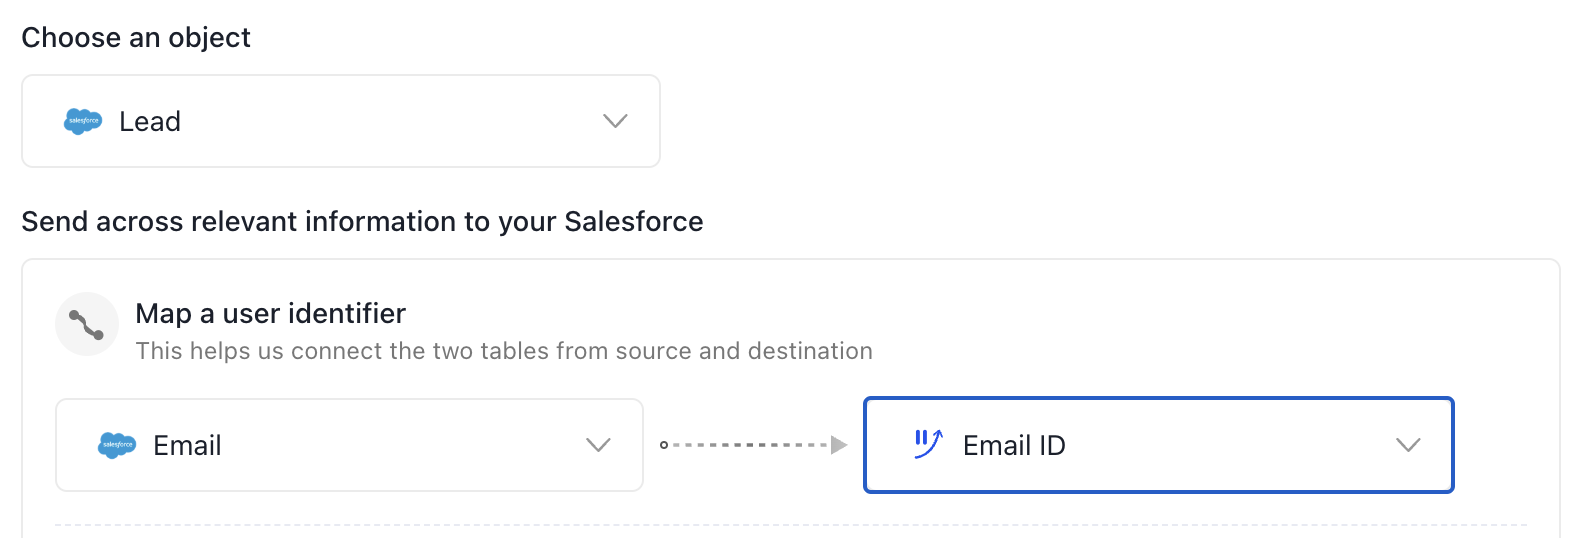
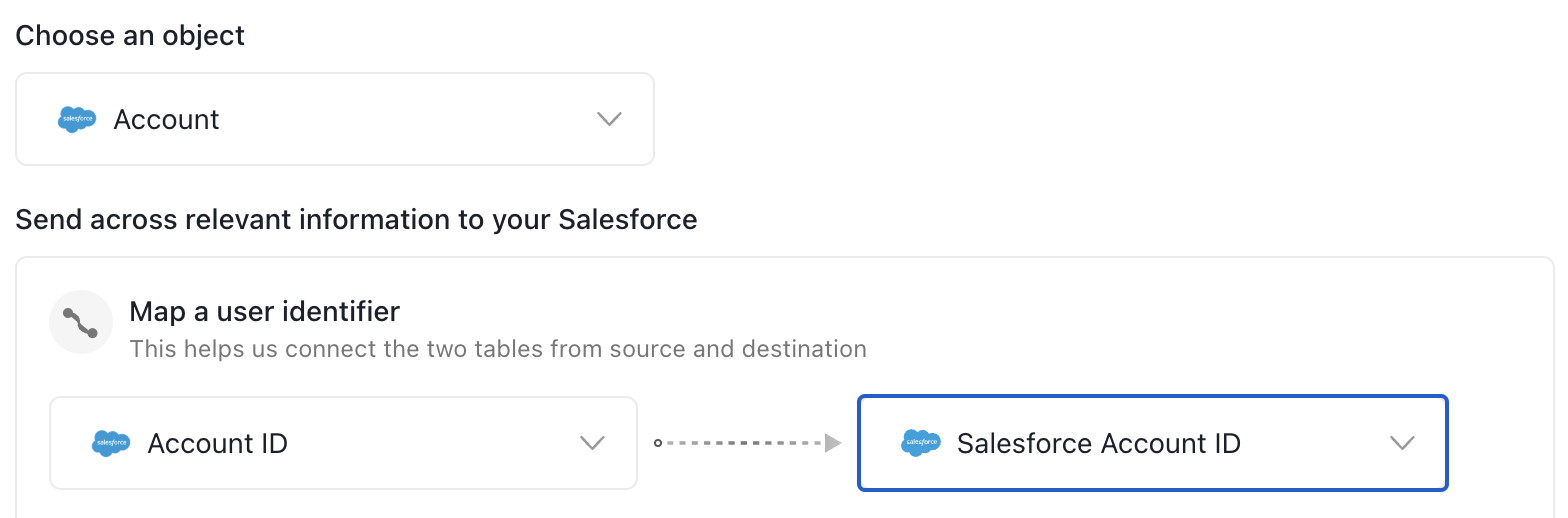
Record mapping
Define the unique identifier that will connect Salesforce records to Toplyne ones. Only fields marked as “External ID” true on Salesforce can be used as identifier fields. Read more here
In Salesforce:
-
Contacts object can be mapped based on "email id"
-
Leads object can be mapped based on "email id"
-
Accounts object can be mapped based on any field which is marked as "idLookup" = true and "externalId = true" on your salesforce dash
To mark a field as "externalId = true" in salesforce, follow these steps
- Go to "Object Manager" and select the object you are concerned with
- Then select "Fields & Relationships" tab
- Select the field you want to use as an identifier to sync data from Toplyne into Salesforce. Then click on "Edit" button
- Enable tick marks on "External ID" and click on "Save" button
- You can now use this field to map data from Toplyne to Salesforce
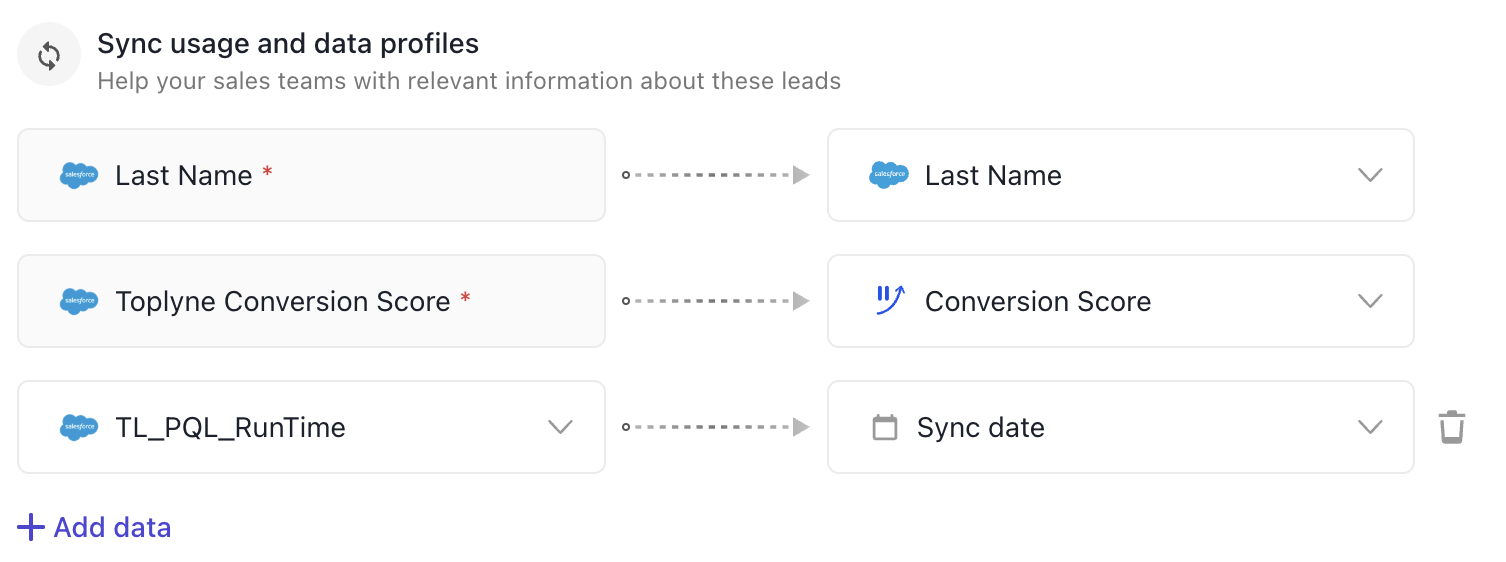
Field mapping
Map Toplyne fields to the fields in Salesforce that need to get updated
Reading data from Salesforce
Toplyne stitches Saleforce data to product usage data
Contacts & Leads in Salesforce are stitched to individual users using the product. Accounts in Salesforce are stitched to domains in product data. This stitching of data allows our customers to
- Segment on Salesforce data like filtering out PQLs which are already in deal stage
- Improve AI model strength. Salesforce exposes important signals, such as meetings booked, emails sent, opportunities created, etc., that go a long way in enriching Toplyne's AI models
- Access Toplyne's Chrome Extension. Toplyne’s Chrome Extension lets you access critical intelligence and insights (based on first-party data and third-party enrichment) about your contacts and companies from within your CRM
Frequently Asked Questions
What object records will Toplyne be creating in Salesforce? What fields will Toplyne be updating on each object it touches?
You need to create three fields within the object you'll be syncing Toplyne leads. They are:
- A Number type field with eight decimal places called the “Toplyne Score" - where we'd pass the score of a lead or account.
- A Text Area (Long) type field called “Toplyne Context” - where we’d be able to pass context on why a lead or account is marked high-intent to convert.
- A Timestamp field called “Toplyne Updated At” - where we pass the timestamp for when the record was updated.
How often will records be pushed into Salesforce?
We can update/push records to your Salesforce at the cadence of your choice. Most of our customers want to work with a fresh set of leads every morning or at the start of every week, and hence, daily and weekly update cadences are the most popular.
How is Toplyne determining if a lead/contact already exists in Salesforce before creating one? Which fields will be used to make this determination?
When syncing data from Toplyne to Salesforce, you pick a primary key in your object, which you map to data that exists in Toplyne. Once you do that, Toplyne will see if that lead/contact exists in the object. If they do, we will update them; if they don’t, we will create them.
Which leads will Toplyne be scoring? Will it score contacts as well?
Depending on the goal (conversion, enterprise expansion, etc.) and the entity (contacts, teams, domains, etc.) we choose to work with, our AI model continuously scores all your leads, contacts, or accounts. We will, however, sync only those leads to your Salesforce that you would like to work with on a daily/weekly basis.
What additionally needs to be set up for the sales team?
We don’t need to set up anything “new”. We want to ensure that your reps are comfortable and continue to work out of the flow they are comfortable with. Accordingly, we will update leads and other records so that they show up in the view your reps are currently using.
Updated 8 months ago