Customer.io
Through a simple integration, you will be able to use Toplyne's playbooks to better target your users on Customer.io. Furthermore, you will be able to share Customer.io data back to Toplyne to unlock powerful segmentation features!
Setting up Customer.io as a destination 🔩
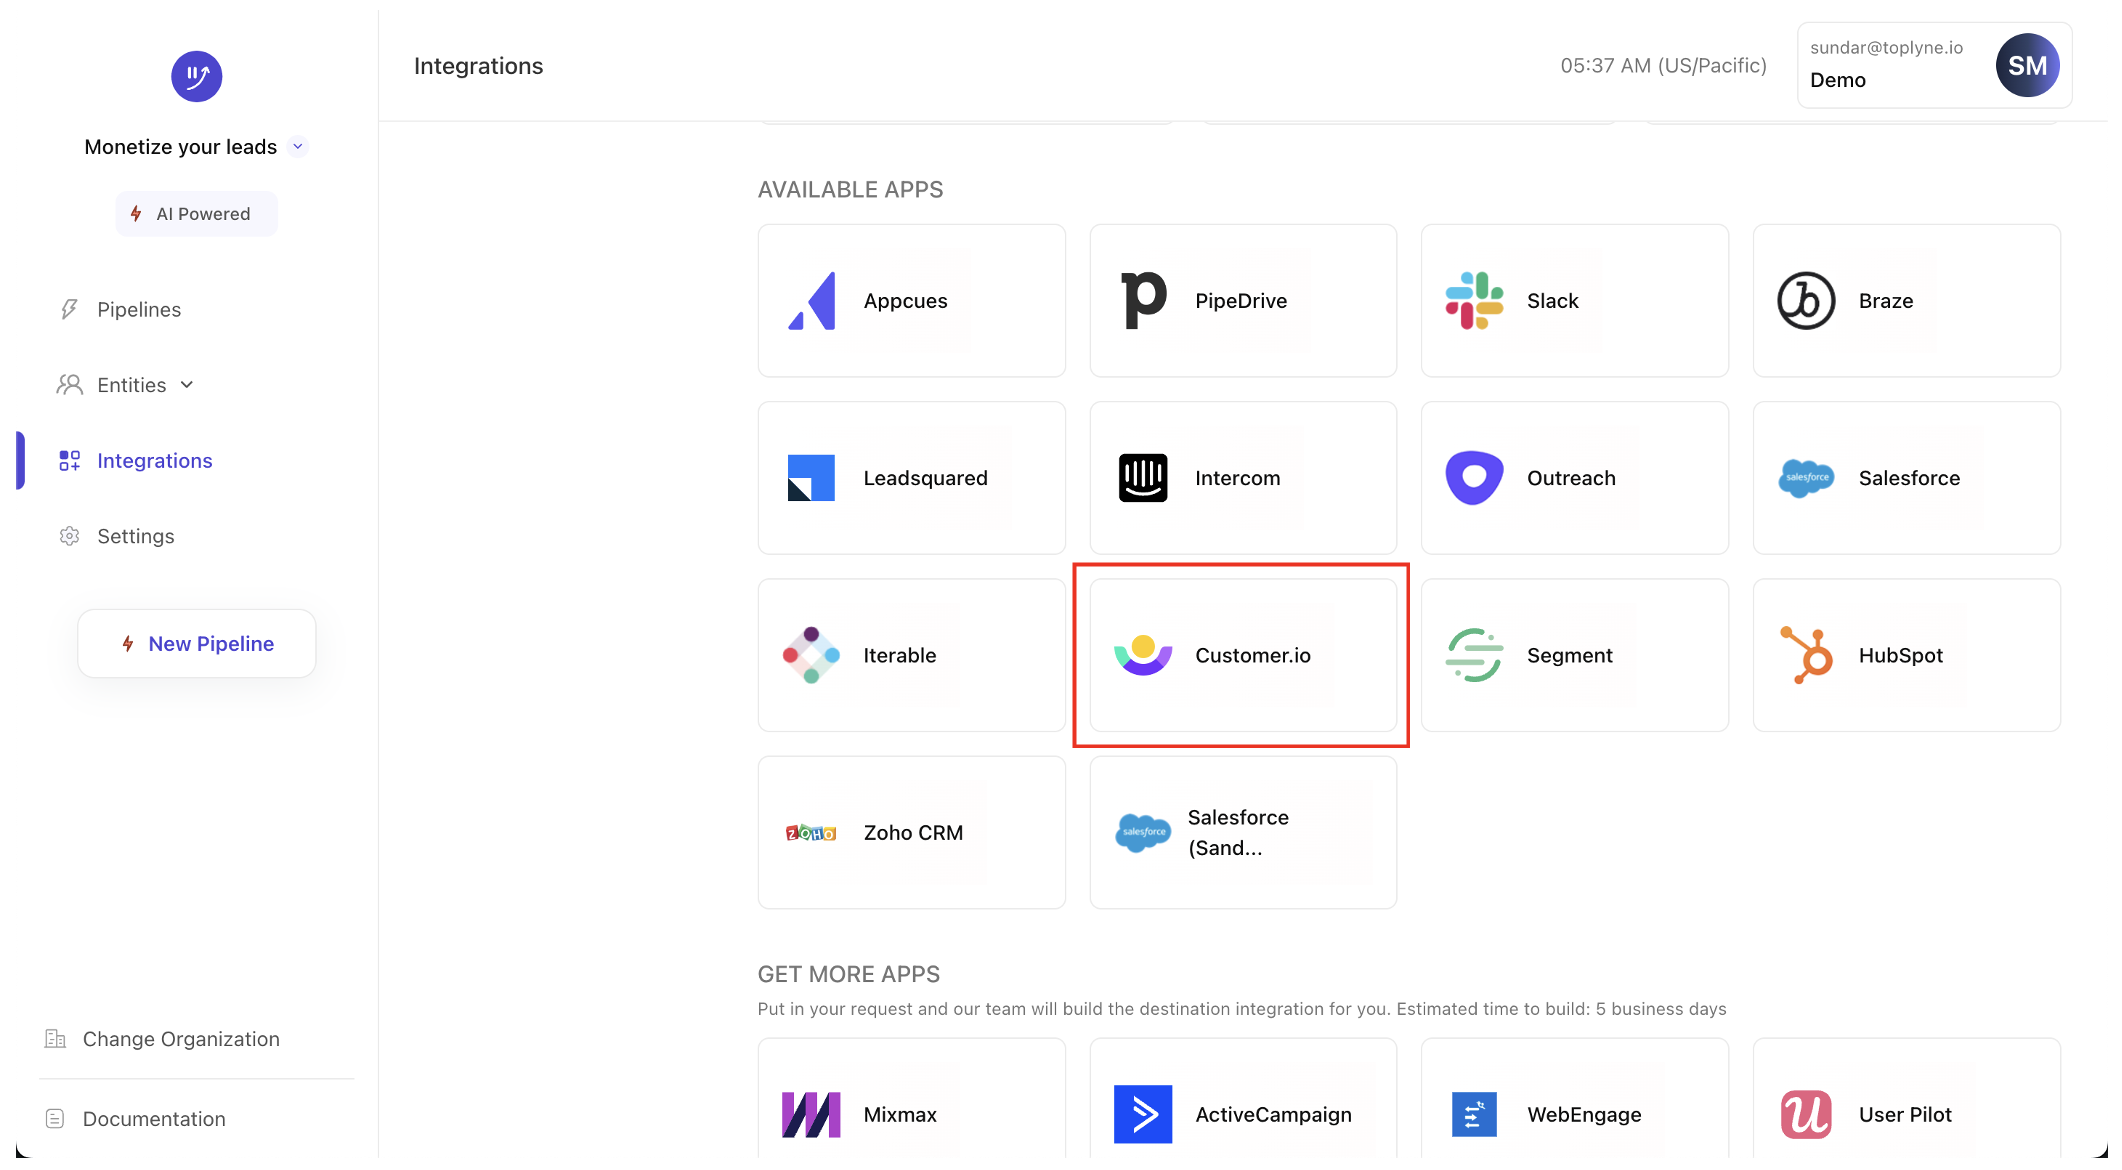
- Select Integrations from the left pane. Search for Customer.io and select it from the list of destinations.
-
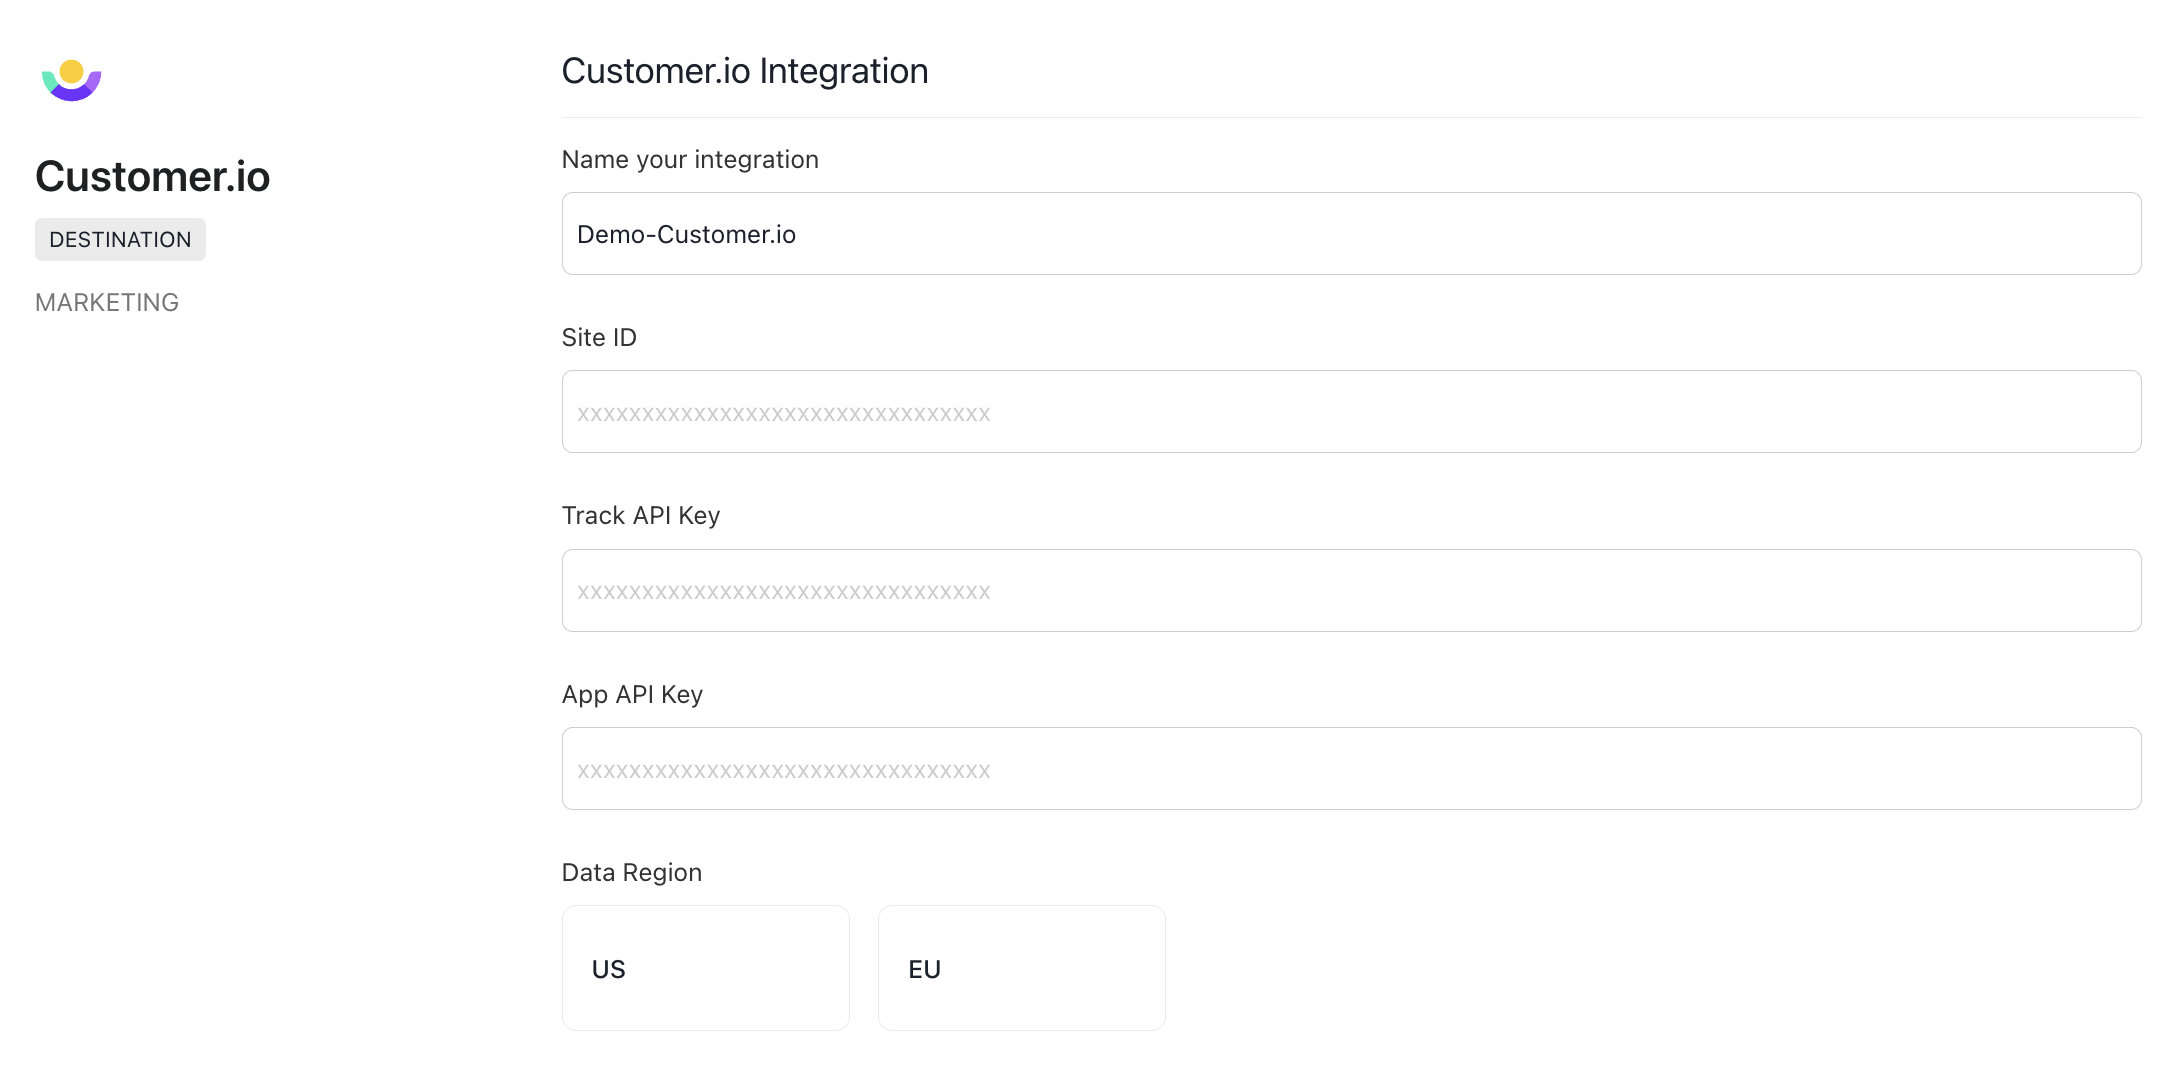
On the Customer.io integration page, name your integration.
-
Filling additional information - a Customer.io detour:
-
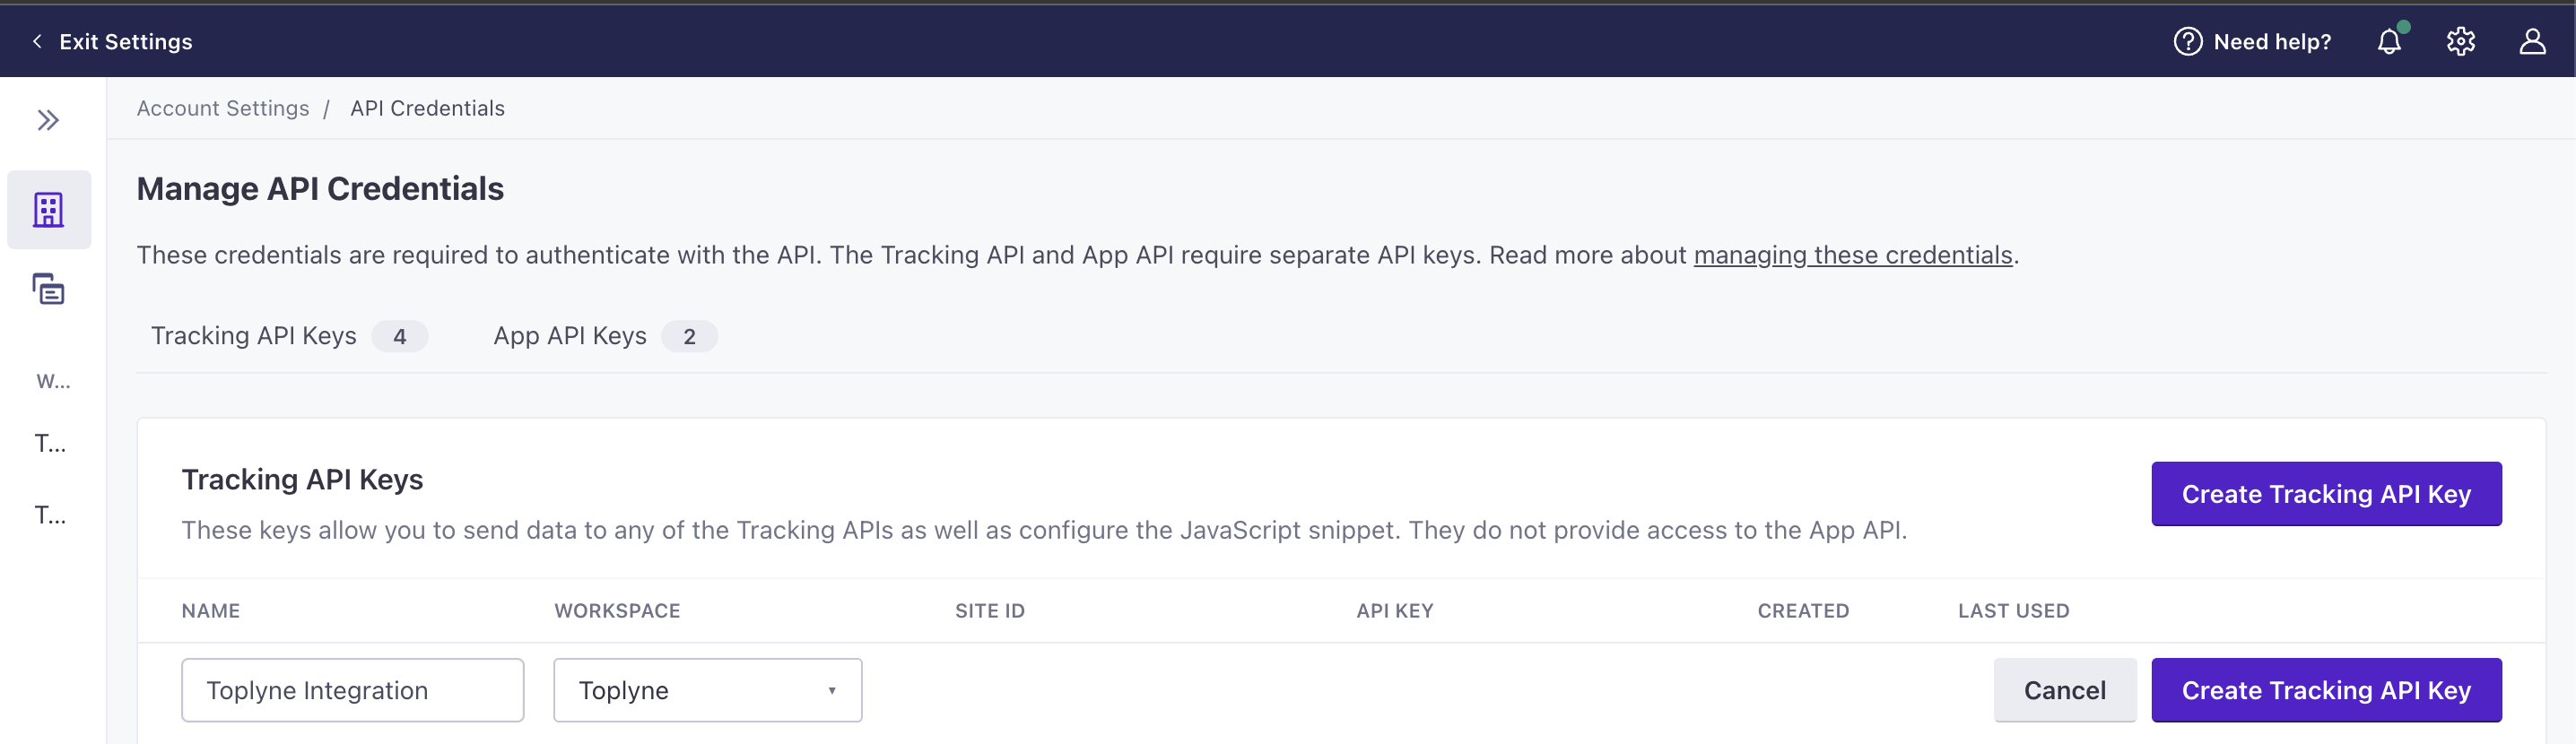
Navigate to Customer.io Dashboard > Settings > Account Settings > API Credentials. Click on Create Tracking API Key.
-
Name your key, select the right workspace, and click on Create Tracking API Key. Copy the Site ID and API key generated.
-
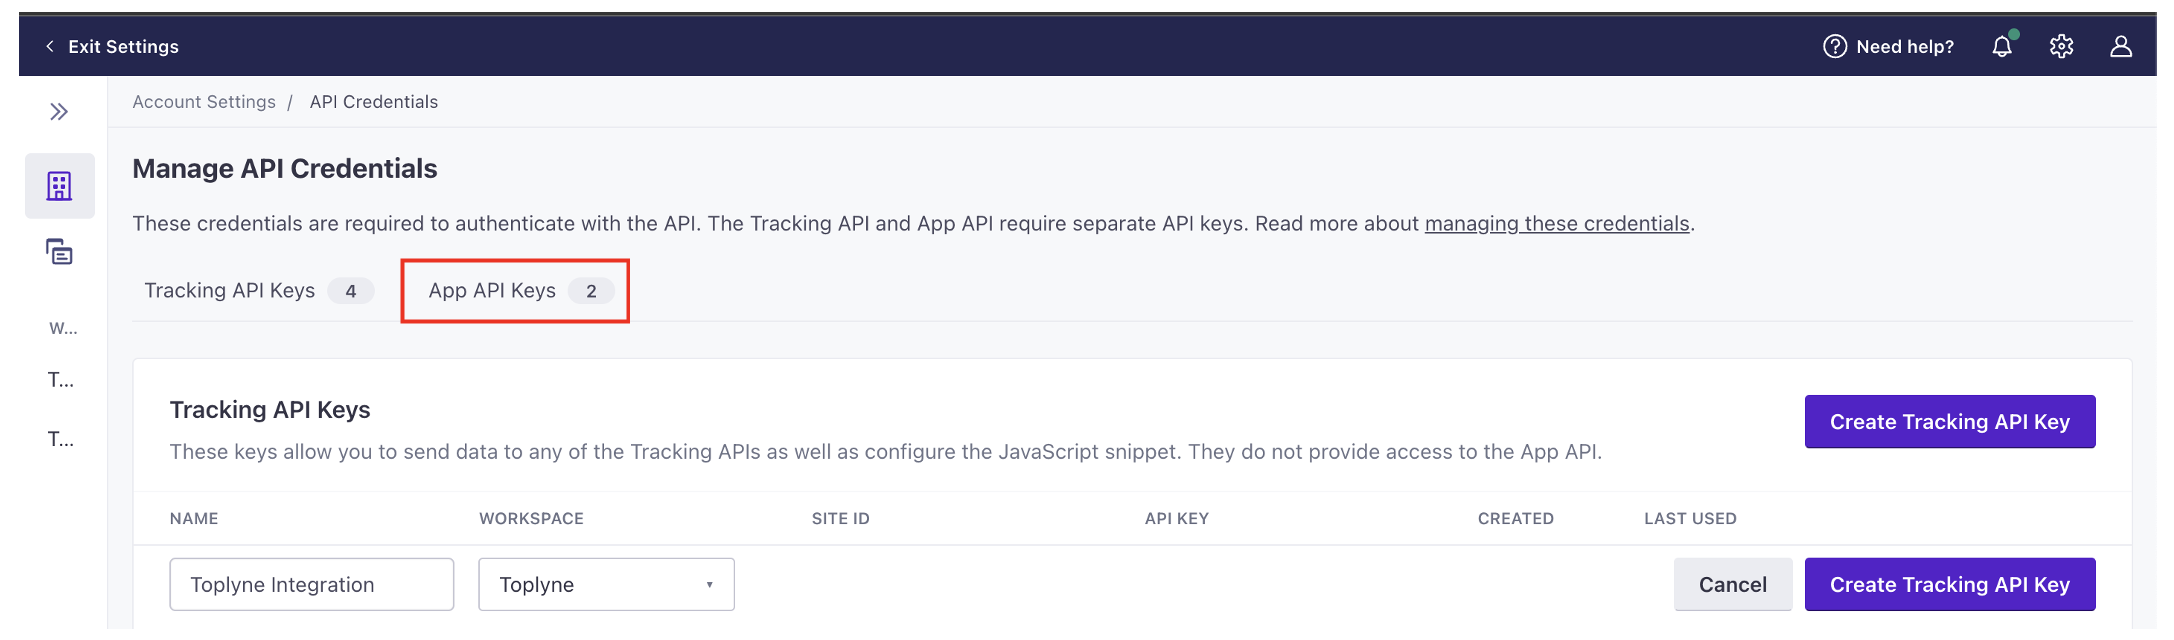
Head to App API Keys tab. Click on Create App API Key and follow the instructions. Copy the App API key generated.
-
Then, navigate to Customer.io Dashboard > Account Settings > Privacy & Data. You should see the Data Center Region on the top right. It would be the United States Data Center (US) or the European Union Data Center (EU).
-

- Input the fields on the Toplyne integration page and click on Authenticate.
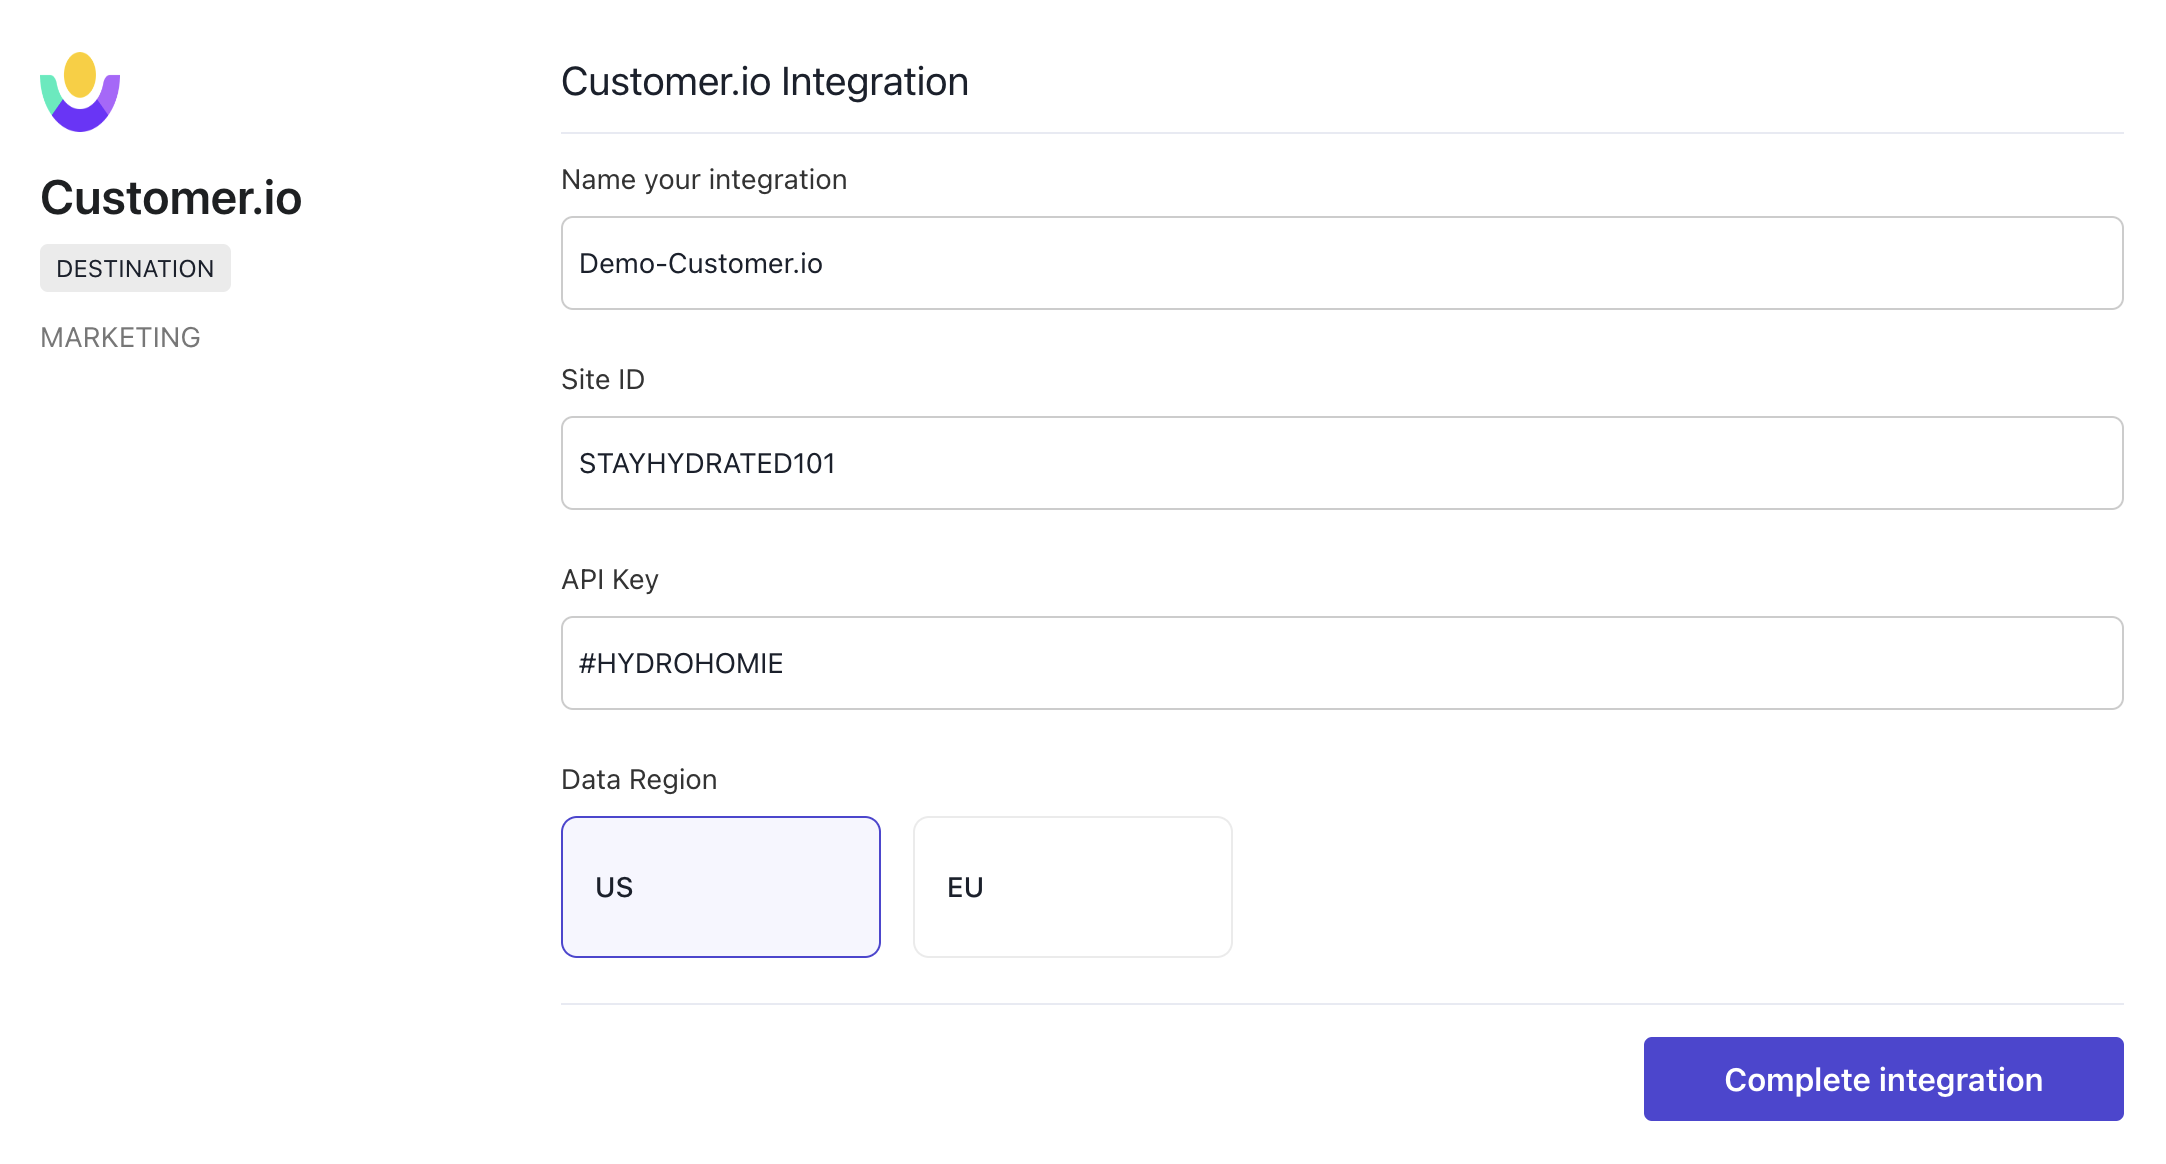
- Click on Complete Integration, and you're done!
Using Customer.io as a destination 🔀
- Select the destination you just created in the export section.

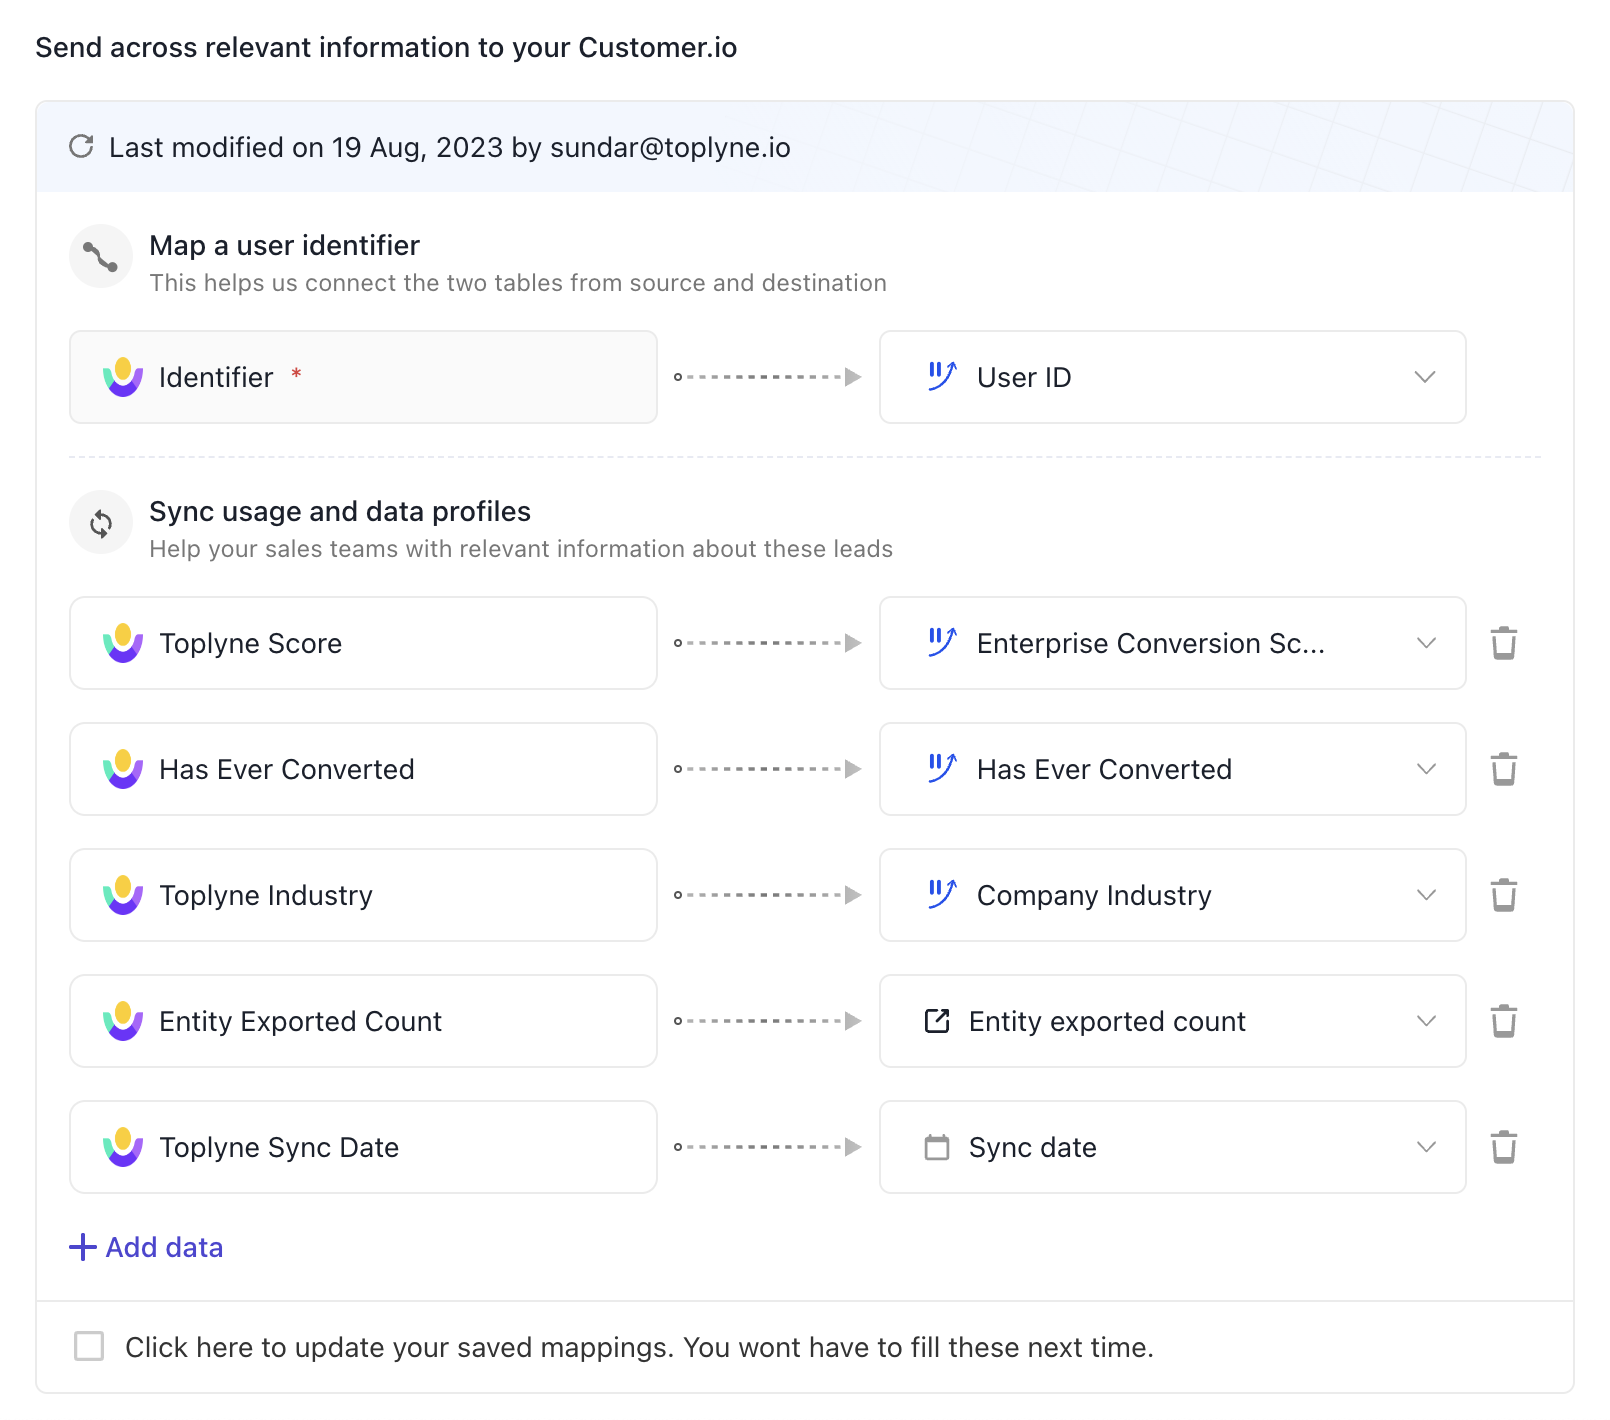
- Currently, we support the People object on Customer.io. Select the customer.io ID [cid] available on the Toplyne fields to map the user identifier field. If that is unavailable, you may select the Email ID Toplyne provides.
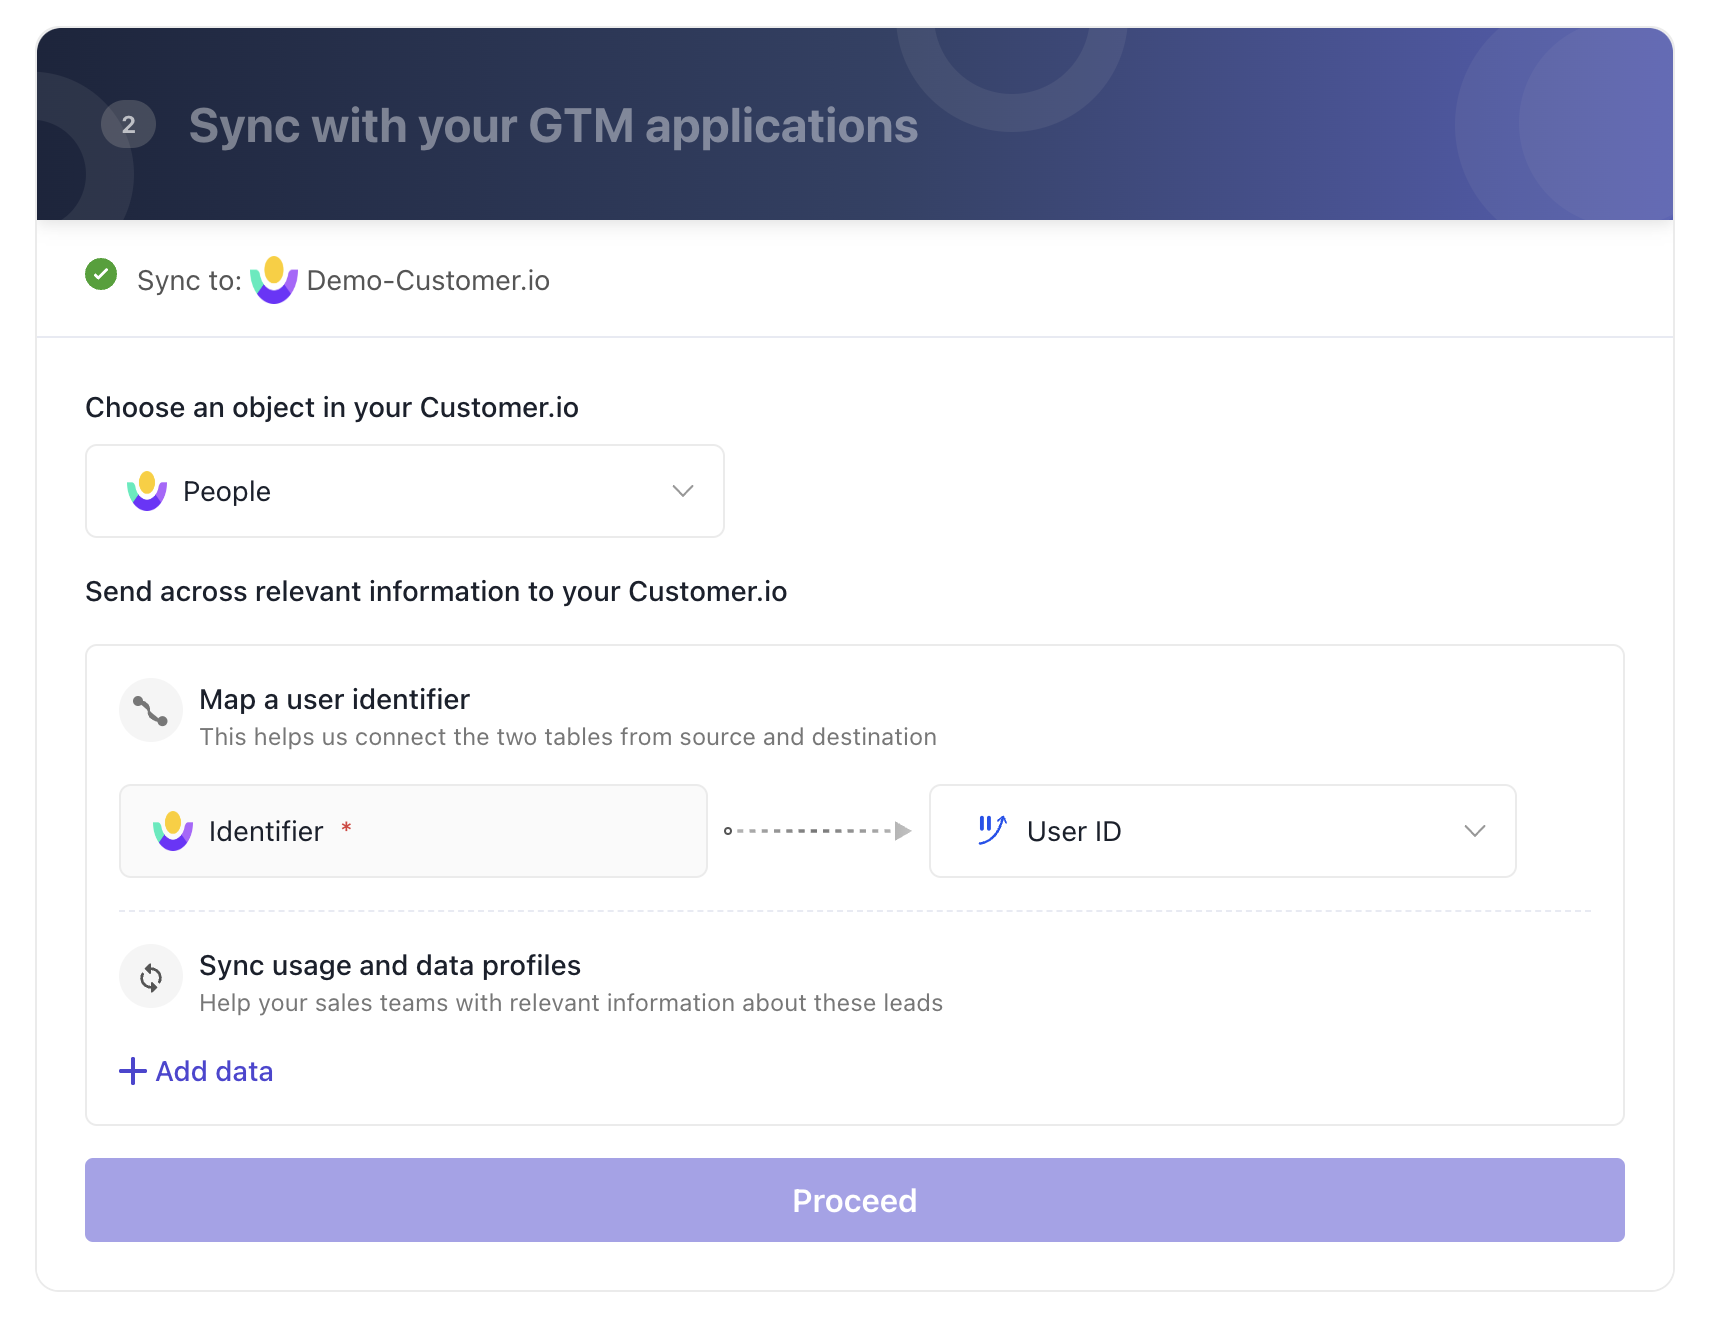
- You can also choose which other information to pass to Customer.io. Generally, our customers export the Toplyne Conversion Score and the Toplyne Sync date. Any new attributes will be automatically created on Customer.io. Existing attributes will be overwritten.
- Name your pipeline and finish the setup. You should have the leads updated once your playbook runs!
Updated 10 months ago