BigQuery
Setting up tables
Data in BigQuery typically resides in tables. When sharing data with Toplyne, the best practice is to create separate tables for event data and profile data partitioned on a time column.
How does Toplyne sync work?
Toplyne requires read permissions on all the tables you want to sync with us. You can grant us read permissions at individual table-level granularity or on the complete dataset in which your tables reside.
We prefer to ingest your data from BigQuery in an incremental fashion. You need to add a monotonically increasing timestamp column in your tables. We will use this column to identify all the new data that has been added to the tables and will only read-only that much data for syncing.
You can add a column called UPDATED_AT with timestamp data type to your table, and this column will highlight when the row in question was added to the table.
If you don't share such a timestamp column, we'll do a daily full scan of your table and sync it entirely.
Event data table
This table will capture a user's action; it will help answer the question, “what has a user done on your product, and when.”
Rows
Each row in this table represents an event triggered by a user.
Columns
USER_ID(Required): Key to identify which user has performed the eventACCOUNT_ID(required for account-level analytics): Key to identify which account the particular user belongs toEVENT_NAME(Required): Name of the eventTIMESTAMP(Required): Timestamp at which the event has occurredUPDATED_AT(Required): UTC timestamp when the row has been updated or added (not the event timestamp)EVENT_PROPERTIES(Optional): Event properties, typically shared as a JSON
with key/value pairs
Partition
Partition this table on TIMESTAMP column.
Sample Event Table
| USER_ID | ACCOUNT_ID | EVENT_NAME | TIMESTAMP | UPDATED_AT | EVENT_PROPERTIES |
|---|---|---|---|---|---|
| 1298 | 23 | Payment_Initiated | 2022-10-26 07:08:34 | 2023-01-09 17:08:34 | { "payment_Id": 123, "amount": 200, } |
| 1567 | 77 | Trial_Ended | 2022-11-01 20:01:14 | 2023-01-09 17:08:34 | { "account_Id": 77 } |
Profile data table
This table will capture any profile information a user or an account has; it will help answer the question, “who is this user or account?”.
Rows
Each row in this table is a unique entity.
Columns
USER_ID/ACCOUNT_ID(Required): Key to identify which entities' properties are listed in the row.USER_CREATION_TIME/ACCOUNT_CREATION_TIME(Optional): To identify since when the user or account has been active.UPDATED_AT: UTC timestamp when the row has been updated or added (not the event timestamp)USER_PROPERTIES/ACCOUNT_PROPERTIES: Each subsequent column is a profile key; against it, you will have its value. For example, you may include the email address, geographical location, account name, current billing plan they are on, etc.
Partition
Partition this table on UPDATED_AT column.
Sample User Table
| USER_ID | USER_CREATION_TIME | UPDATED_AT | Country | Current Plan | |
|---|---|---|---|---|---|
| 1296 | 2022-10-26 07:08:34 | 2022-11-26 07:08:34 | [email protected] | UK | Annual Plan |
| 2676 | 2022-11-01 20:01:14 | 2022-12-01 20:01:14 | [email protected] | UK | Monthly Plan |
Sample Account Table
| ACCOUNT_ID | ACCOUNT_CREATION_TIME | UPDATED_AT | AccountName | Country | Current Plan |
|---|---|---|---|---|---|
| 23 | 2022-10-26 07:08:34 | 2022-11-26 07:08:34 | Queen | UK | Annual Plan |
| 56 | 2022-11-01 20:01:14 | 2022-11-26 07:08:34 | Beetles | UK | Monthly Plan |
Step-by-step guide to share
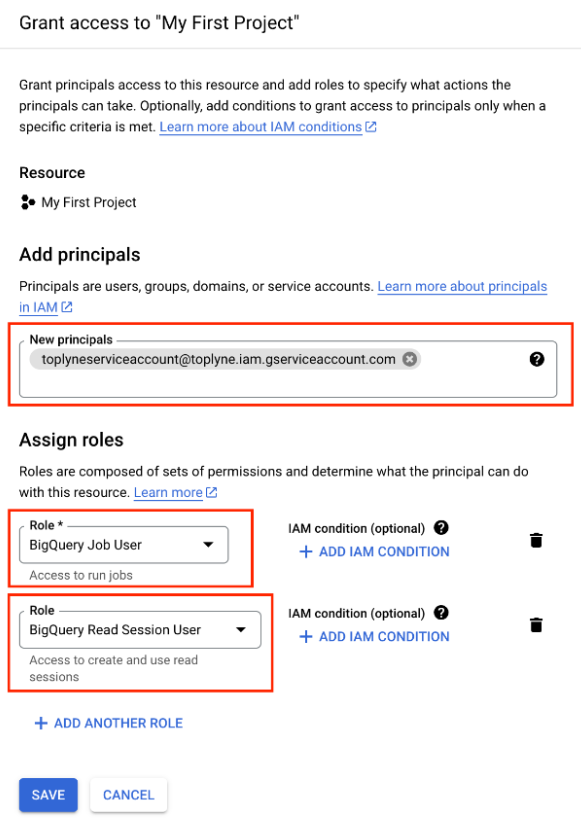
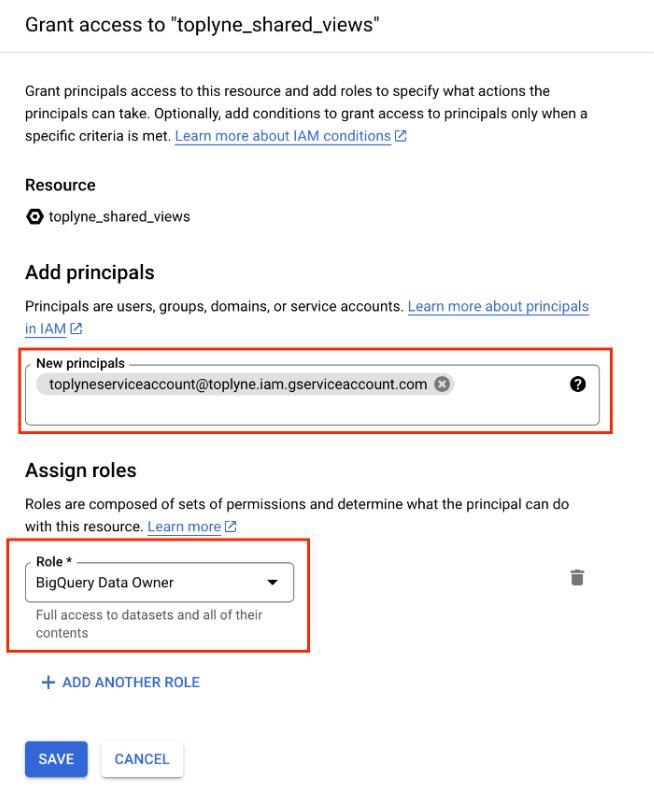
Toplyne has a service account [email protected], which will be used as the principal to give access to your data in BigQuery.
You need to ensure that you are consistent with the Project ID on both the IAM and the BigQuery console.
-
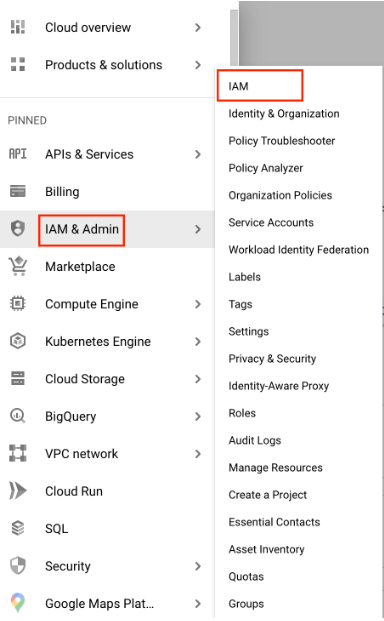
Login into your Google Cloud Platform account.
-
Go to IAM & Admin -> Click on Roles
- You need to grant access to the Toplyne principal as shown here. Access is required for the following two roles:
BigQuery Job UserandBigQuery Read Session User.

- Now let's move to the BigQuery console.
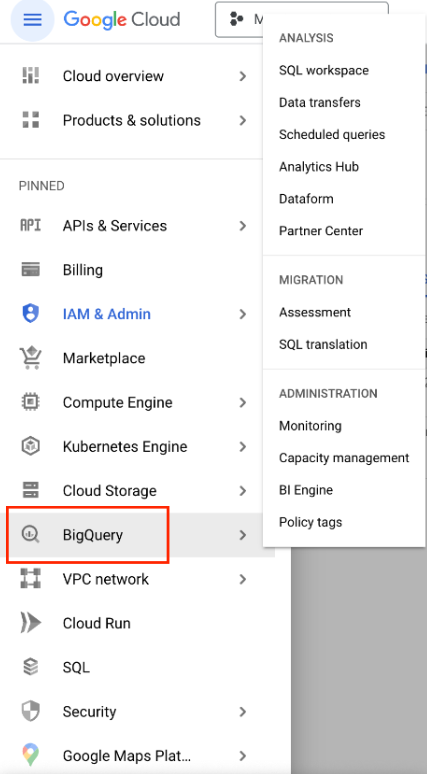
- Create a dataset for Toplyne to use:
In the BigQuery console, select your project and create a dataset namedtoplyne_shared_views.
You can do this from the query console as follows:
create schema toplyne_shared_views; - Select the dataset you created above. Then navigate to Sharing > Permissions.
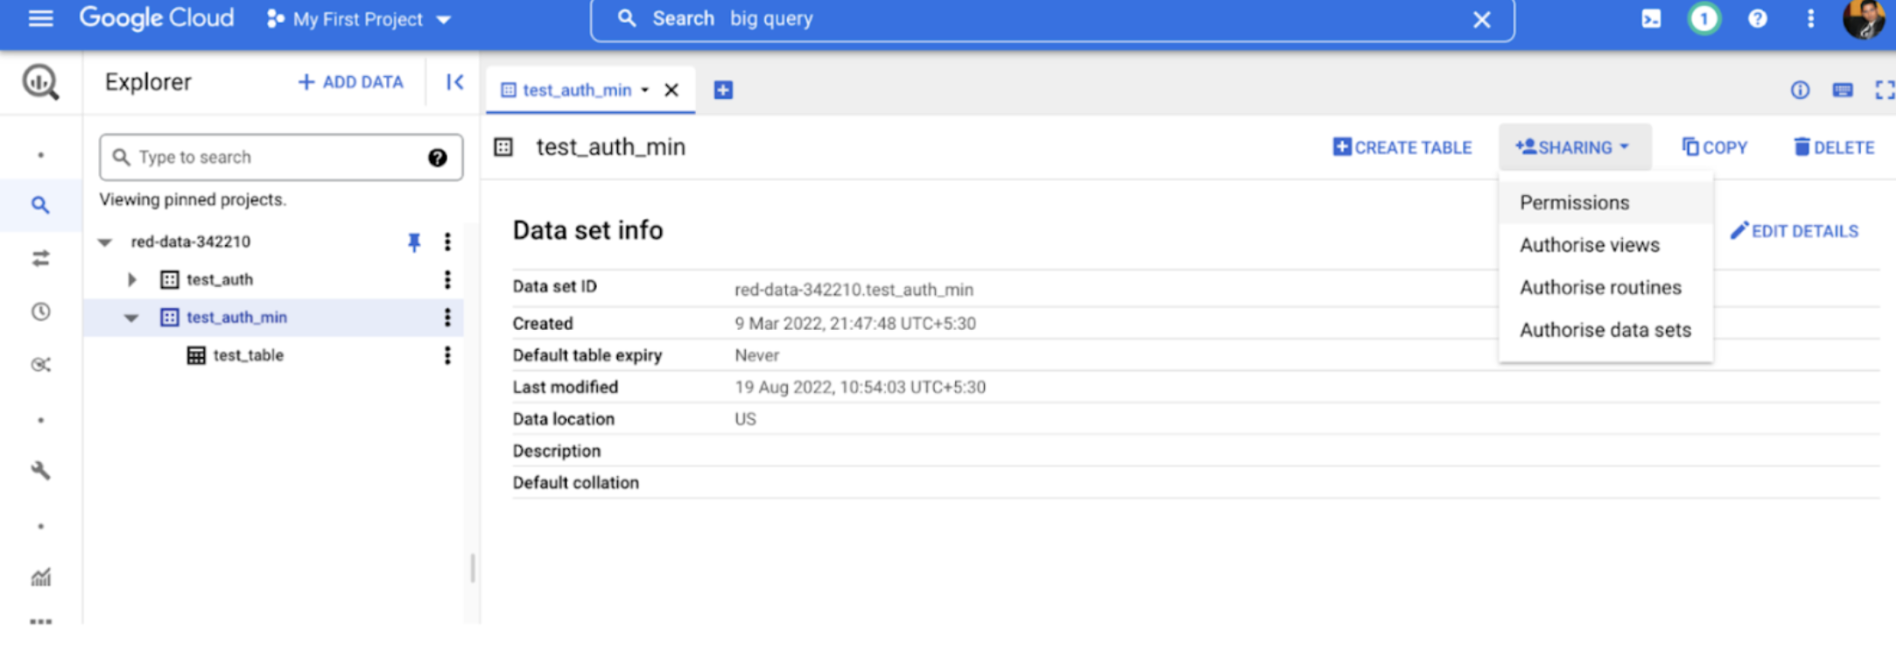
- In the permissions section, select Add Principal.
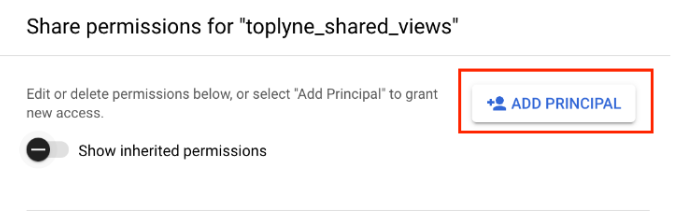
- Grant
BigQuery Data Owneron this dataset to Toplyne principal and save.
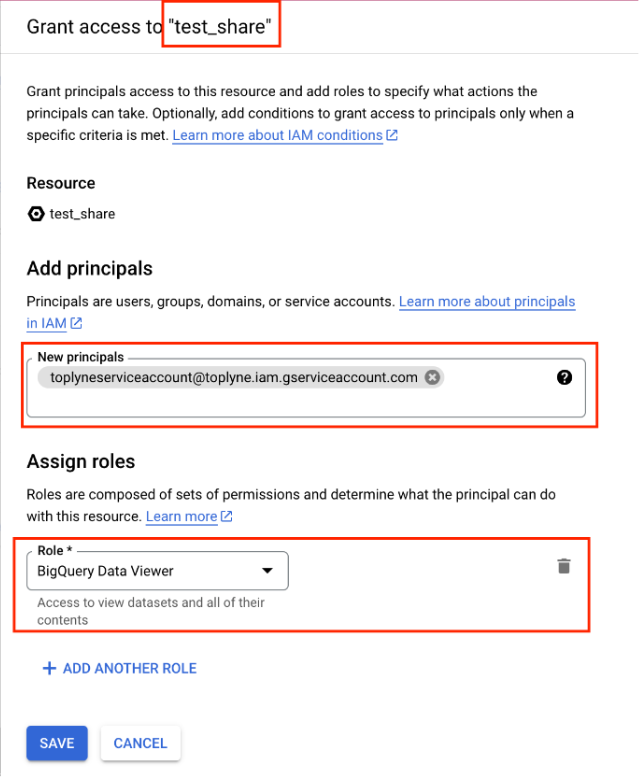
- Share your data:
- If all the tables you wish to share are already in a dataset, grant
BigQuery Data Vieweraccess to the whole dataset and click Save. - If you wish to share only specific tables or views with Toplyne, grant
BigQuery Data Vieweraccess to those tables one by one and click Save. - In case you are sharing views with us, please ensure that you have granted us
BigQuery Data Vieweraccess to all the underlying tables for the corresponding view definition.
- If all the tables you wish to share are already in a dataset, grant
- Once you have completed the outlined steps, share your
Project IDwith Toplyne, along with the shared dataset & table names.
Updated over 1 year ago