Iterable
Through a simple integration, you can use Toplyne segmentation to target potential users better using campaigns on Iterable to convert promising leads, motivate your champions to purchase more, and re-engage with users at risk of churning. Follow our step-by-step integration guide to get started!
Setting up Iterable as a destination 🔩
-
Step - 4: To fetch API key - a quick Iterable detour.
-
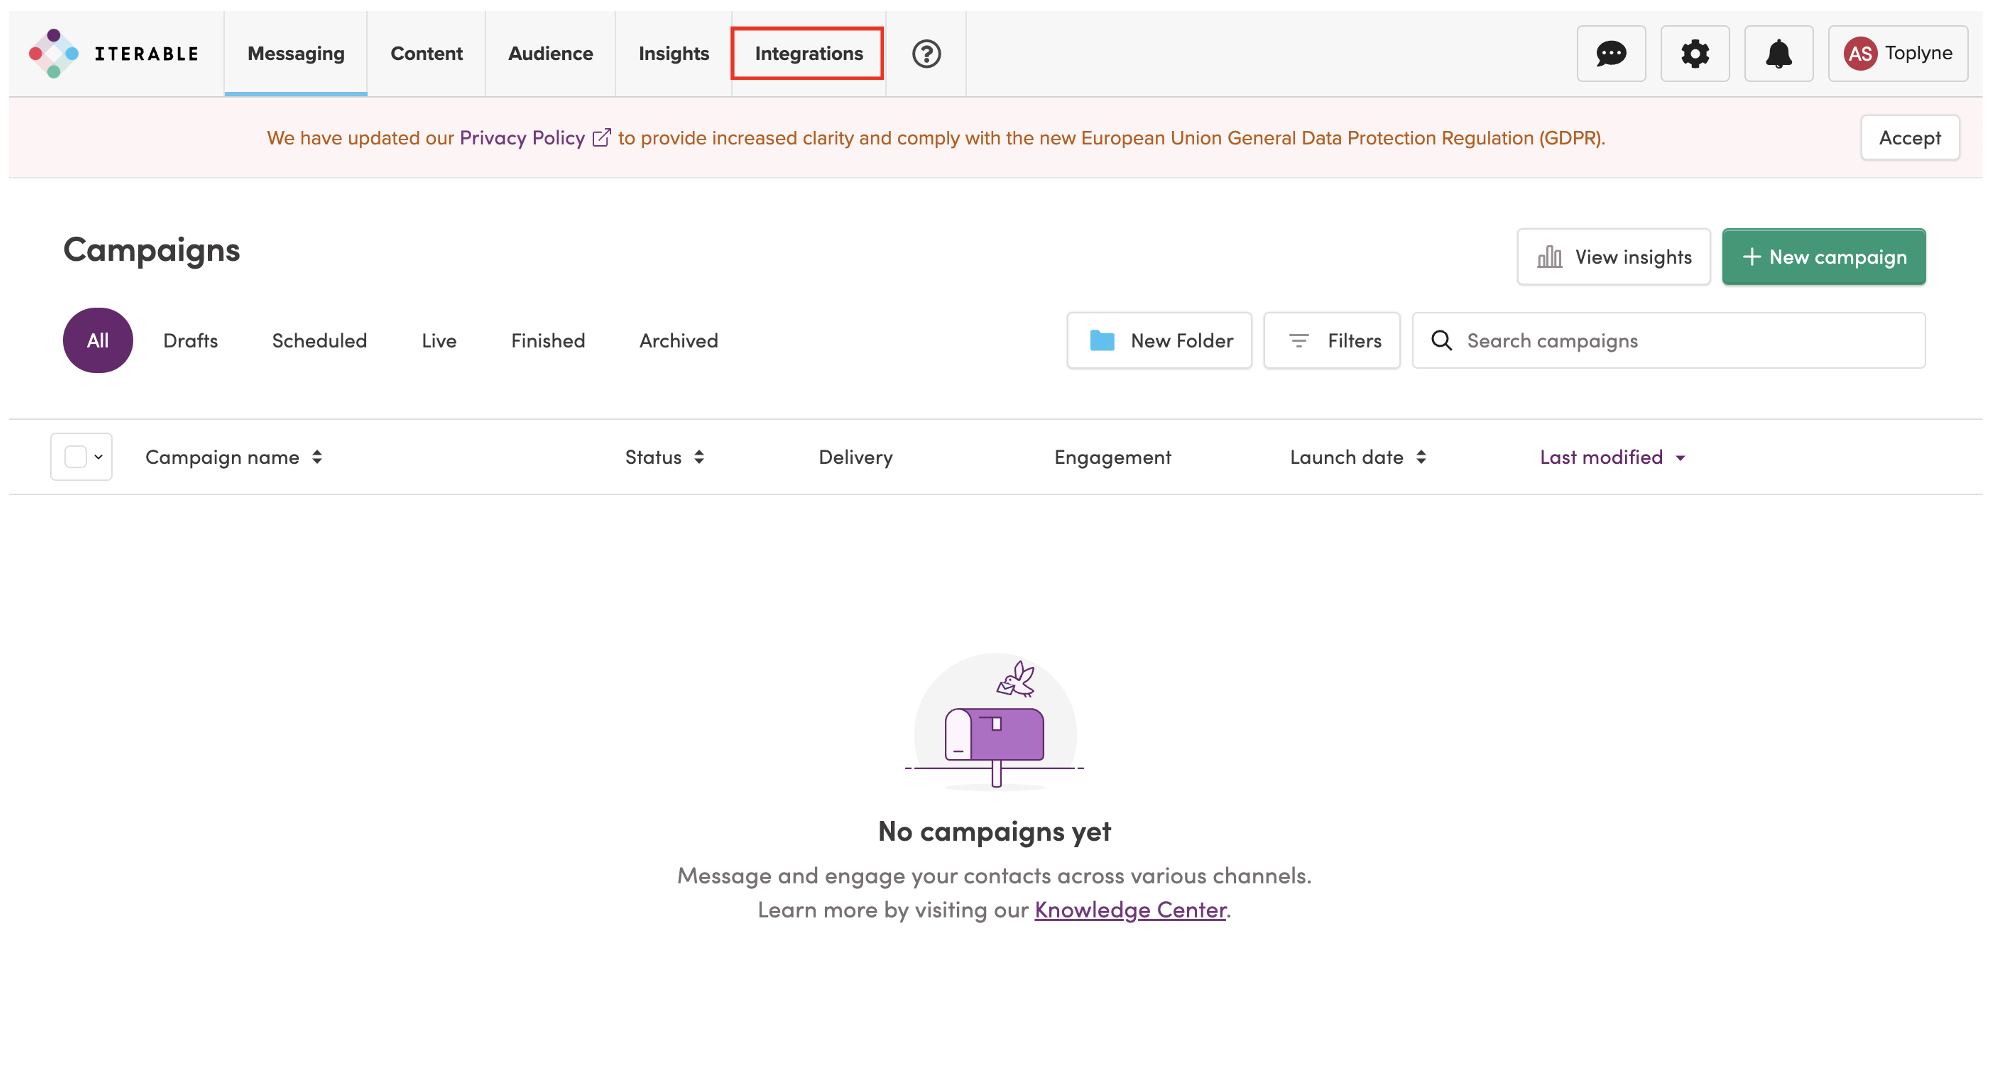
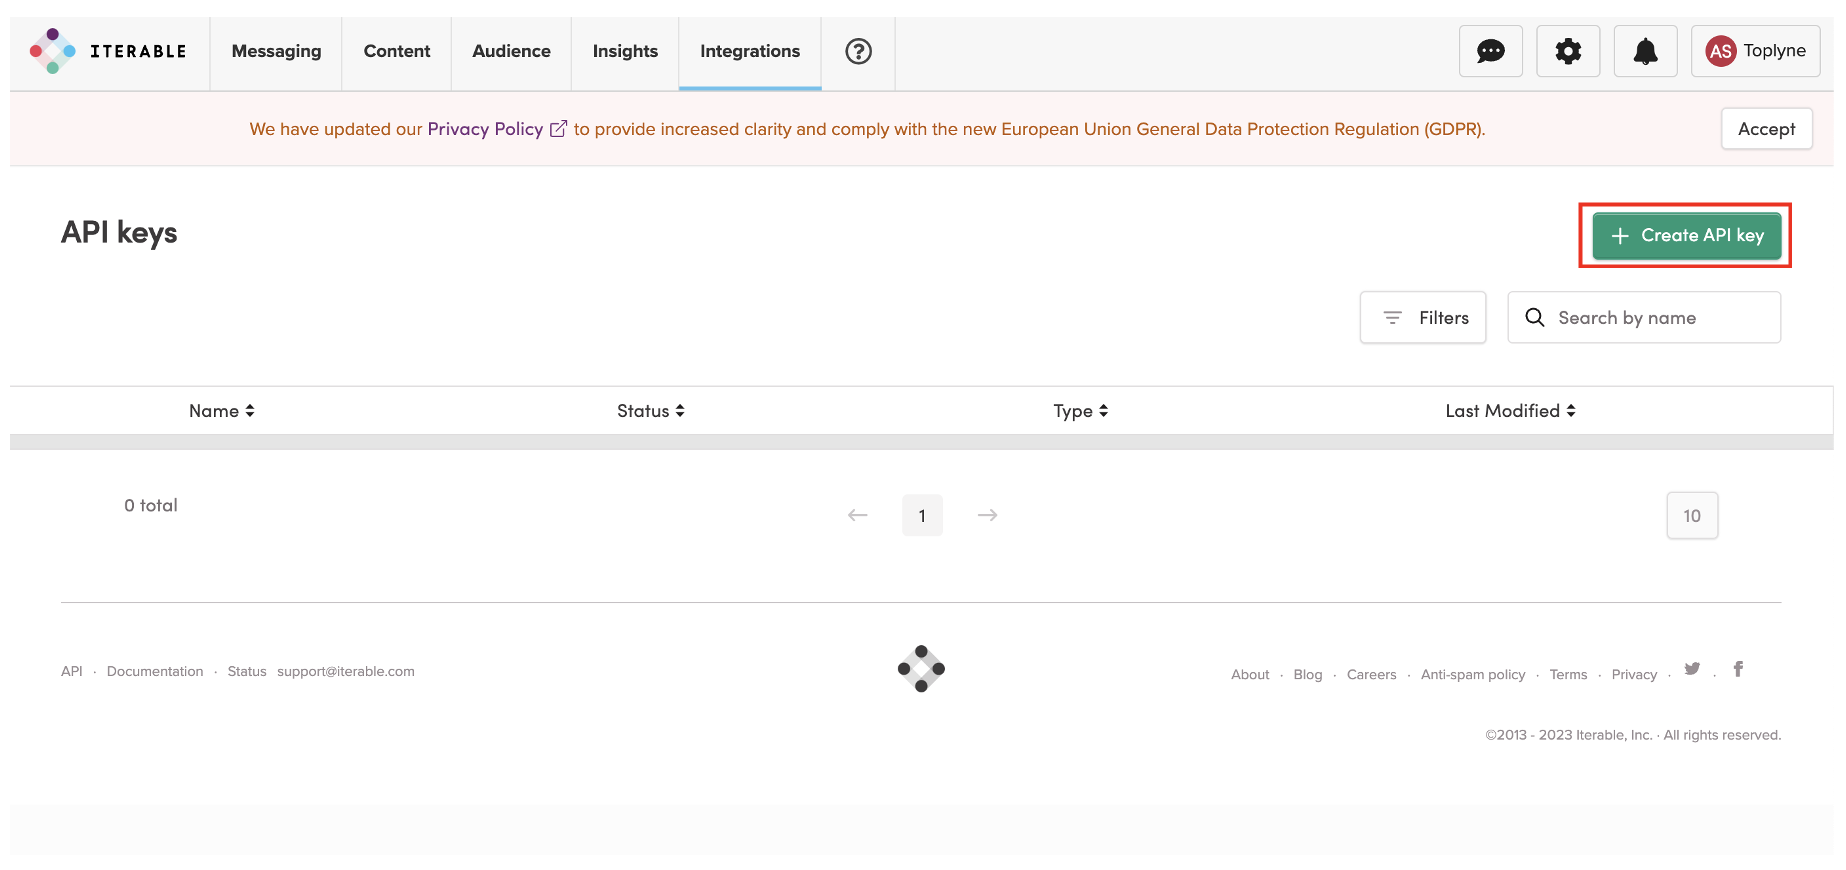
Step - 4.1: To create a new API Key, navigate to Iterable dashboard > Integration > API Keys
-
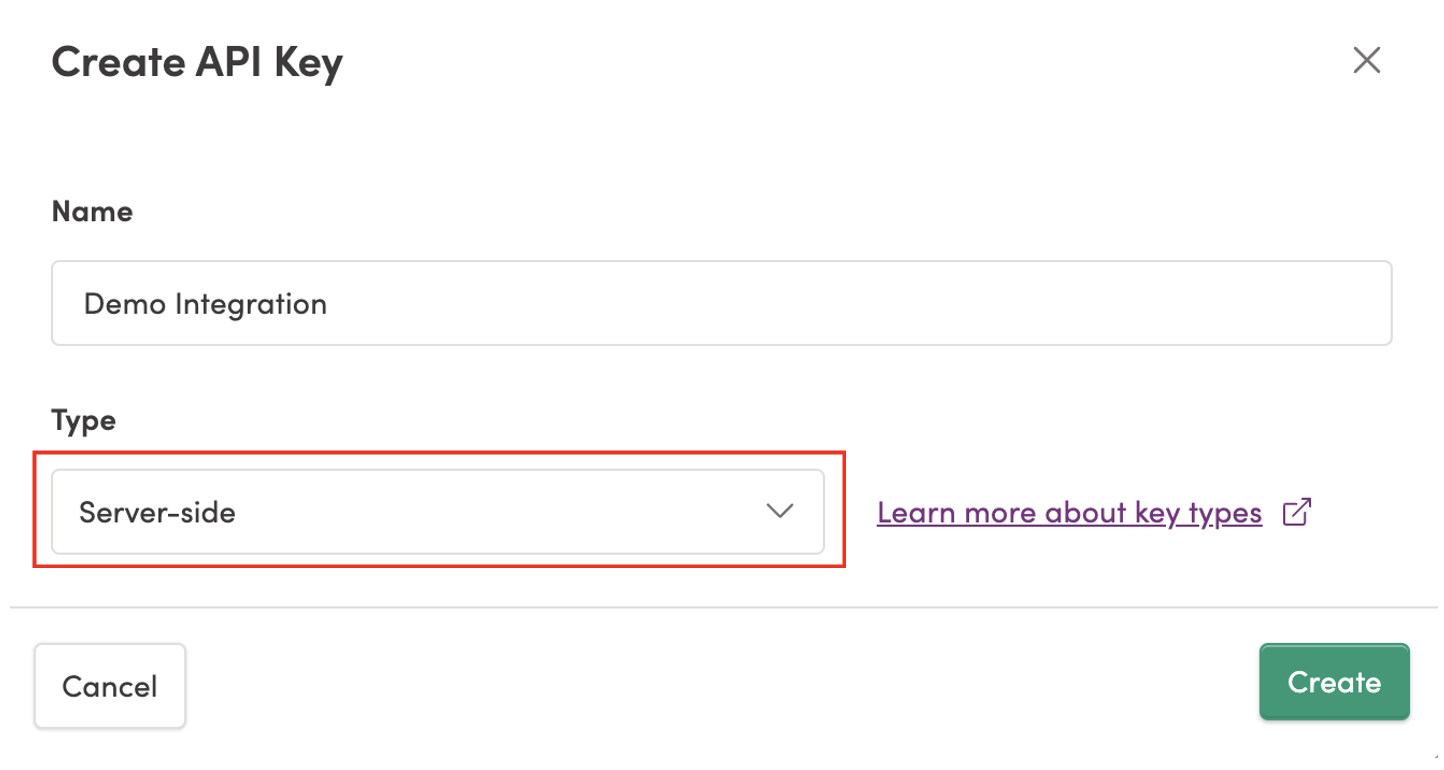
Step - 4.3: Provide a name for the integration, and select Server-side on the Type dropdown. Then click Create.
-
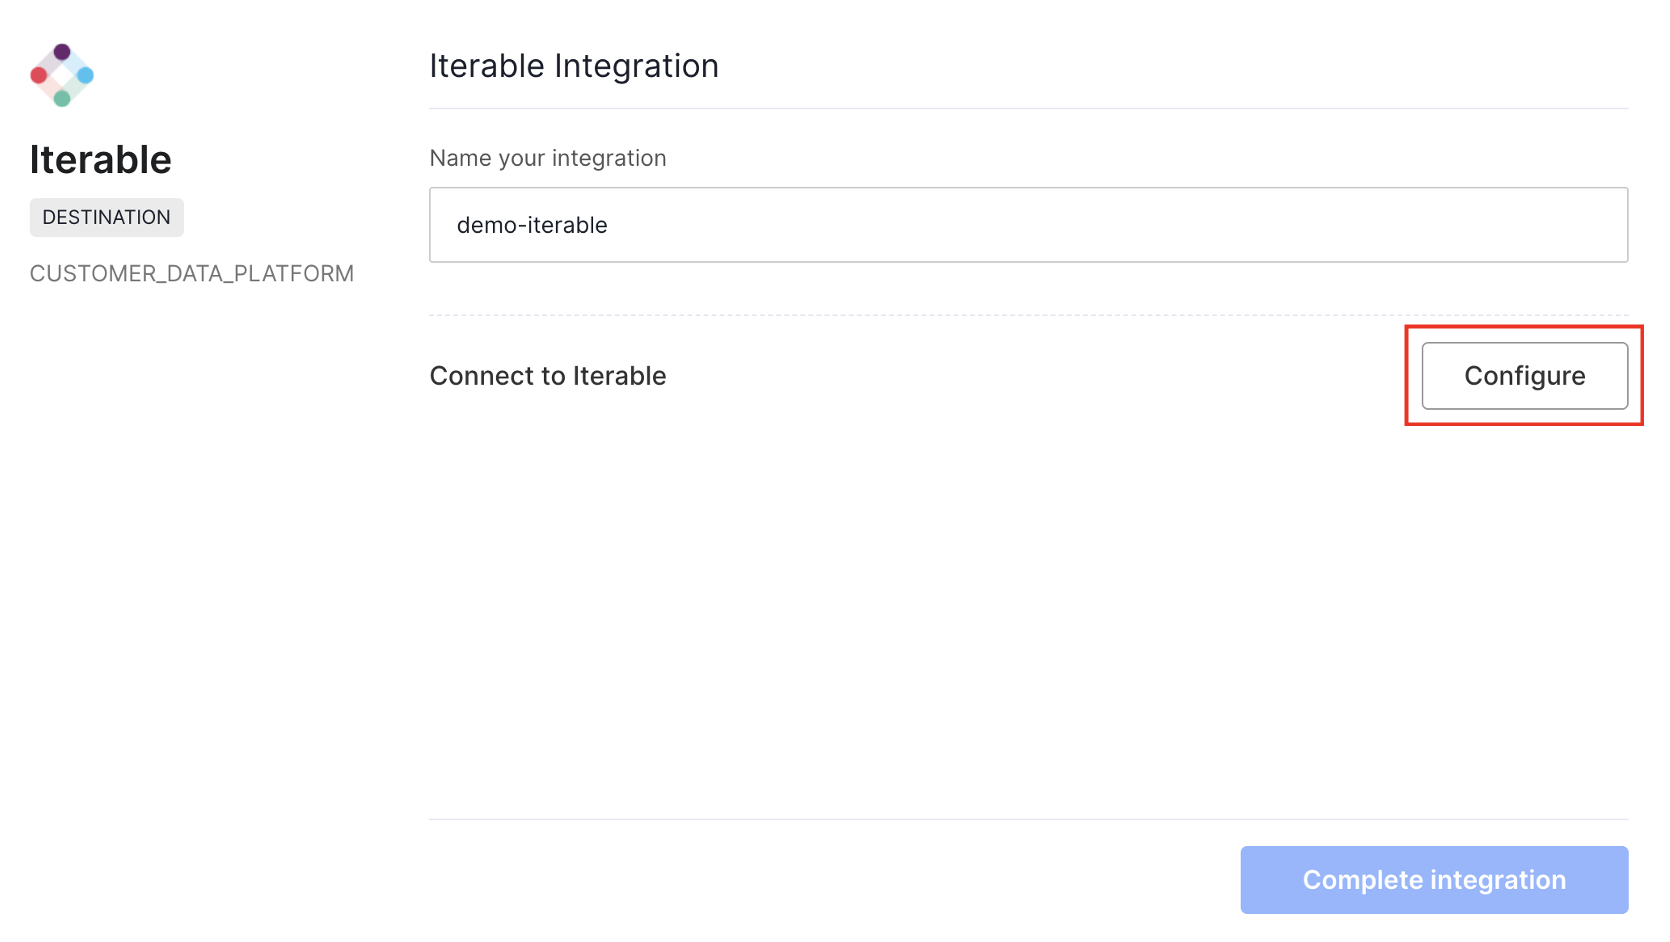
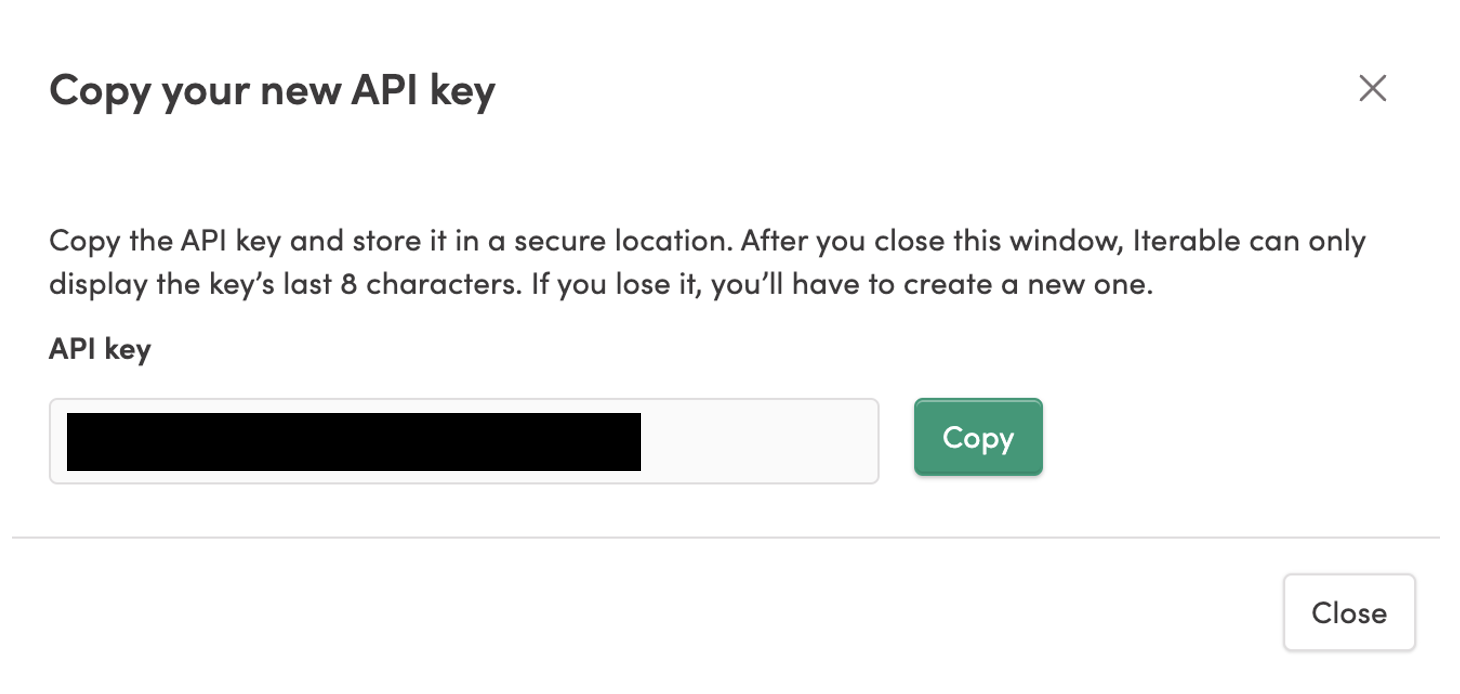
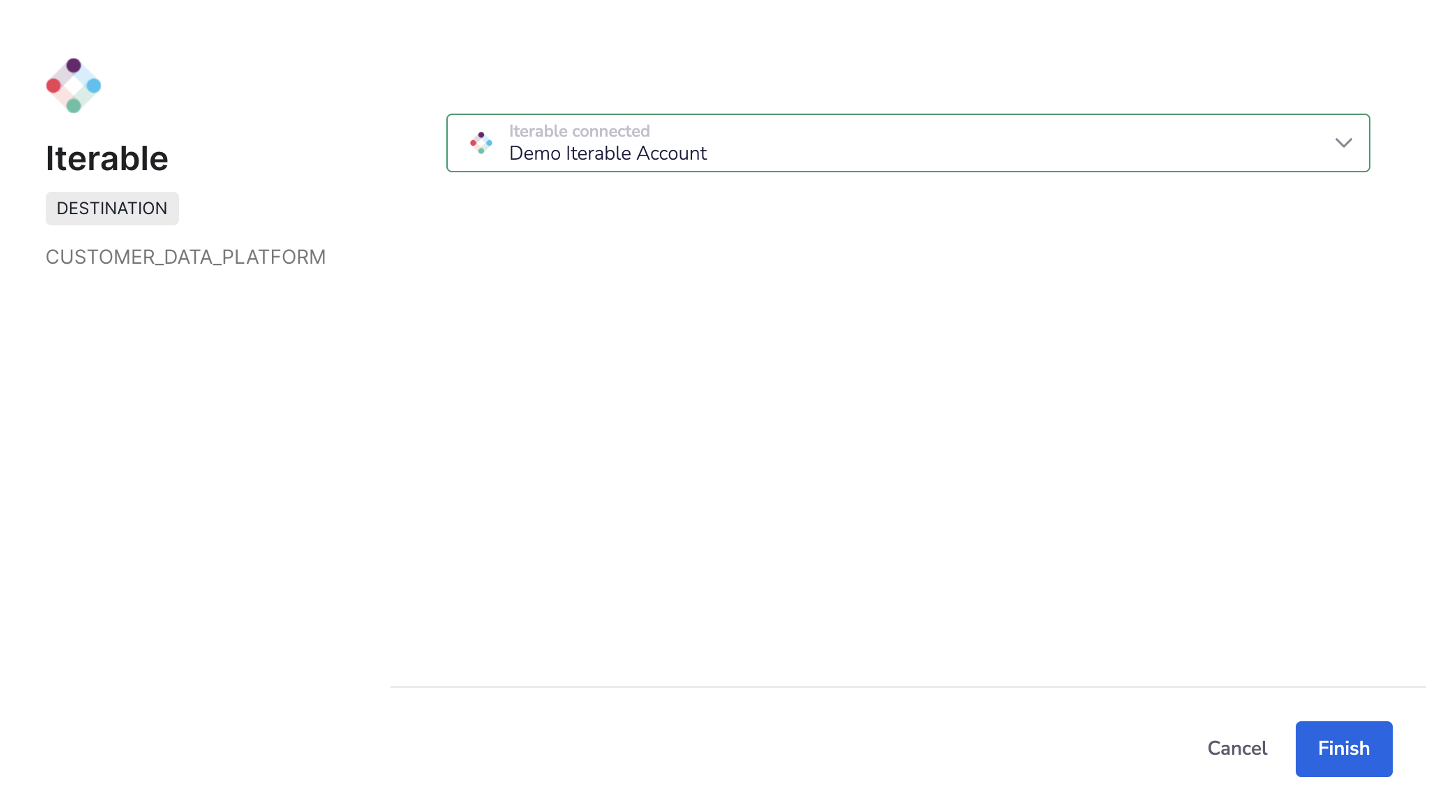
Step - 5: Once you enter the API key you just copied, click on Finish and then ‘Complete Integration’ to complete the configuration.
Using Iterable as a destination 🔀
Step - 1: Select the destination you created on the sync page.
When you’re in the sync stage of creating a new playbook, select Iterable and choose the integration you set up.

Step - 2: Choose how you wish to update the leads on Iterable
Currently, you can perform the following options while updating leads:
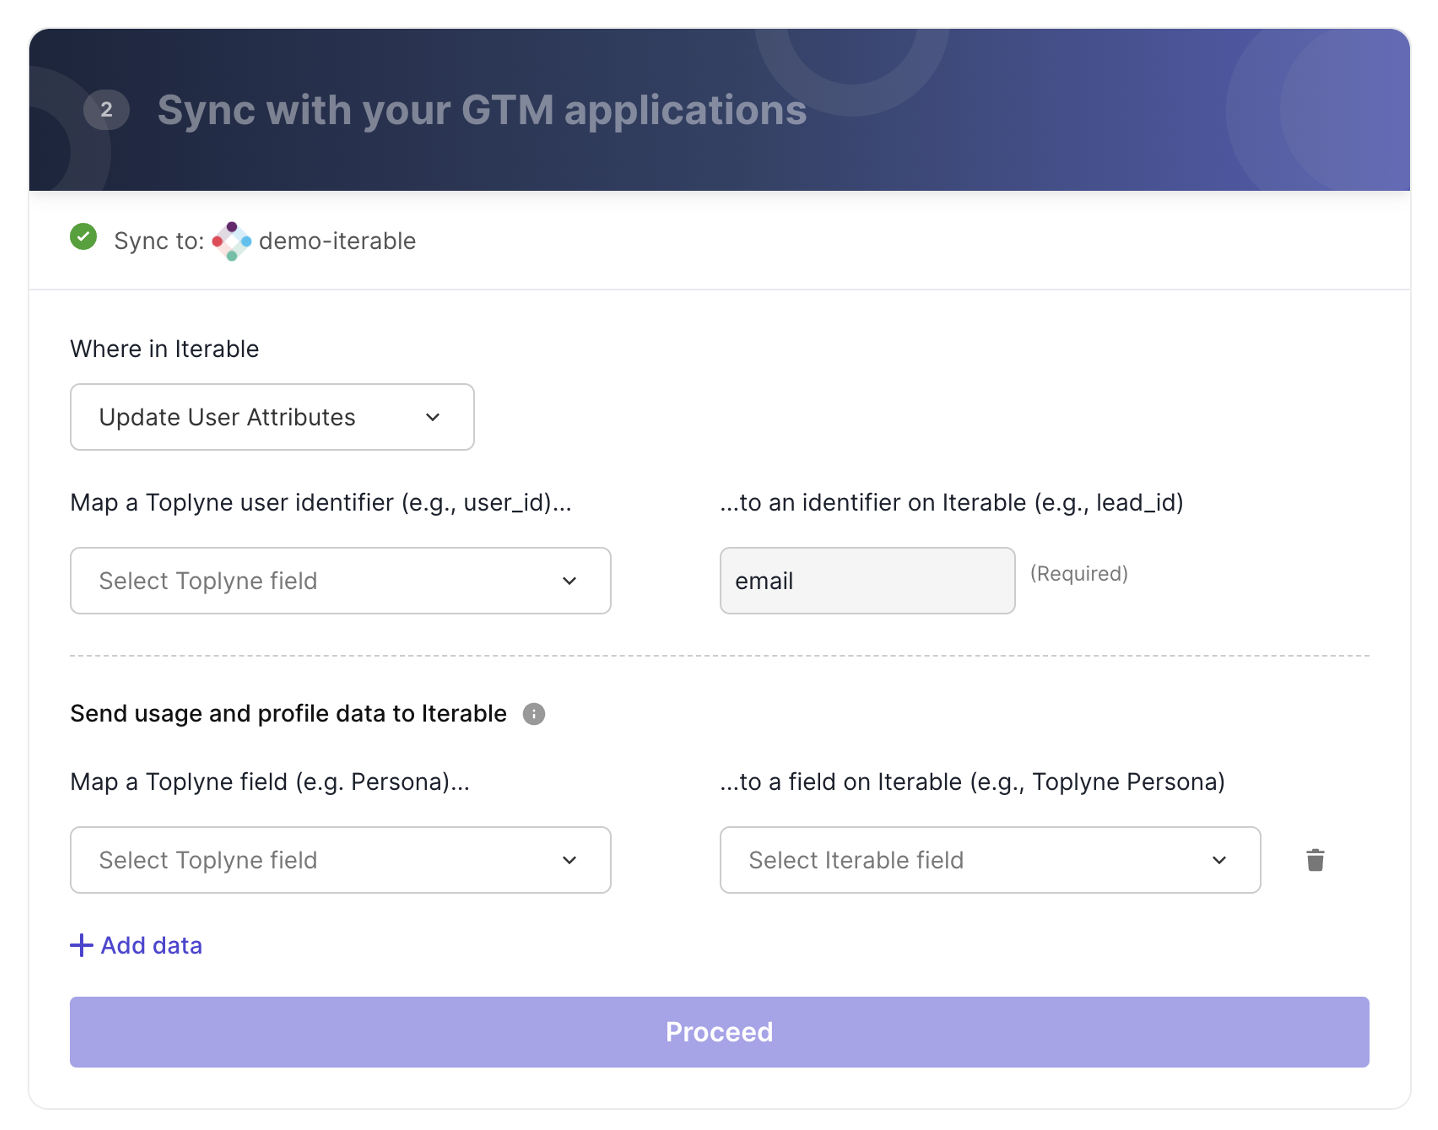
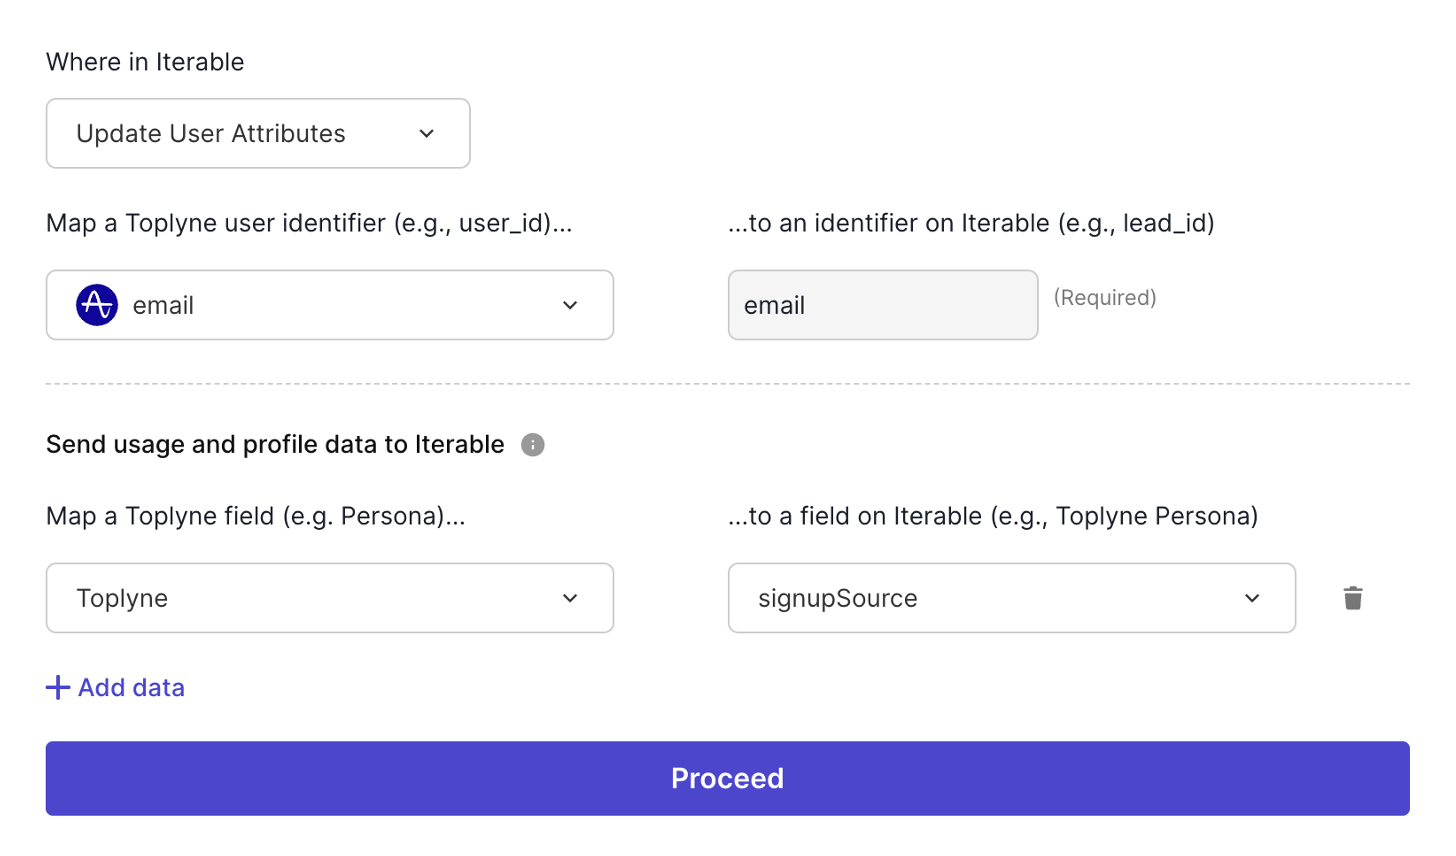
- Update User Attributes
This is used to update the contact fields against a user on Iterable. Note that the two fields must have the same data type.
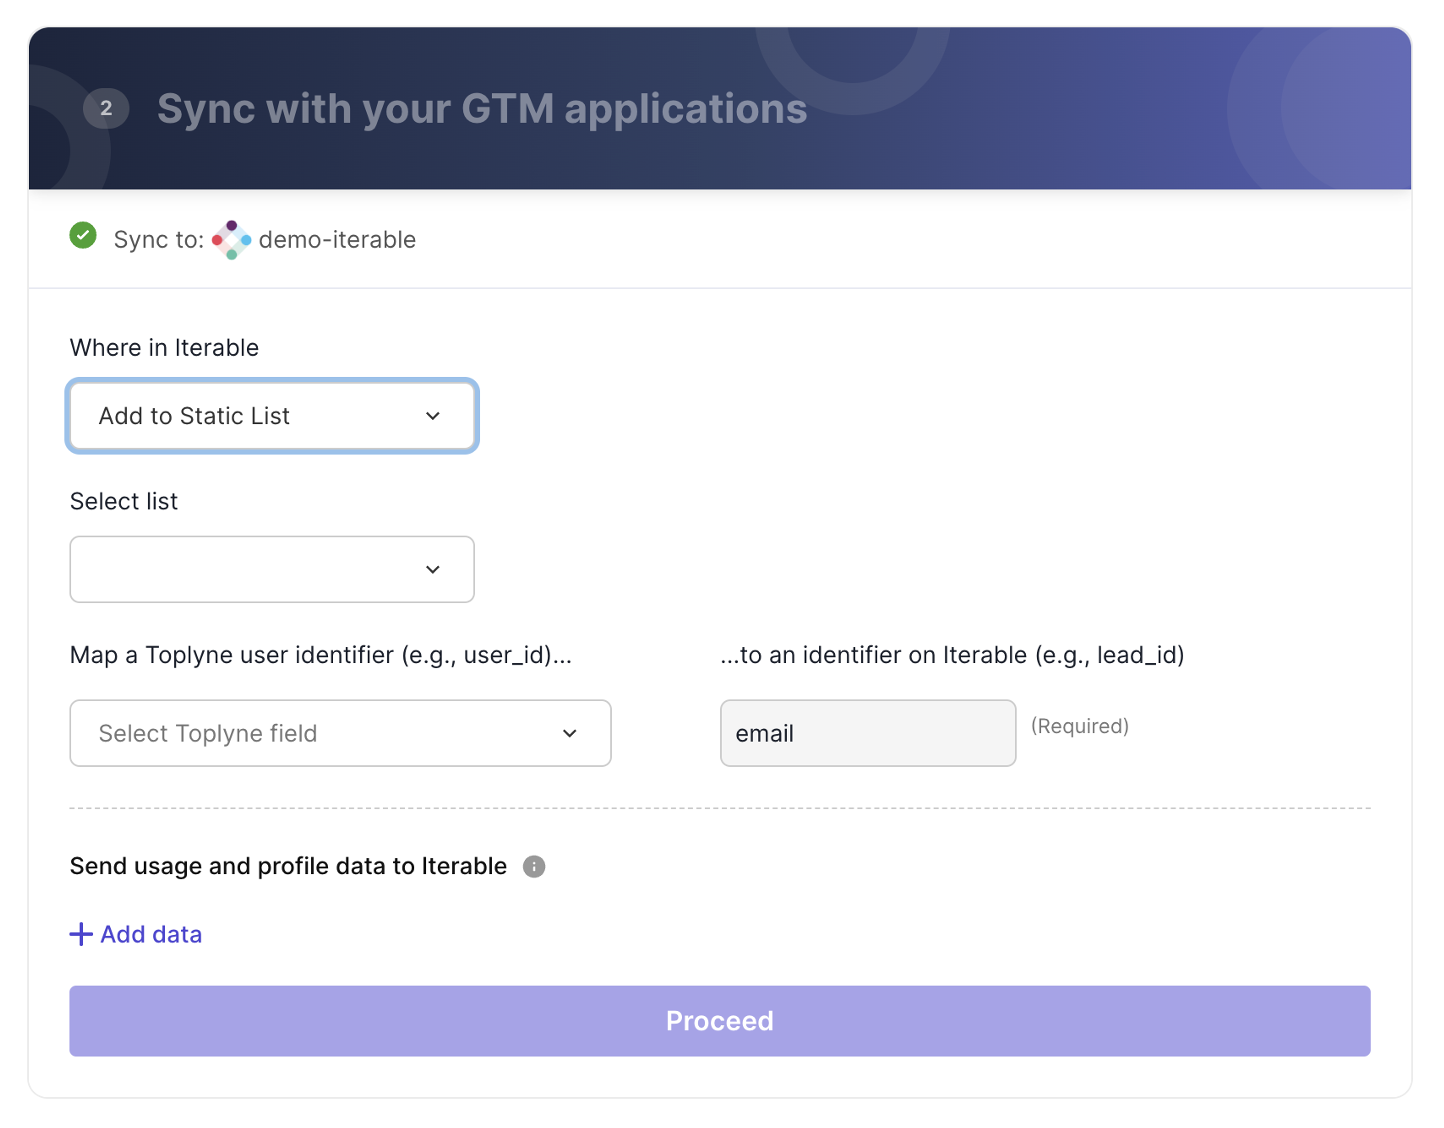
- Add to Static List
This is used to add a user to an existing static list. You can select the list you wish to update through the dropdown.
- Create and Add to Static List
This is used to create a new list and add users to the static list. Note that if the list name already exists, the user gets added to the existing list.
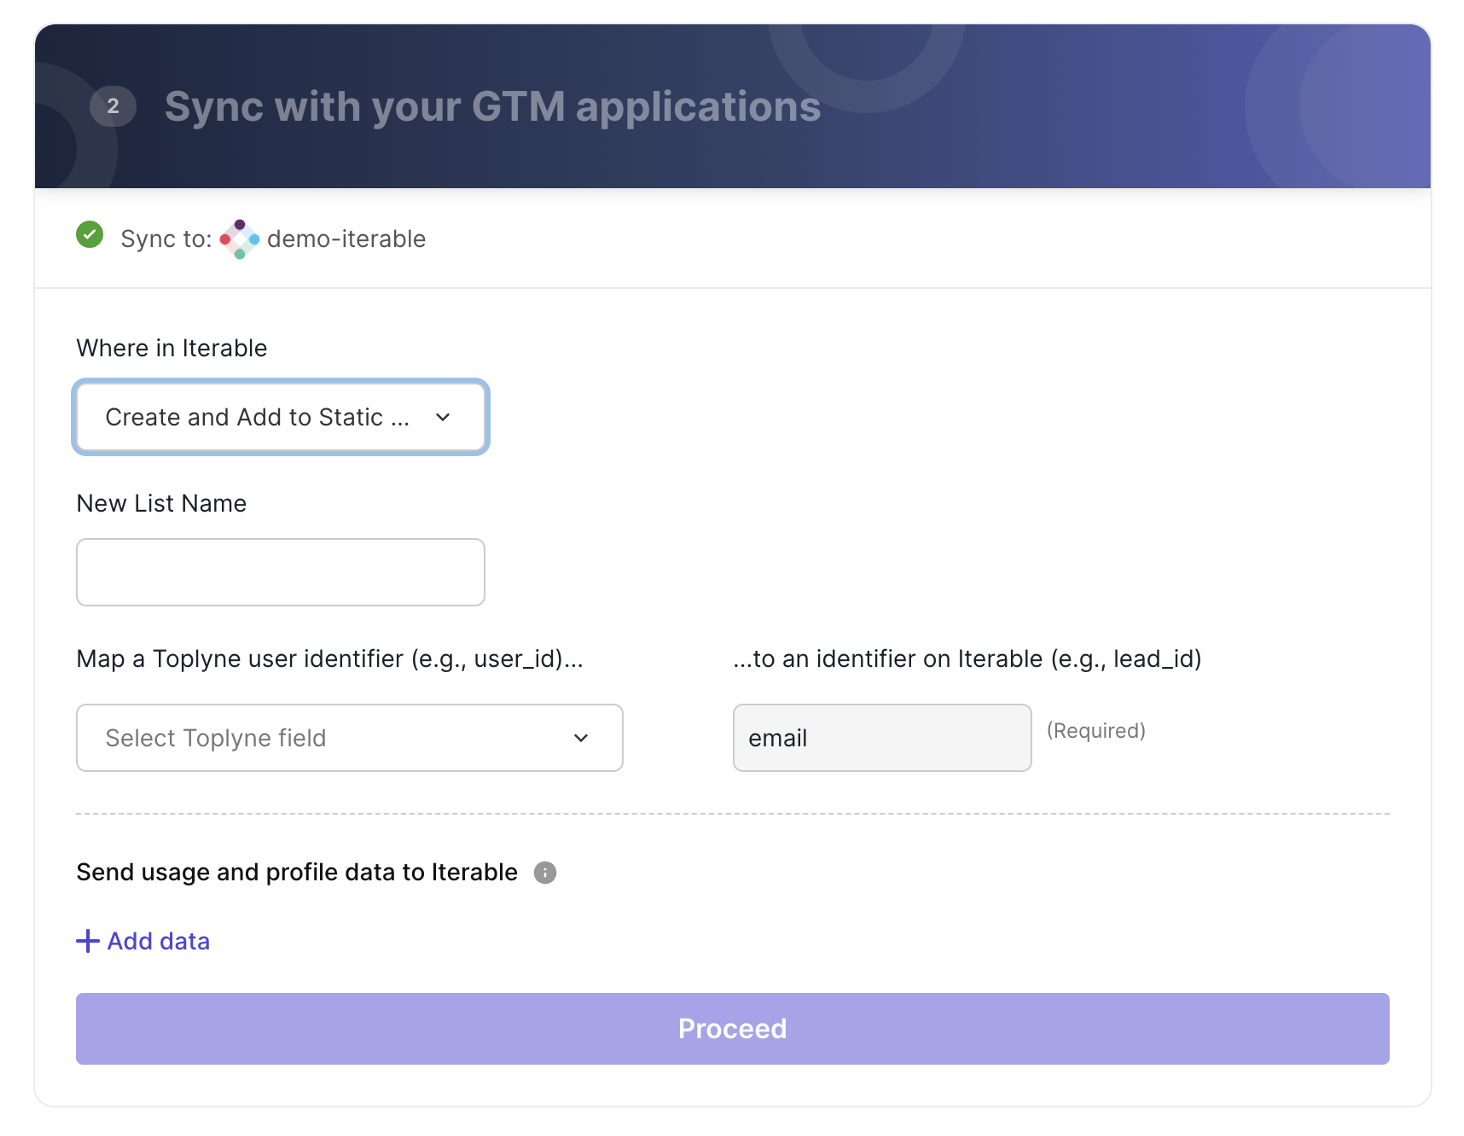
Step - 3: Map a Toplyne user identifier
Email ID is mandatory to update contacts on Iterable. You must map the corresponding Email ID field (from your product analytics source) to Iterable's email identifier (pre-filled).
Step - 4: Choose the fields you wish to update on Iterable
If you have chosen to Update User Attributes, you can choose the fields you wish to update. Typically, our customers update fields such as the signup source, conversion score, or Toplyne persona.
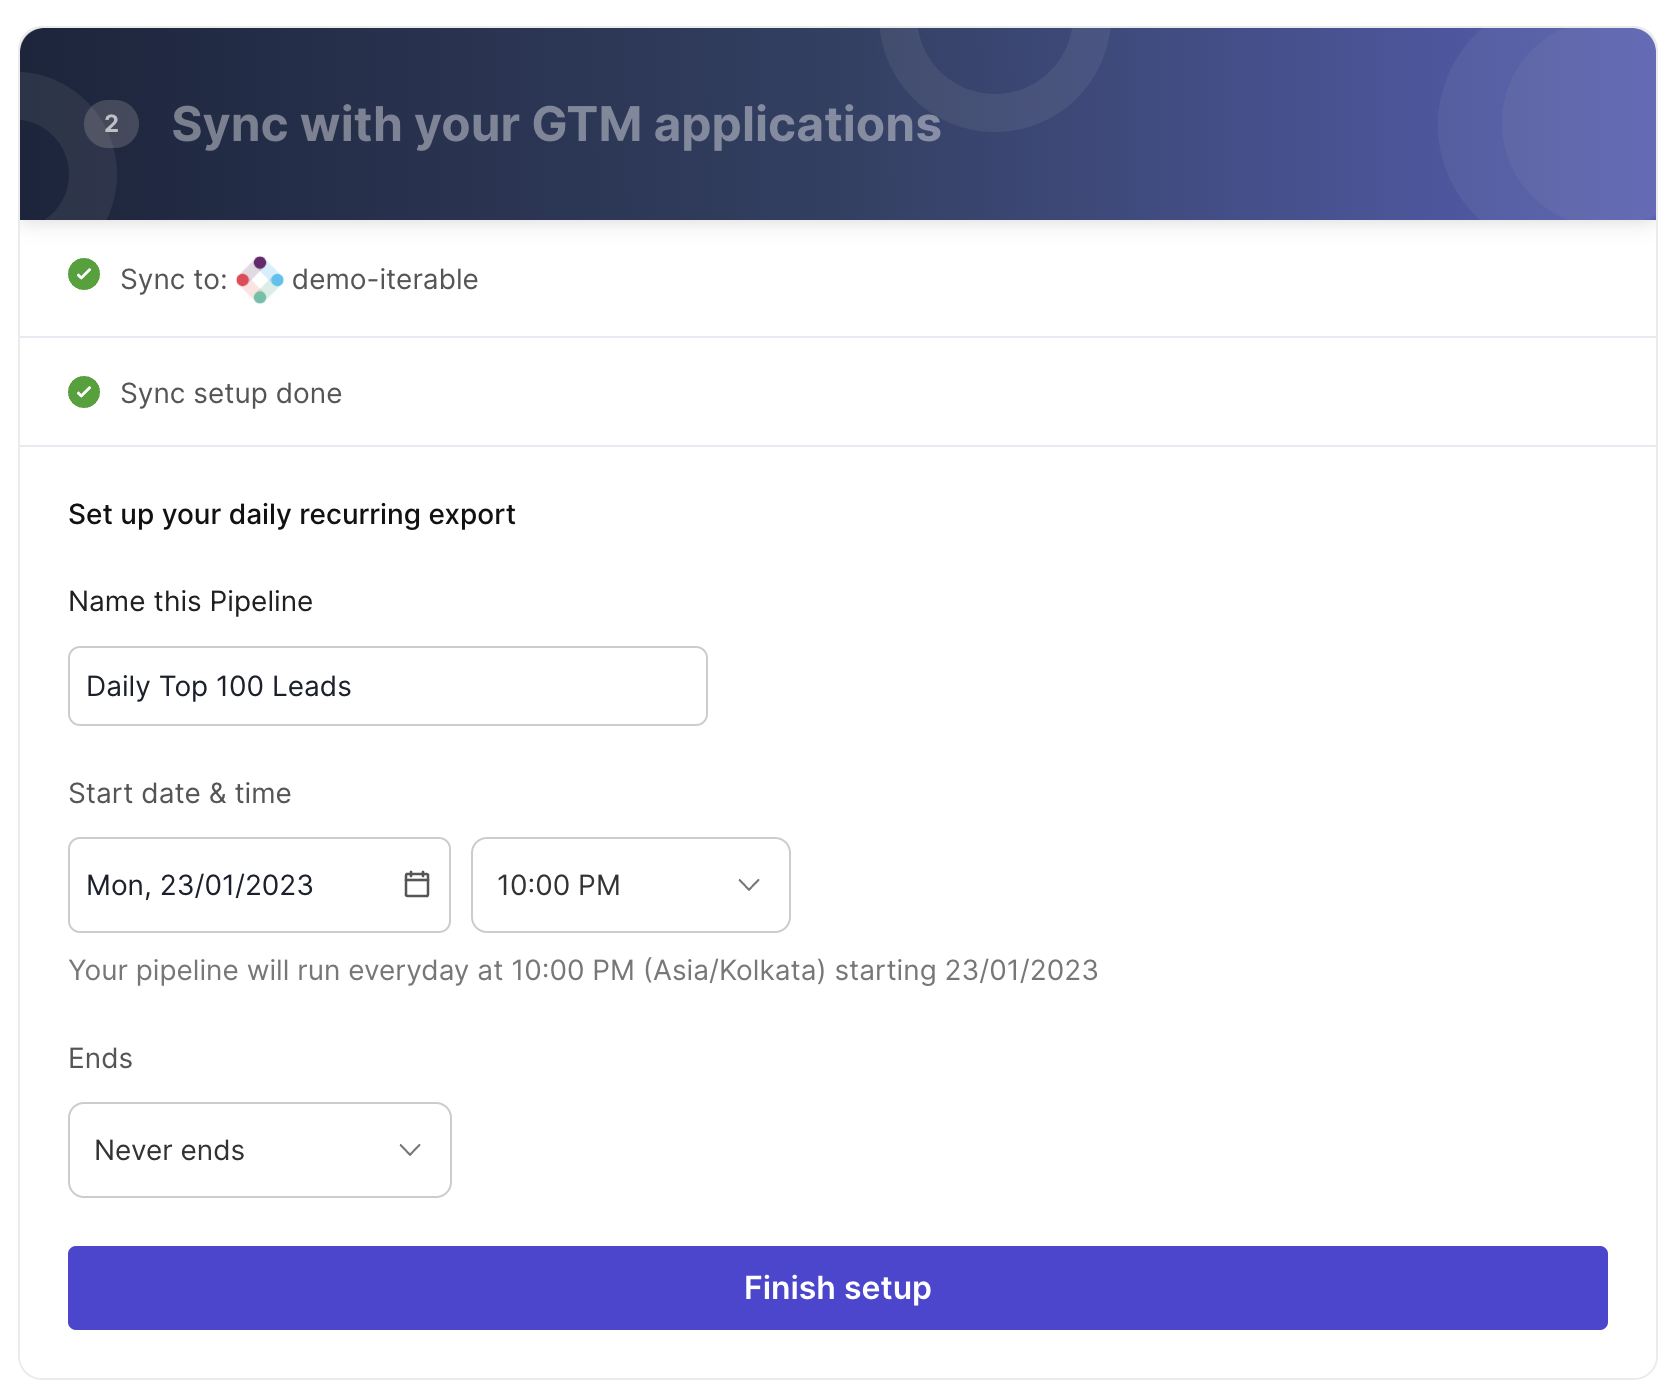
Step - 3: Finish creating the pipeline!
In the last step, name your pipeline and the start date. Then click on ‘Finish Setup'.
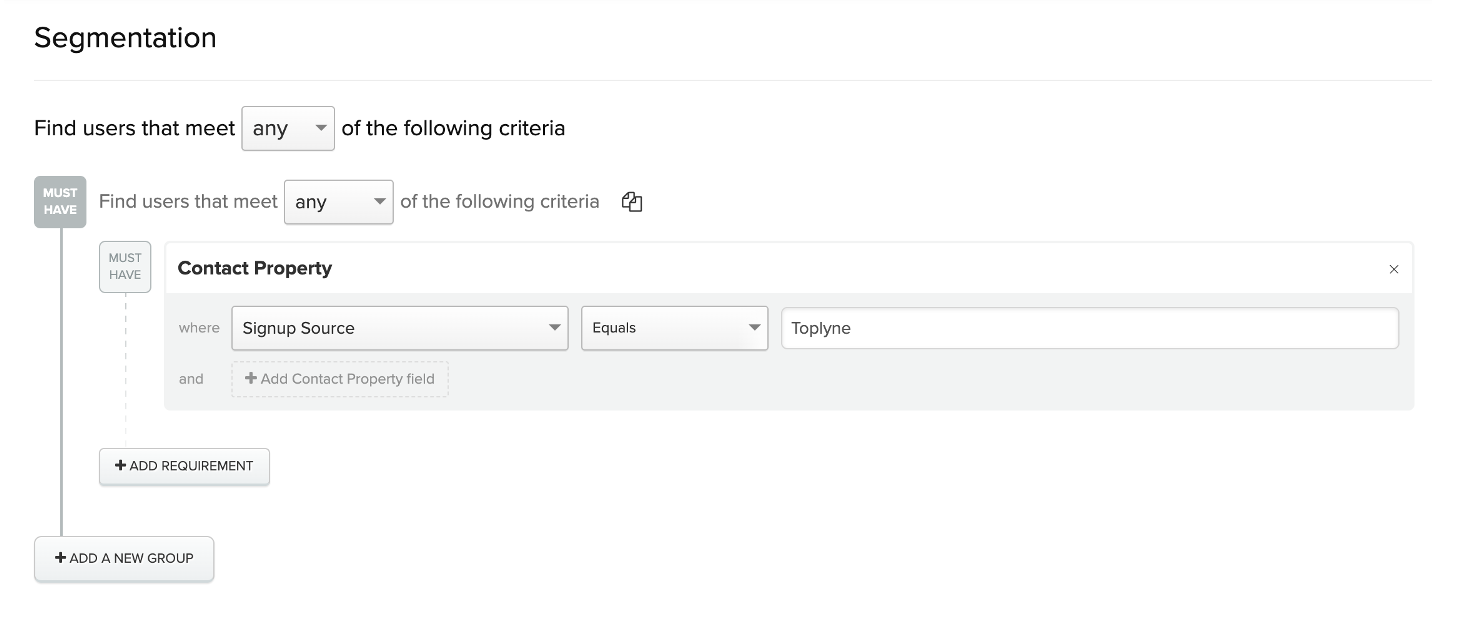
Step - 4: Creating segments on Iterable
Once the playbook completes, you can use Iterable's Segmentation feature to target users qualified by Toplyne. To do so, navigate to Audience > Segmentation on Iterable and filter users based on the fields you just updated through the playbook.
And that's how you can target specific leads from Toplyne on Iterable!
Updated over 1 year ago